
Well, you might have noticed that things have been a little slow on the site lately. There are a few reasons for that such as the fact that there haven’t really been any new releases for Blood Bowl, or any new information about the upcoming Necromunda release(until the last day or so, more to come on that). Another big reason is that I recently had surgery and that has really put me on the side lines for the last couple of weeks. With all of that in mind, I have decided to write about something that makes an appearance in almost every post I write, though I have never really talked about it directly before… my miniature painting stand. Over the last couple of years, I have received a number of questions and comments about the stand, so I thought it was finally time to write a little about it.
Years ago when I first got into miniature games, I would just hold minis by the bases while I painted. Anyone who has ever tried that will know how bad of an idea that is. There is almost nothing to hold on to, so you end up frequently rubbing the mini itself, which rubs off paint that you worked so hard to apply. Even if you manage to not rub paint off of the mini, with so little to hang on to, you run a real risk of accidentally dropping the mini and doing far more damage than just rubbing paint off.
After a few years I read on the interwebs that some people were attaching minis to plastic bottle caps using poster tack, so I decided to give that a shot. The bottle caps worked much better than having nothing at all to hang on to, but after a while of hanging on to small bottle caps, my hands would always end up killing me. Fast forward a few more years, and I read about people trying a number of different things for holding on to while painting minis, including wine bottle corks, and empty Games Workshop paint pots. These things were always a slight step up, but for a guy like me with fairly large hands, they still seemed a little inadequate.
After thinking about this dilemma for months, I started thinking about other frustrations that I would frequently run into while painting minis. Things like only being able to carry a couple of minis at a time out to the garage for priming and clear coating, unless I wanted to put them onto a plate… where I would again run into the risk of dropping some of my precious minis if I didn’t keep completely steady. There was also the issue of wanting a longer handle to attach minis to, but being concerned about the minis being too top heavy and falling over once attached to the handle.
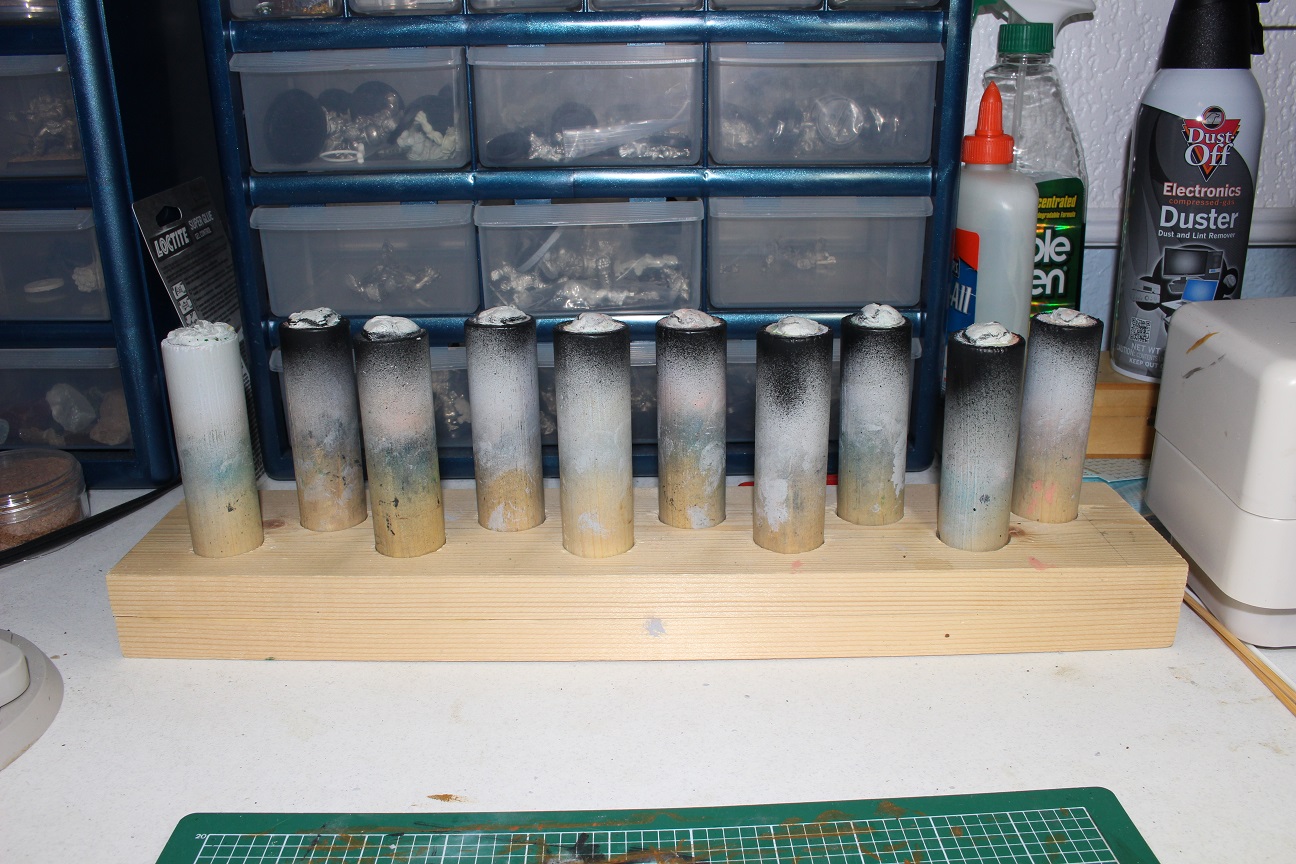
After designing and redesigning different stands in my head over time with varying levels of complexity, I finally settled on the most simple of all the different ideas that I had come up with. This is the end result:
I will start by saying that this stand took less than thirty minutes to make (not counting glue drying time), and cost less than $10 in supplies. I bought a single 1×4 pine board, and a single four-foot long dowel rod.
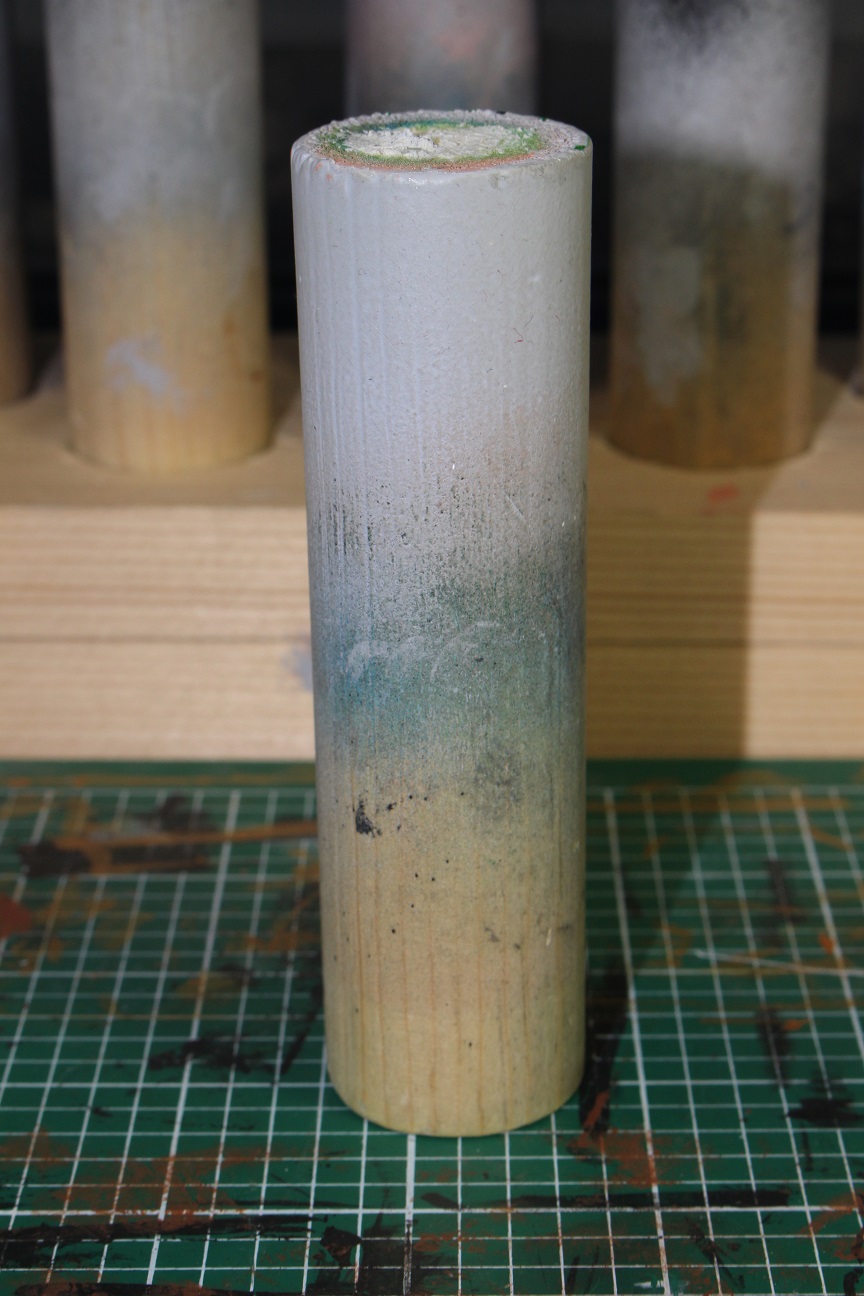
After picking up a couple of different dowel rods at building supply store, I decided that the one inch diameter dowel rod felt the best in my hand. Using a chop saw, I cut dowel in four inch long sections until I had ten pieces. One thing that I didn’t do at the time, but would highly recommend to anyone considering building one of these would be to use a fairly fine grit sand paper to sand down the edges of the dowels to make as smooth a surface as possible for the poster tack to adhere to.
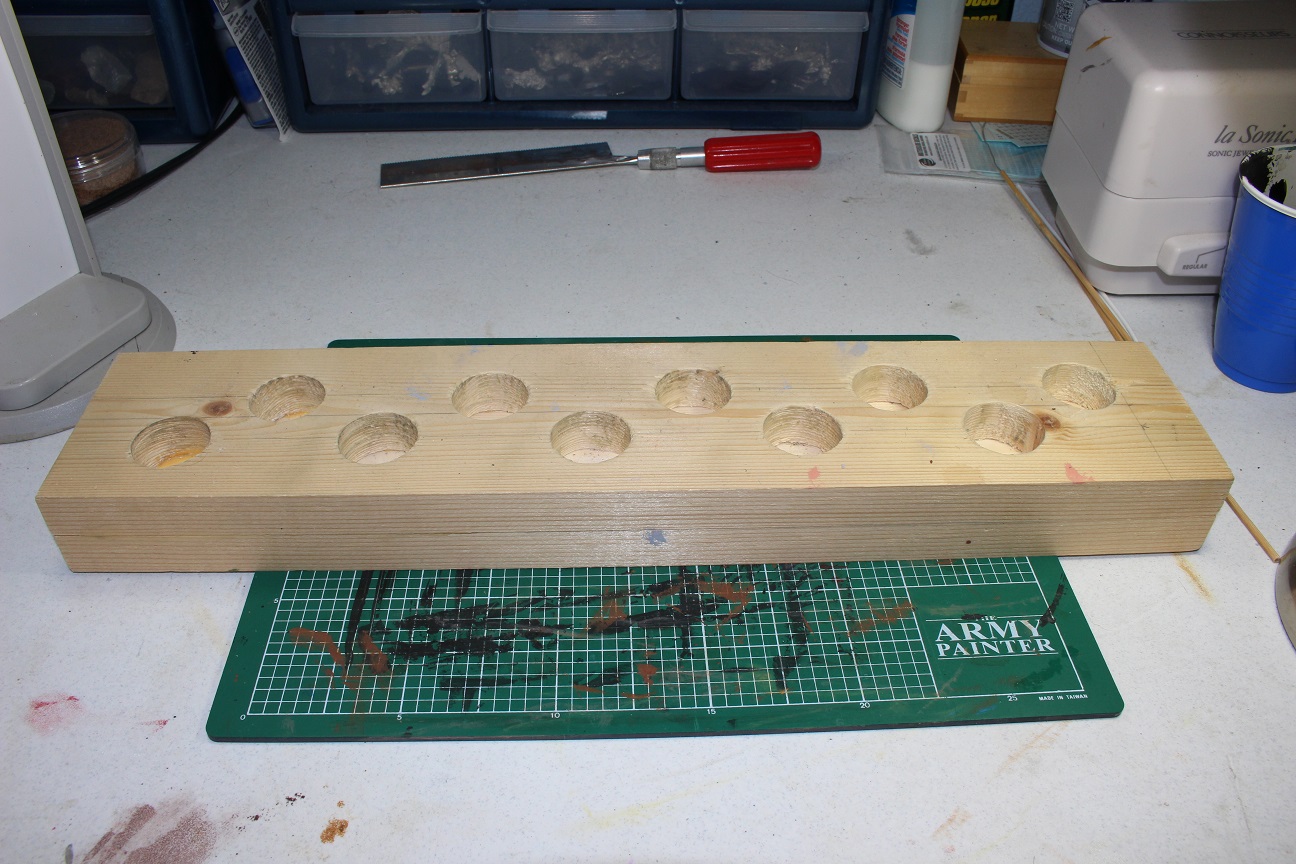
The base is made up of two pieces of 1×4, cut to seventeen inches each. I grabbed one of the seventeen inch pieces and then marked a full one inch thick border on each end. I then measured out ten, one-inch, evenly spaced circles for the dowels. This didn’t leave a lot of room between dowels (which I expected), so I offset the circles a little to increase that space. Then I drilled small pilot holes in the center of each of those circles, then followed up with a one-inch drill bit to get the holes to the correct size. I sanded a little and made sure that all the dowels fit into the holes in the board, and then it was time for the final step.
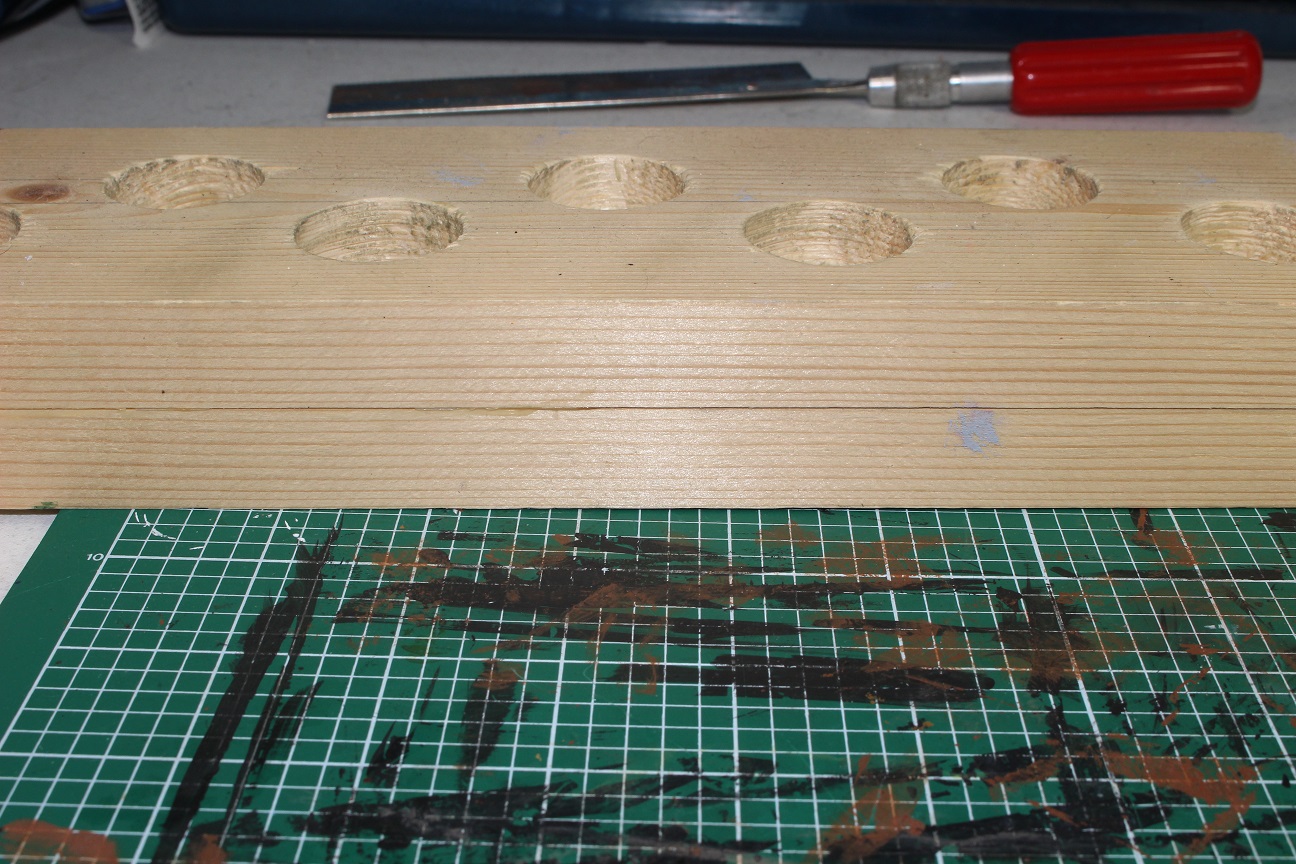
I grabbed some Elmer’s wood glue and and glued the top piece with the holes drilled into it, to the bottom piece with no holes drilled into it. I put a clamp on either end and let it dry overnight.
That’s pretty much it. Now I have a stand that will hold ten miniatures at a time. I can take them to the garage, or to the back porch and prime them, carry them all back inside, paint them, then carry them all back outside again to clear coat them without ever taking them off of the handles. This is a very cheap and effective solution that does exactly what I need it to do. Best $10 I have ever spent on the hobby!
Are you interested in building something like this for your setup? Or, if you already have something built, be sure and share it with us so we can see what work for you.
Well, that’s all for today! Be sure to check back soon as we have great stuff coming soon. Check the images below for teasers!

![]()

I’ve been painting by holding the base (or worse yet, the tab) for years. It’s not too often that I would smear paint, but dropping the mini does happen a fair amount. Most of the minis I’ve worked on were metal or older plastic ones, and I’ve never had one break when hitting the floor. Not sure if the newer GW minis I’m working with now, are more or less prone to breaking.
I’ve since started using blu tac and old paint jars. I might move on to medicine bottles and lids soon. With the blue tac, I’ve occasionally had the mini not stuck well enough and drop. Especially if it’s a heavier metal mini. Nowadays I’m working in our carpeted office, so I really dread dropping the mini and having it acquire all the fibers and stuff. So far so good though.
That’s a great solution you have come up with. I would probably poach the idea, but I’m now trying to figure out how to store the minis out of site and keep them covered while drying. I’ve been putting the Dwarves in a little wooden drawer thing I bought. But I don’t think it will hold anything much taller than the Dwarves. So new solution might be in the works. Mainly I want to keep them safe while drying and out of sight from our toddler.
LikeLiked by 1 person
This solution was born out of years of frustration and various brainstorming sessions to try and figure out what would work best for me. I have to say that I have been very pleased with how well it works for me. It may not be as pretty or ergonomic as the new GW painting handle that is about to hit store shelves, but it is a much cheaper solution when you consider the painting handle only holds one mini at a time.
LikeLiked by 1 person
Yea, I think I saw that painting handle. The one that grips the base, looks like it is spring-loaded? Surprised that hasn’t been done before, but I’m sure there are cheaper methods. I’ve heard that some people glue the model down instead of using blue tac. I guess they just ‘break it off’ the platform after they are done? I still think your solution is one of the best I’ve seen.
LikeLiked by 1 person
Thanks. I’m quite pleased with it.
LikeLiked by 1 person