
I’ve been sitting on a lot of terrain. In the past I never did much in building or painting terrain, usually relying on others to put up the scenery. Being a naturally slow painter and being burdened with long hours at work, taking the time to paint terrain seemed a luxury. Recently though I have started buying terrain pieces. Mostly components to fit in with Dark Age to Napoleonic eras. Most of these buildings are stone so I wanted to find a system that could easily paint up stone while making it look realistic. Following my usual modus operandi, I scoured the internet to find someone who had the solution.
The method I decided on using was from a YouTube video that I came across. The technique was very similar to what I had done before on the bases for my Eye of the Nine warband long ago. This newer technique utilized the airbrush to get the base coats started but it could be done with a normal brush and dry brushing the later layers. Once those layers are done it is a matter of painting random stones with water-downed paints to tint them different colors.


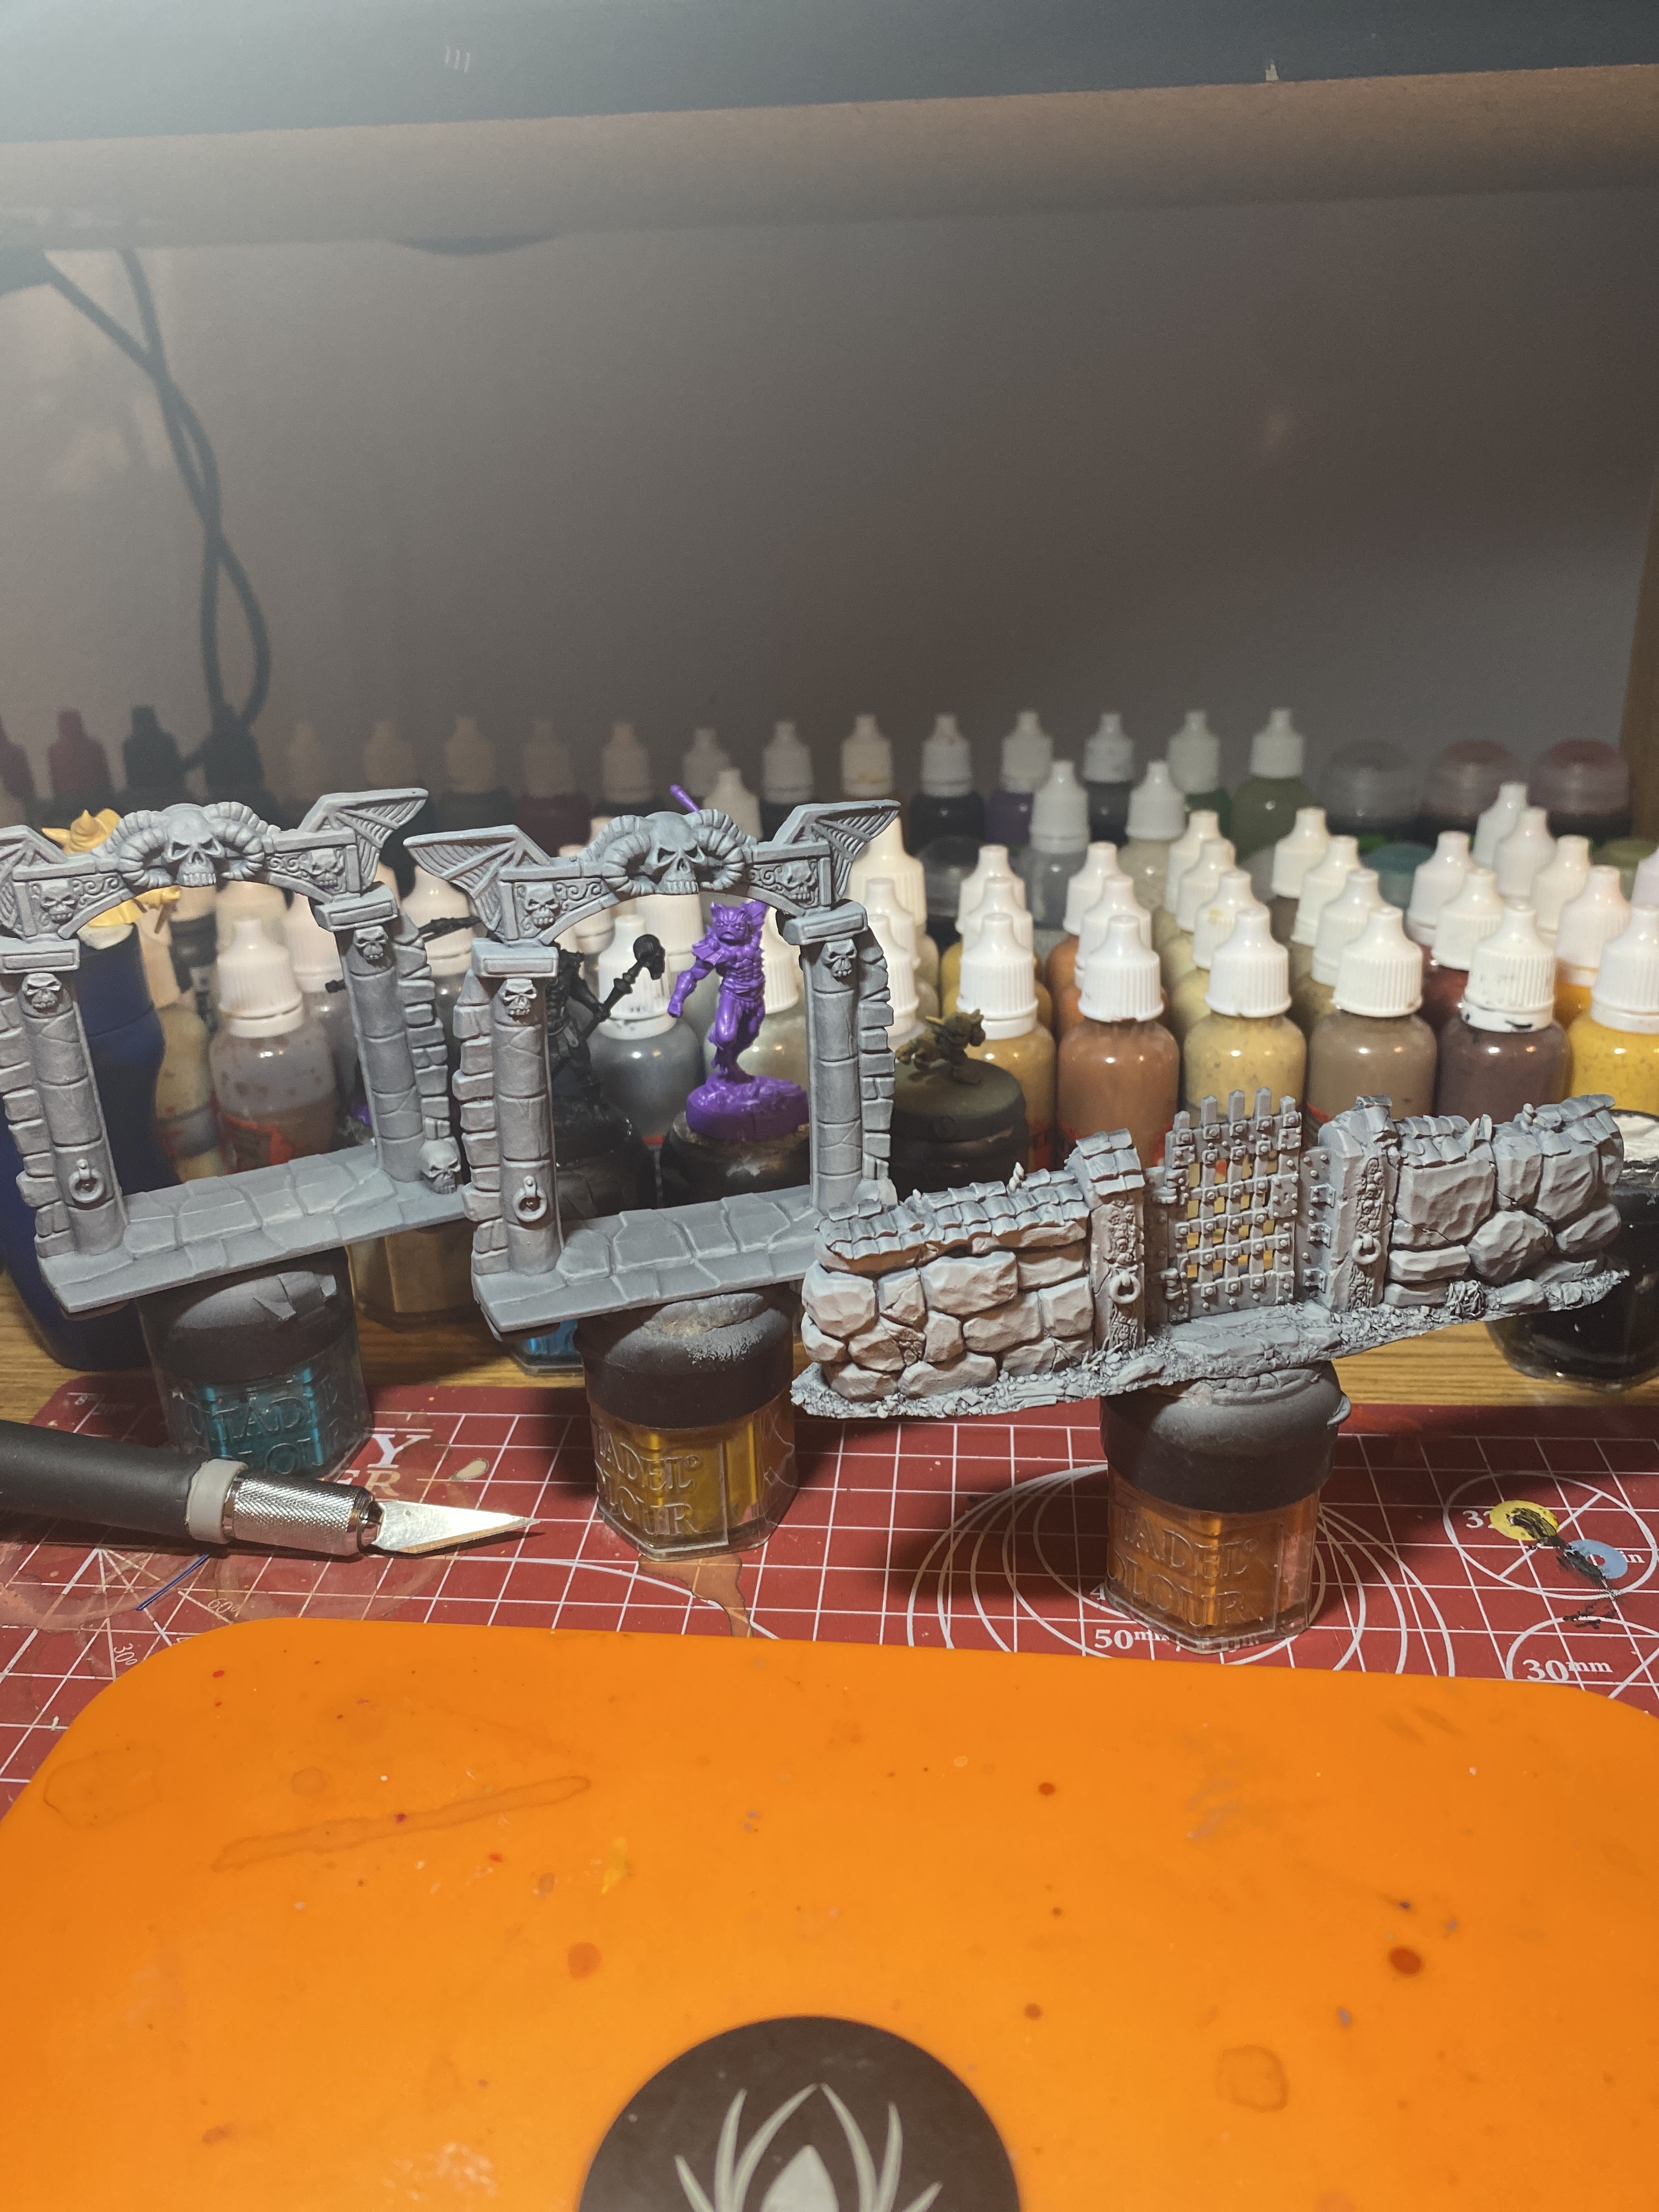
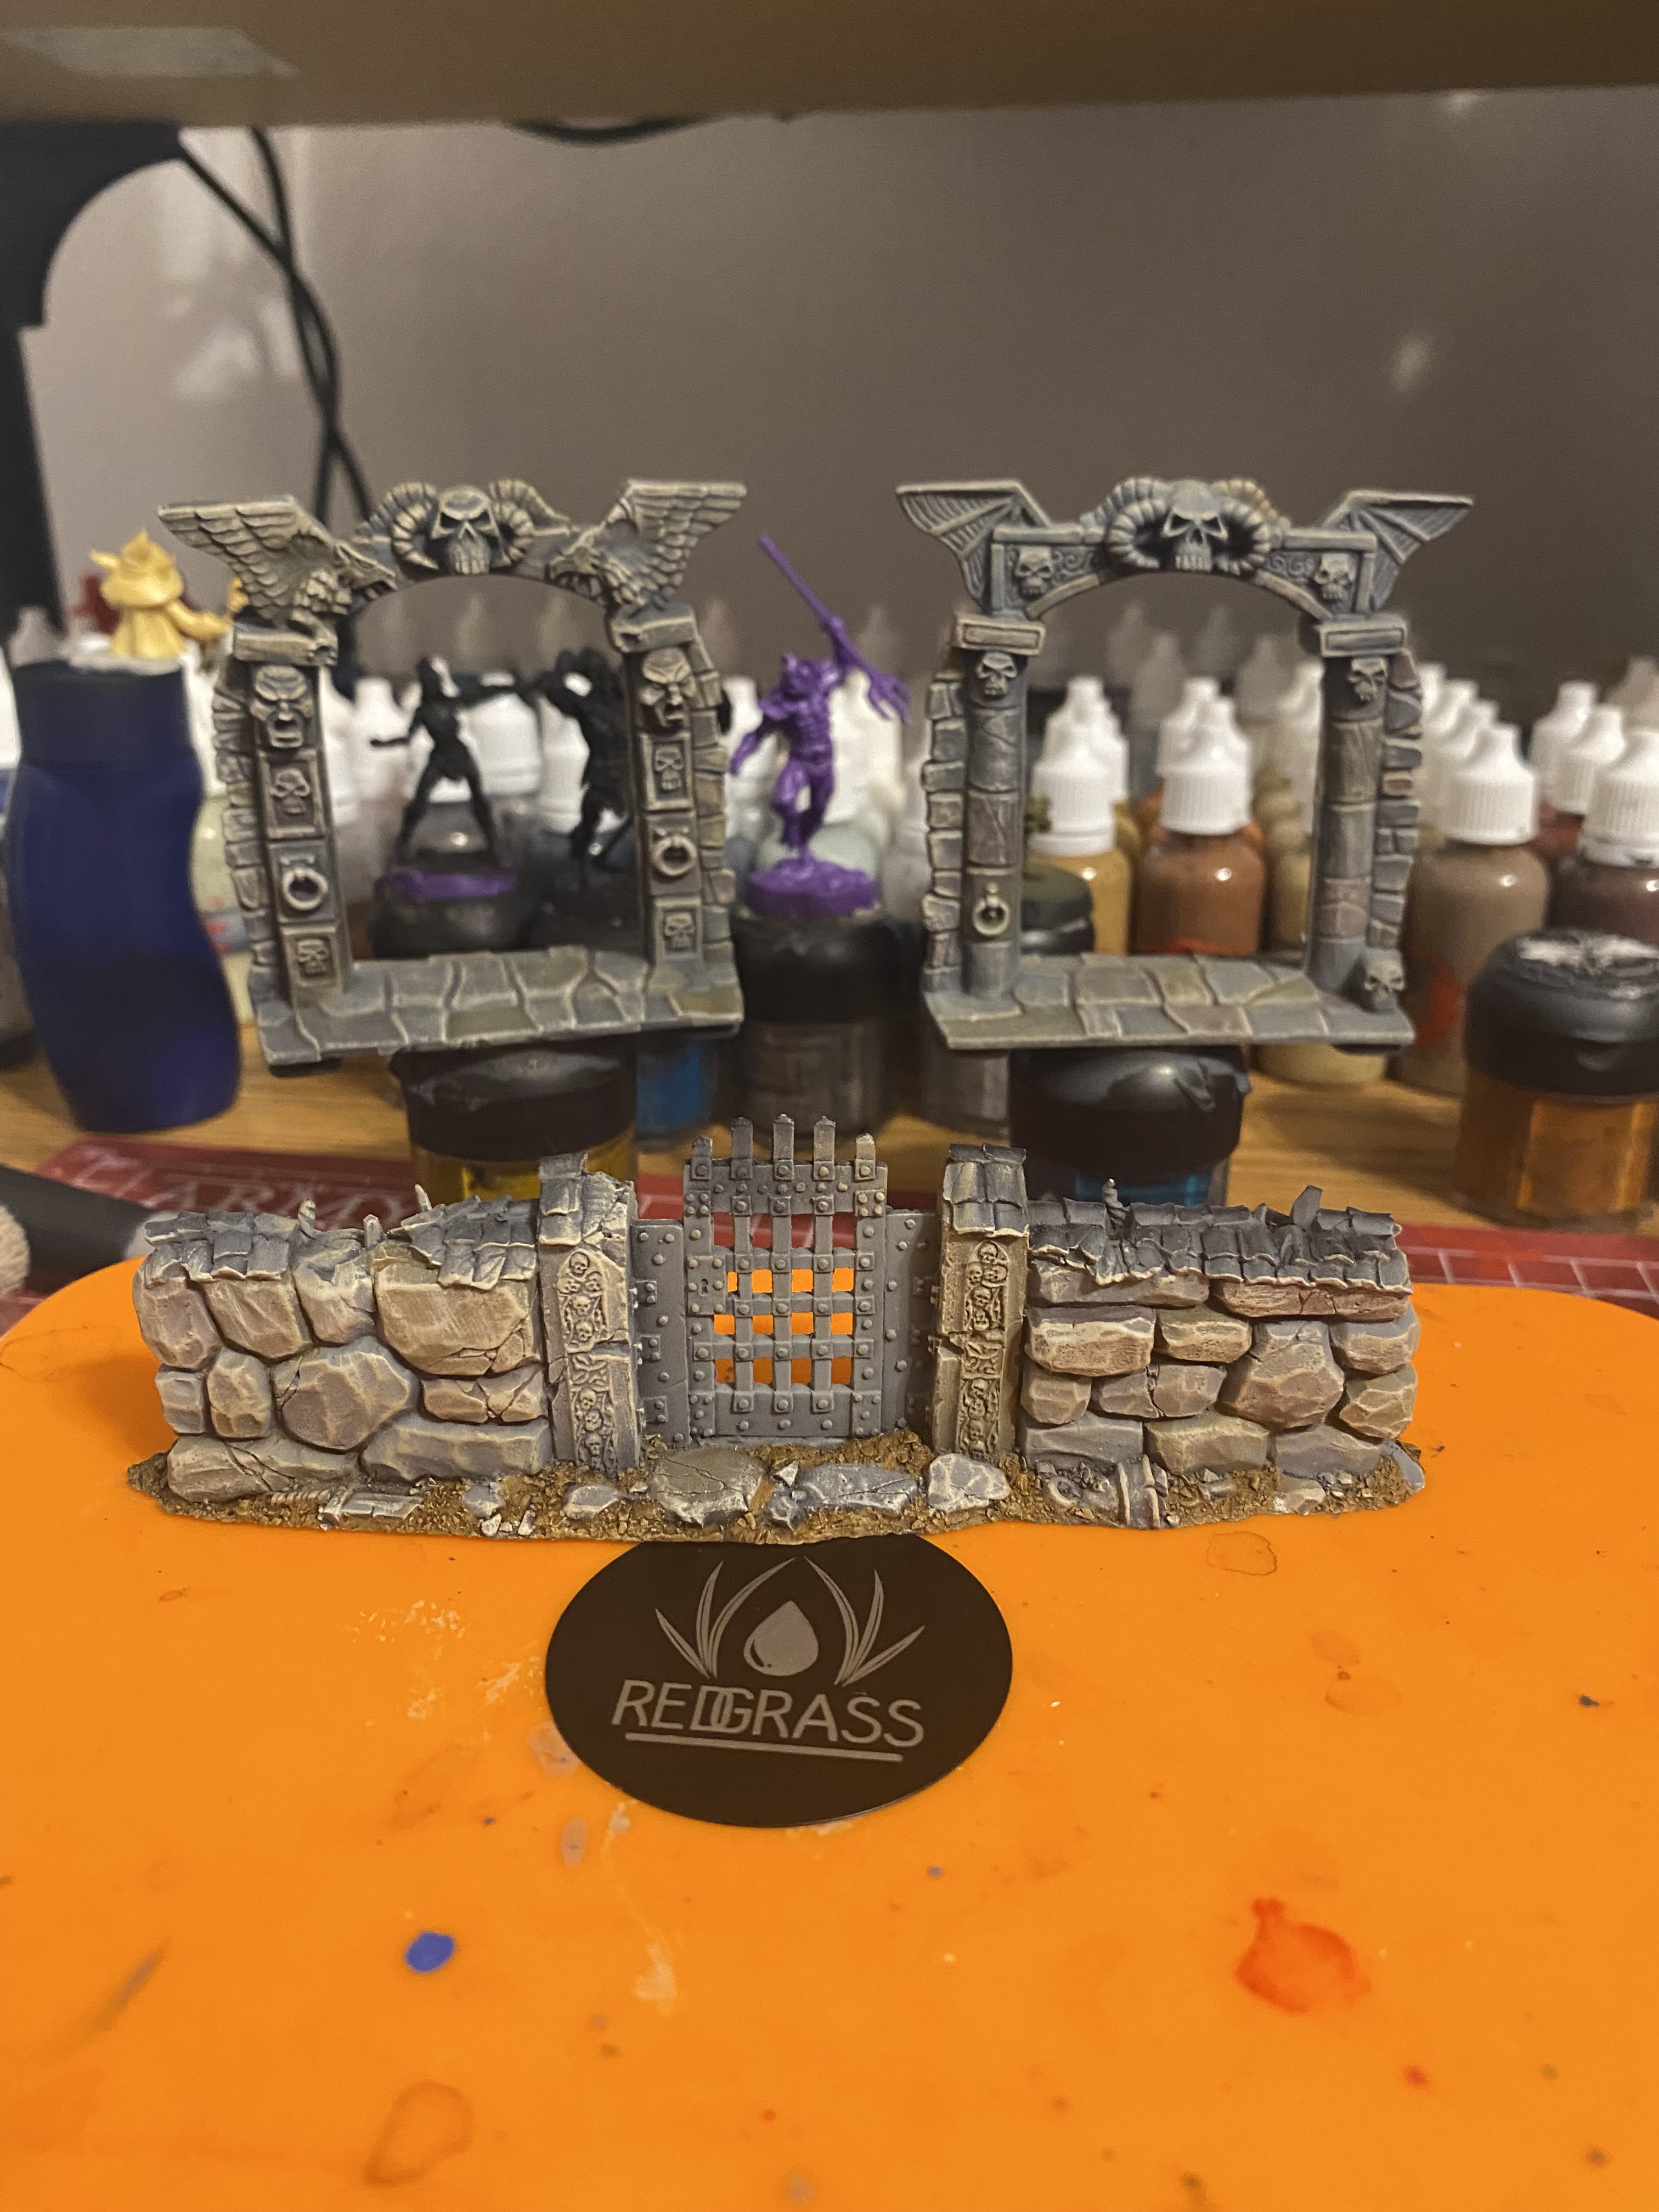
Once the tinting was done it was a matter of dry brushing to give the stones a unified look. For the test run I used a wall from Kromlech’s dark forest line. To me it’s a great line for The Silver Bayonet as it captures the feeling of a grimdark wood. I have already painted the haystacks and have more sections of wall and some tombstones to do in the future. Additionally, I went with two arches from Warhammer Quest. Jeff and I brainstormed the idea to use them after we played a few games of Dungeon Bowl, and I felt they were a must have. Unfortunately, I cleaned out eBay to pick up a ton of them as in my mind I think all the hallway connections need them. Two down, twenty or so left to go! Both the walls and the dungeon arches I played around with some rusty metals.

The scale of the Kromlech stuff is more heroic 28mm so it benefits from some larger details that really came out in the dry brushing phase. If I could change one thing, I would have painted the red tiles before the dry brush. I did the opposite, so they look very clean compared to the rest of the wall. An easy fix though. I’m happy with the arches. The detail is not as crisp, but the technique still worked well. In future arches I would like to play around with some more affects like moss or verdigris.

Jeff and I have swapped the Beehive huts from Fogou many times, but with them back in my hands again I was able to take this technique and get some of them painted. Sorry Jeff, no trade backs now! For these I used some of Dirty Down’s Moss paint to get them a wet climate look. It’s an interesting paint. At first, I put it on thick to make it very dark, but I wasn’t too happy with the result. Thankfully, it can be reactivated with water, and I was able to use a brush to feather out the moss to make it look better to me. I also used some water-downed Agrax Earthshade to make the bottom of the walls dirty to blend in with the ground some. Perhaps that is something I can use on future wall sections as well.
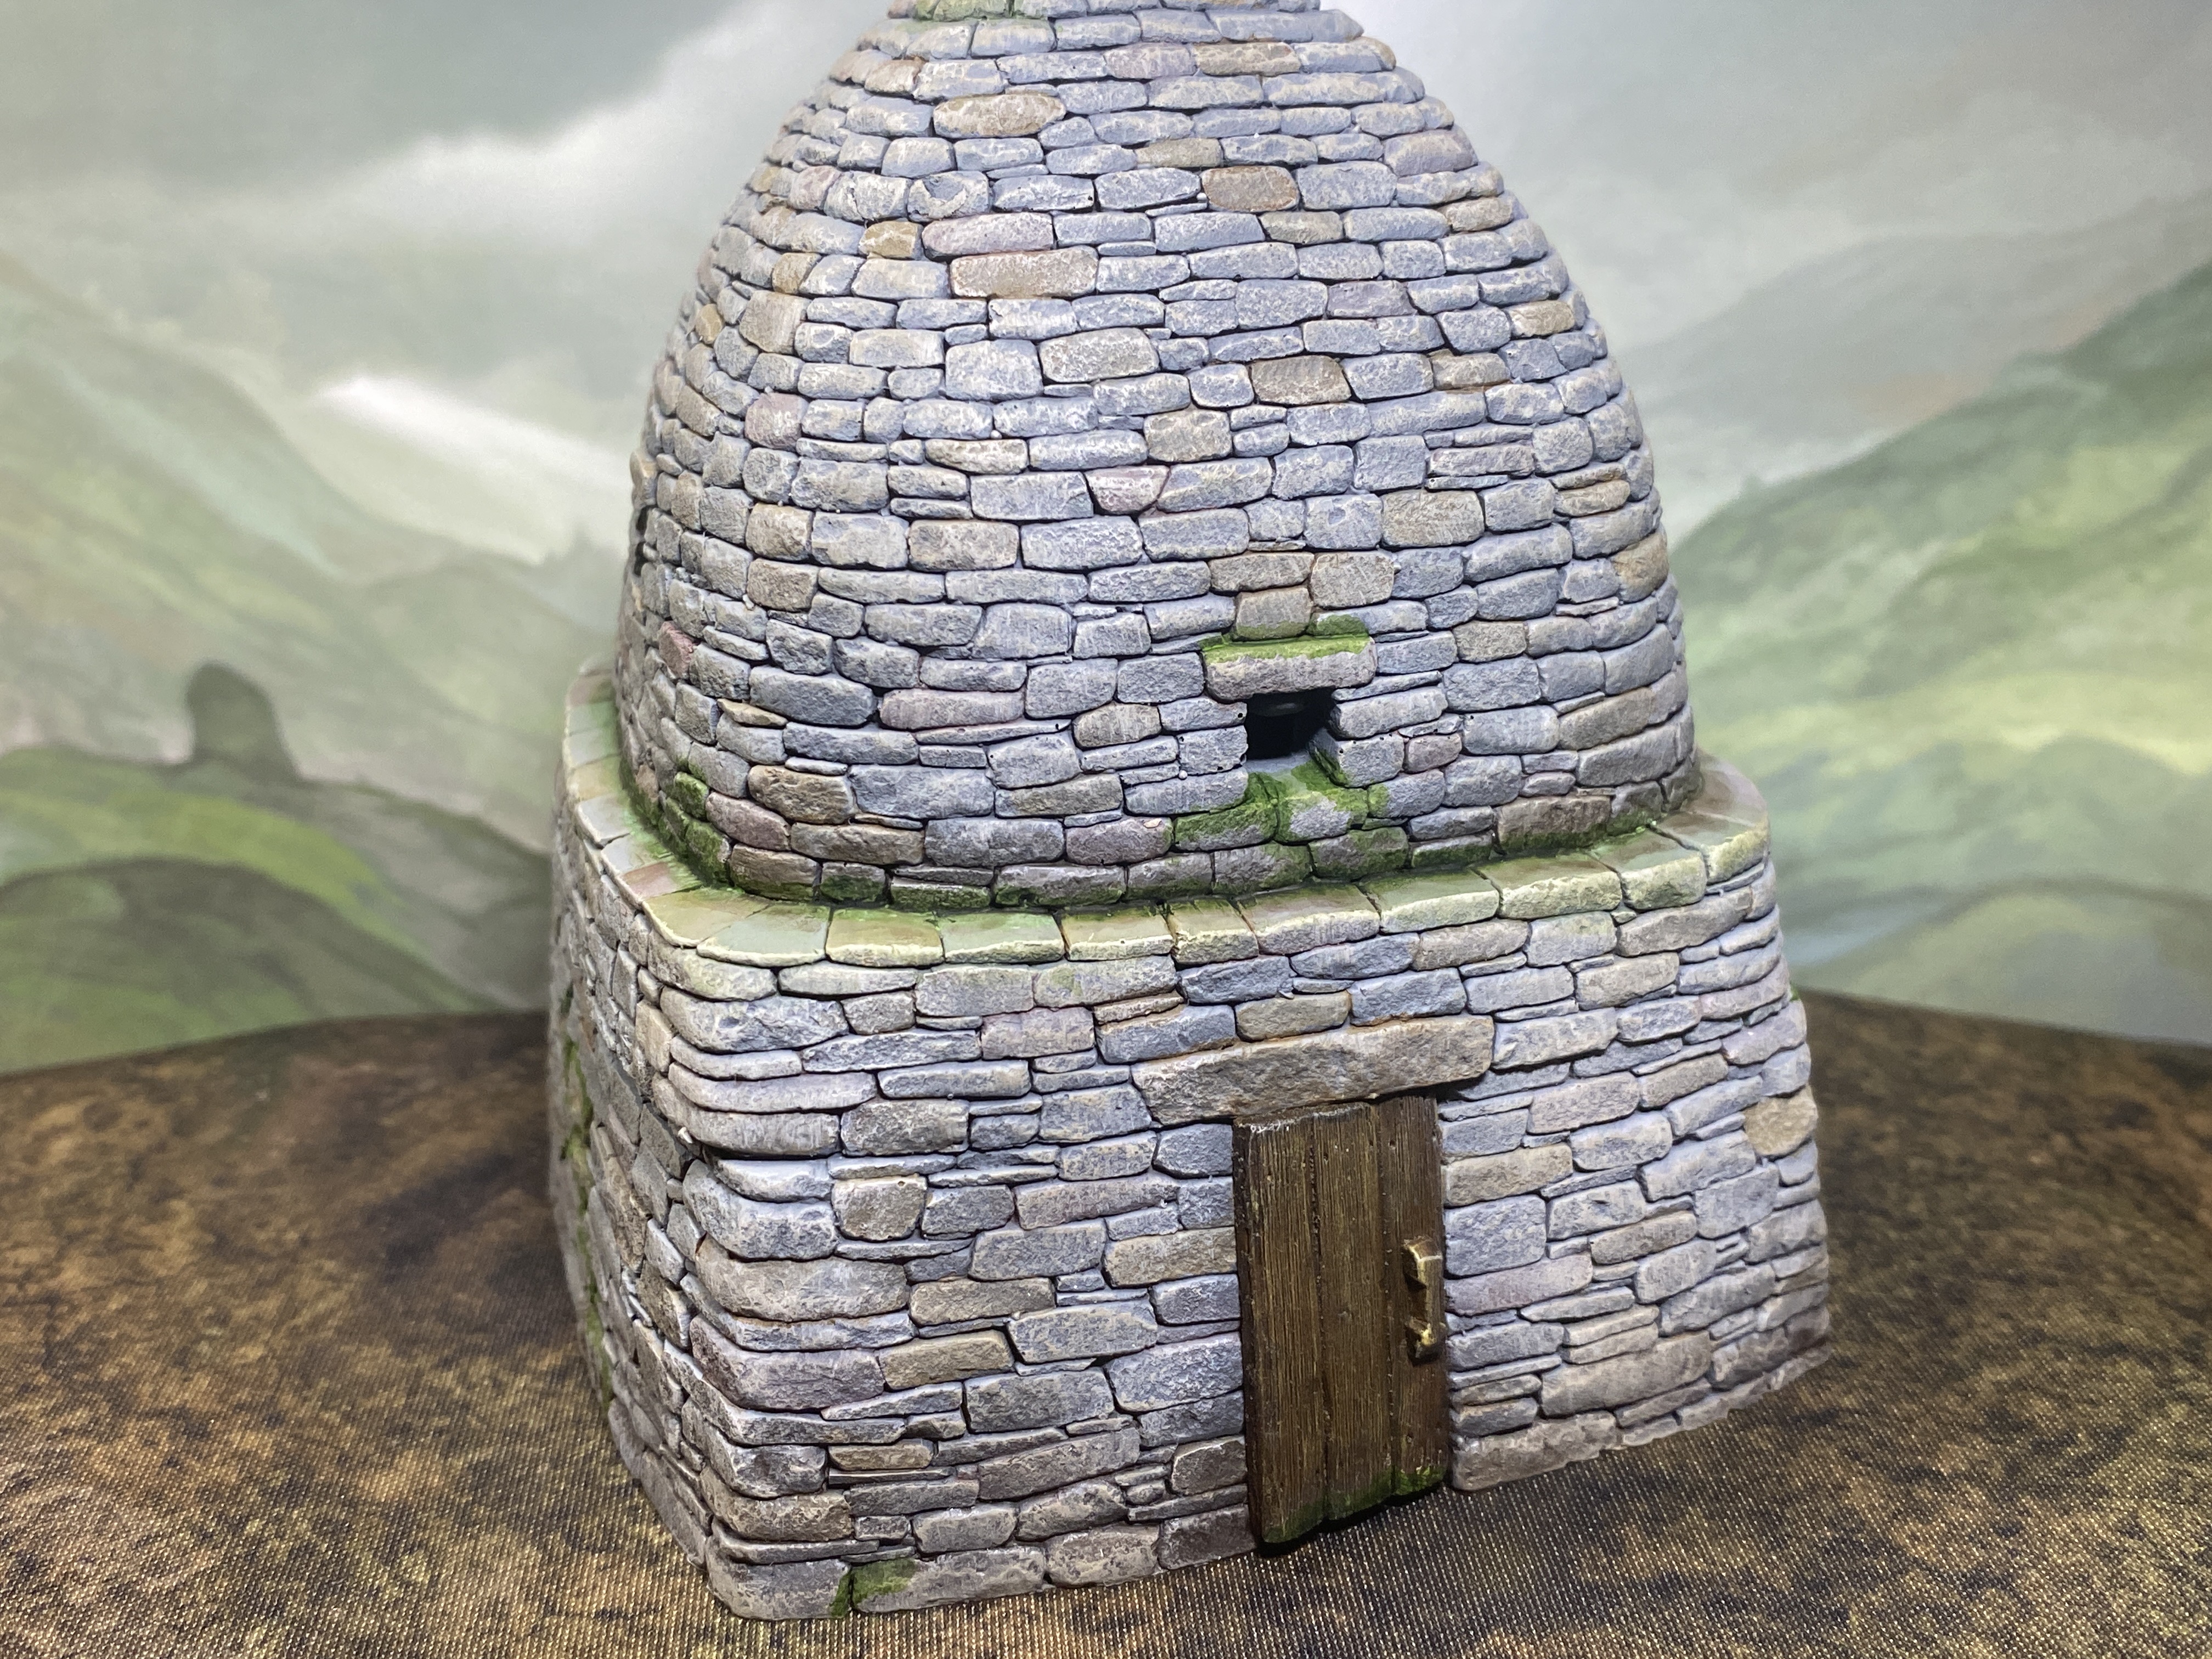
I also knocked out a larger beehive following the same techniques. As with the others I am pleased with the results. It’s nice to see this great terrain with some color on it. I have plenty more terrain from Fogou to include a pigsty, well, ruined buildings, and even their awesome ring fort. Hopefully these are all items I’ll be able to share painted someday. Fingers crossed I’ll have the time!

The bee hives look great! They found the right home. Let’s see the ring fort!
I need to get some of that Dirty Down’s Moss paint to try out in trees and rocks.
LikeLike