
Finally! A freaking update! OK, so I will not bore you with details as to why I have not posted an update to the tutorial in while. I have just been busy. That is all there is to it. But now, I have an update to share with you! So, here we go!
The last update ended with us working on details, and interestingly enough, that is where we pick up with this update. Just to add a little flair, I decided to add a couple of small rubble piles to the floor of the buildings. Nothing too large as I did not want the piles to get into the way of the functionality of the piece. Rubble piles are pretty easy. We just want to drop a few small wood strips, and layer them with some small pieces of foamcore, or other make shift pieces of debris. On one of the piles, I used foamcore, on another I took a plaster Hurts Arts mold brick that a friend gave me, and I broke it into chunks of various size. Both methods worked well for me.

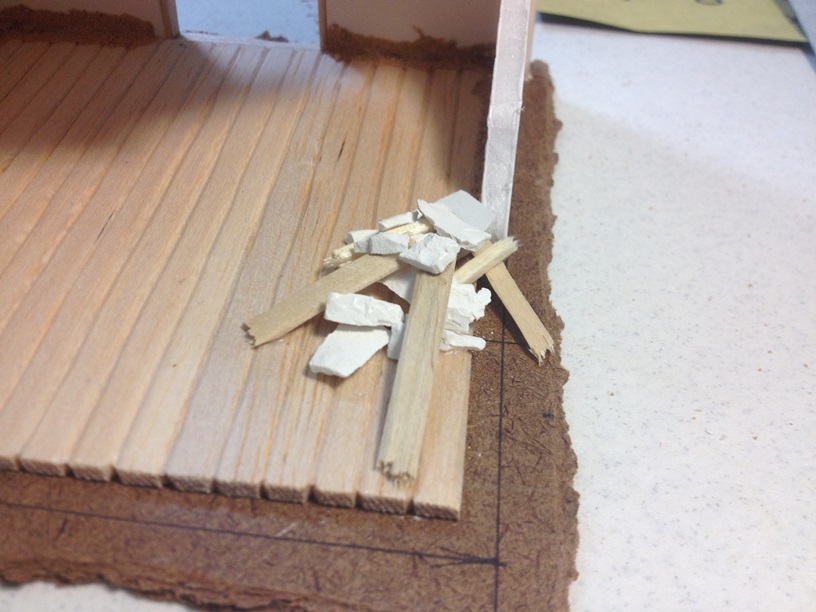
After creating our “piles” we need to add a little grit and dirt to make it look as natural as possible.


Along with the small barrels that I regularly use in my terrain, I also had a couple of larger barrels that I had not used before, that are large enough to be big beer casks that you might find in some medieval tavern. I built a small stand for one of them and placed it in the corner. It is not an ideal location for for where it might be realistically placed if the building were real, but it was the best spot I could find to make painting the inside also viable, Sometimes you just have to make compromises.
At this point, we have enough detailing on the building to move on to the next step.

And that step is that our building needs a roof! We will use a simple but effective method for this piece. First, we will glue down a piece for our roof sections to attach to. I like to use thin cardboard from cereal, or soda boxes. This is also the material we will make our shingles out of. We just measure out pieces to fit on top of our roof sections, that have the basic shape we want the roof to take.

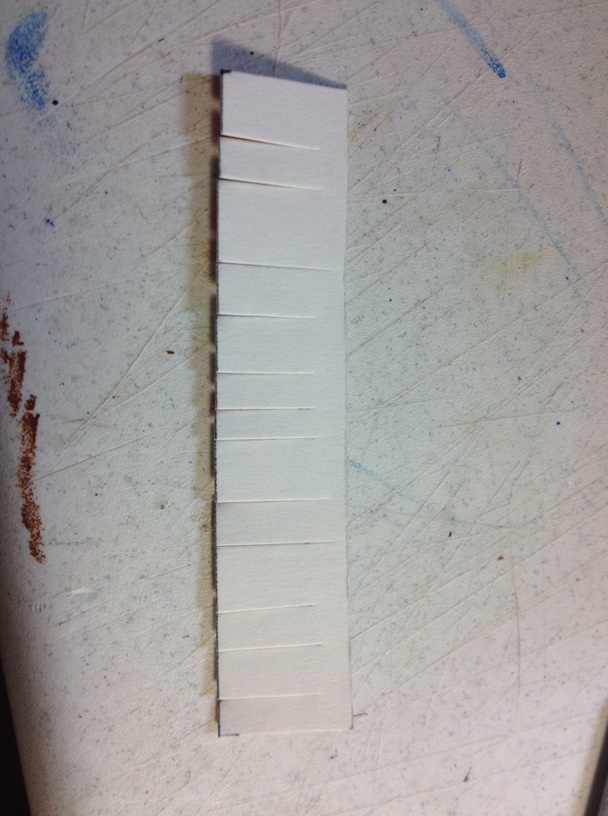
Once we have the pieces that go under the roof glued down, it is time to make some shingles. Shingles are simple, but slightly time consuming. We just measure out some strips of thin cardboard, 3/4 of an inch wide, and as long as we need to cover the roof. Once the strip is cut out, we just need to cut the individual shingles out. Using random widths, we just cut most of the way, but not ALL of the way, through the strip so that we end up with a string of shingles that are still attached along the top.
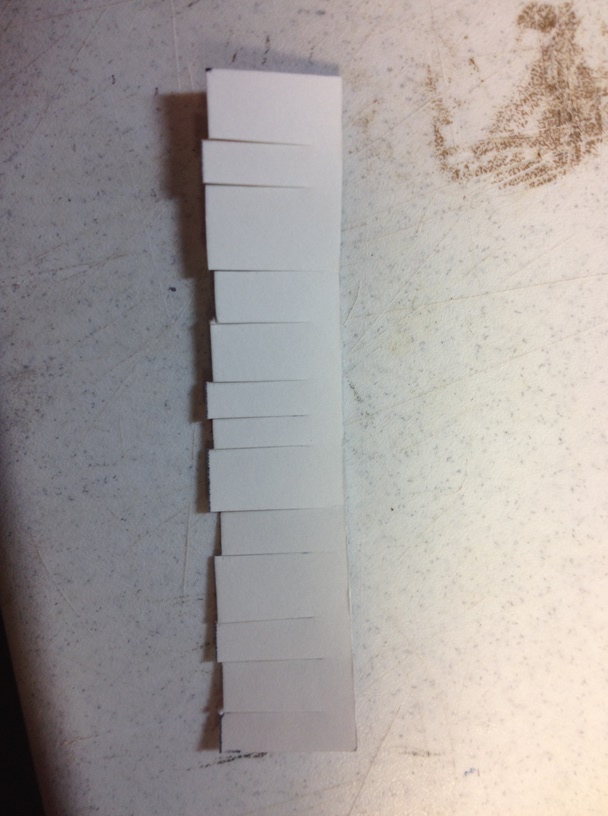
Now comes the fun part. Trim the ends of each shingle to give them slightly random lengths.
Once that is done, cut the corners off of each shingle.
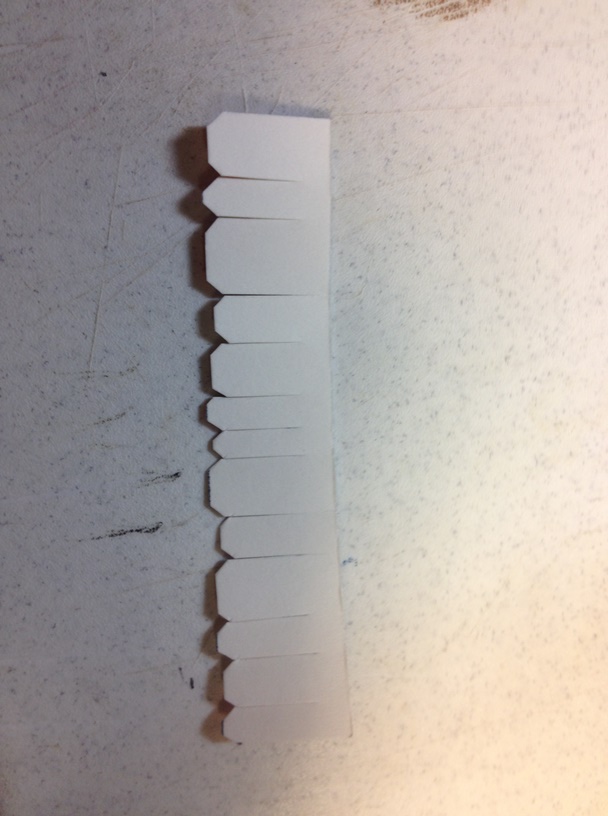
Rough up the ends of the shingles, and glue the strip down to the sub roof, starting at the bottom.

Repeat over and over until the whole roof is covered. Just make sure to stagger the shingle sections to increase the “damaged” look of the building. Once we are done, our building should look something like this…

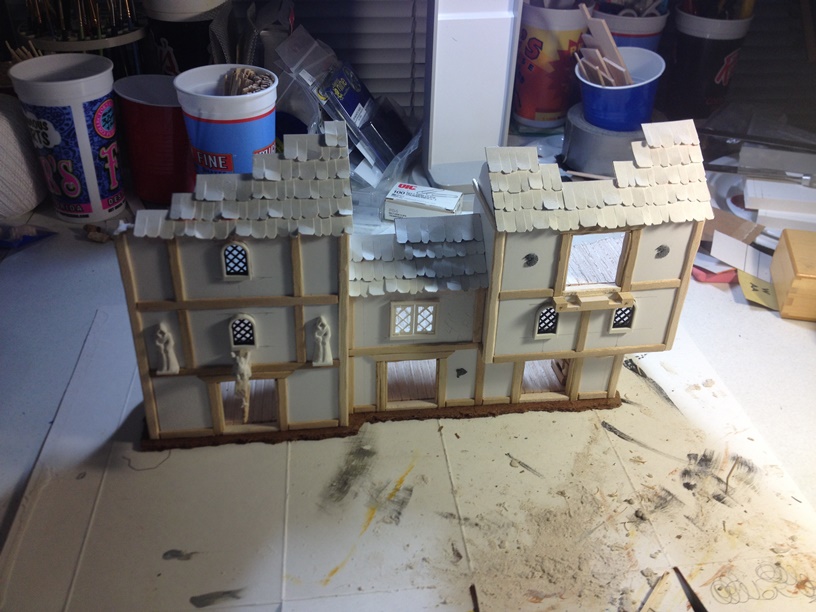
We are almost there. One last important step before we start to paint our building. We need to texture the walls. Texture is important for terrain because the texture is what is going to help us create the illusion of depth when we paint.
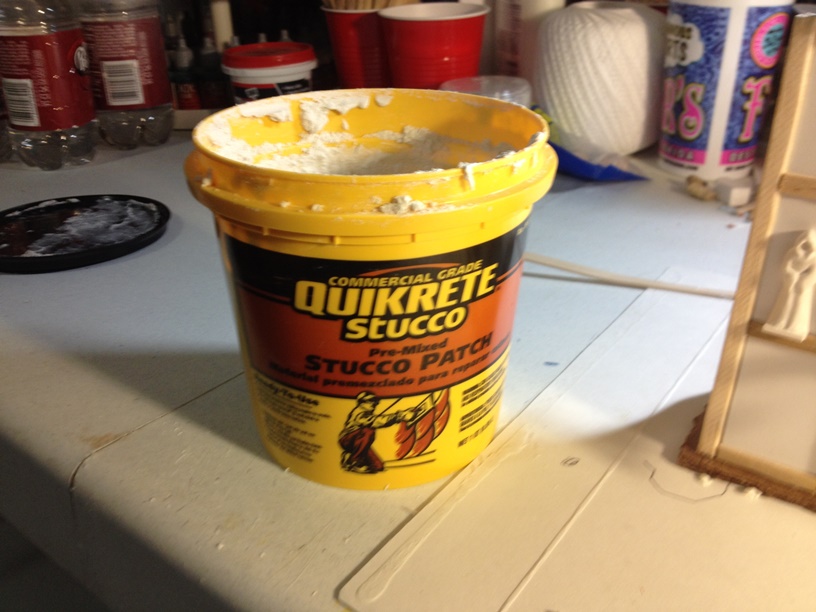
There are many methods to texturing. Some people add sand to black acrylic paint and brush that on for their base coat. Others use store bought textured paint. I use stucco patch. Stucco patch can be bought from any home improvement store, and is fairly cheap. The brand I use only cost $8 and the container is about a quart of patch. I have textured about 10 good sized buildings with it, so far, and I have only used about a third of it. If you use stucco patch, just be sure to water it down just a little. The more dry it is, the more it sticks to you paint brush, but DOES NOT transfer to the foamcore. When it is wet, it sticks to the foamcore REALLY easily.
Here is what I use…
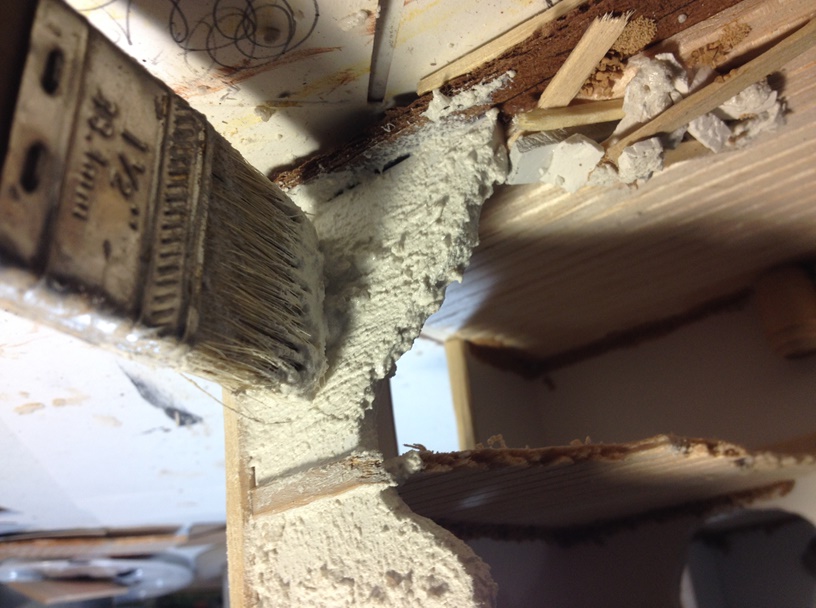
Applying it is simple. We grab an old, cheap brush, and basically just paint it on. We want to apply it to all the sections of bare wall in the building, both “inside” and outside.” We will also add some to the base all the way around. Stucco patch is great and looks realistic as both wall texture, and dirt. We just use different paint colors to separate the two. Be sure to wipe it off of any wooden sections, but do not worry about it looking sloppy. Making it look sloppy actually adds to the “gritty” look that I believe Mordheim buildings should always have.
After the texture has been applied to the whole terrain piece, we just have to let it dry overnight, and then we are ready for painting.


I make no promises, but I REALLY hope to have the piece painted this week. If I can manage it, then we should have the final post to the tutorial by sometime next weekend. Until then, comments are welcome.

Looks absolutely smashing. Thank you again for this tutorial. Clear, to the point and good pictures to accompany it.
One thing you could still add before you paint it is a staircase on one of the upper levels. I could see one (or the remnants of one) on the left side, first floor, just over the barrel. Would need to be only say two or three steps hanging from the wall. You could have the same on the right side were the two barrels are. The staircase would end just over the two barrels and make a turn towards the rubbel pile. That way all floors are connected.
LikeLike
Actually, I like to use ladders. I know stairs are much more realistic, but ladders are MUCH easier to make. I usually do those last which is why there has been no mention of them in the tutorial so far.
LikeLike
Fair enough. Ladders work equally well and might be quite realistic what belongs medievalish buildings.
LikeLike
You left me hanging, dude. 😀 I just started out making terrain and your tutorial has been a massive help so far. 🙂 Did you ever finish the building, cause if so, I can’t find it. 🙂
LikeLike
Alas no, I have not finished the piece or the tutorial… My group has not played Mordheim in a long time, so my motivation to finish it just has not been high. Now that I know someone actually reads this stuff, maybe I will give it another go and finish up soon. I only have to paint it, and make one modular balcony. It has basically been sitting at 80% done for about two years now. lol
LikeLike
I sure hope you find the time. 🙂 Would love to see the finished piece. 🙂
LikeLike
I’m working on making my son’s Halloween costume right now, but once I finish with that I plan on finishing the piece and the tutorial. I have put it off for long enough.
LikeLike
Well, it took way too long, but the final post in the tutorial series is now up!
LikeLike
Pingback: Mordheim Terrain Tutorial – 666: The Number of the Terrain! | Wyrd Stones and Tackle Zones