
Once again I decided to reinvigorate some life into my Mordheim collection and selected my Beastman Warband to leave the Empire in Flames of the world that was, and to join the new hotness of Warcry! Continue reading

Once again I decided to reinvigorate some life into my Mordheim collection and selected my Beastman Warband to leave the Empire in Flames of the world that was, and to join the new hotness of Warcry! Continue reading

Logic would suggest that a person should start with the basics of a game before they start adding extras into the mix. Being a less than speedy painter I can never keep up with the Games Workshop production line of new products. This typically results in me having making a hodgepodge collection as I move in and out of the collection stream. This time around instead of starting with the core released box set of the game I have instead gone with roaming beasts that are not even part of the core rules.
![]()
“Wargame terrain so tough, you’ll be passing it down to your children.”
My son has recently graduated from Heroscape to Age of Sigmar selling off all his Heroscape to bankroll the Age of Sigmar starter set (as well as a Nintendo Switch). What this means is that we now needed a whole new set of terrain for this new game. Our storage space is fairly limited so we needed something that could be stored in a small space, which likely means the scenery bits would need to be on top of each other. Additionally, we still have little sister who also likes to play with minis having done so for years with that Heroscape set. Add these two together, and we needed easy to store, durable terrain. Games Workshop’s hard plastic with small bits and details wouldn’t do.
Enter….Advanced Terrain.
 My son and I have recently been getting into Age of Sigmar, particularly the Shadespire setting for the Skirmish ruleset. This being a new venture in gaming for me necessitated a battlefield. Since we were getting into this from scratch we needed to get terrain and mat in short order . This stuff can get pricey, so I looked around for the best value. Behold Mats by Mars.
Well, here we are… a full two and a half years since my last Mordheim Terrain Tutorial post. What can I say? Better late than never I suppose. Since my group had not played Mordheim (until a couple of weeks ago) in the time since my last update, and with me diving with both feet back into Blood Bowl in that time, the Mordheim projects just got figuratively and literally put on the shelf for a while. After receiving a couple of requests somewhat recently to finish the tutorial series, and realizing that making terrain is actually my favorite part of the hobby that I have neglected for quite a while now, I decided that it was finally time to finish this terrain piece, and the tutorial.
First, to get anyone caught up who has not read the previous posts:
 So, it has been pointed out that there has not been much in the way of Wyrd Stone posts on Wyrd Stones and Tackle Zones lately. That has mostly been due to Mordheim not being played at all in our group, and therefore, no games to talk about and no terrain to build. Well, luckily for us all, last week we actually played a couple of games of Mordheim in one night.
Finally! A freaking update! OK, so I will not bore you with details as to why I have not posted an update to the tutorial in while. I have just been busy. That is all there is to it. But now, I have an update to share with you! So, here we go!
The last update ended with us working on details, and interestingly enough, that is where we pick up with this update. Just to add a little flair, I decided to add a couple of small rubble piles to the floor of the buildings. Nothing too large as I did not want the piles to get into the way of the functionality of the piece. Rubble piles are pretty easy. We just want to drop a few small wood strips, and layer them with some small pieces of foamcore, or other make shift pieces of debris. On one of the piles, I used foamcore, on another I took a plaster Hurts Arts mold brick that a friend gave me, and I broke it into chunks of various size. Both methods worked well for me.

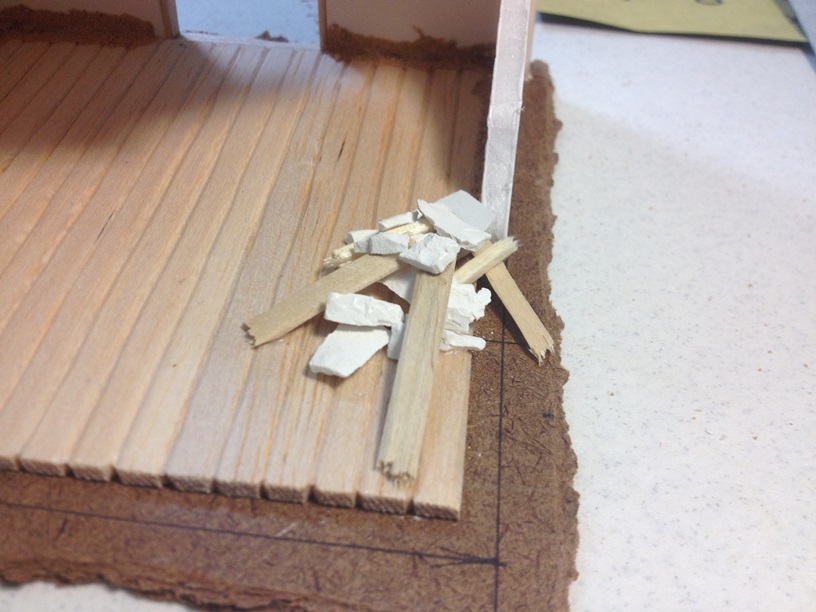
After creating our “piles” we need to add a little grit and dirt to make it look as natural as possible.


Along with the small barrels that I regularly use in my terrain, I also had a couple of larger barrels that I had not used before, that are large enough to be big beer casks that you might find in some medieval tavern. I built a small stand for one of them and placed it in the corner. It is not an ideal location for for where it might be realistically placed if the building were real, but it was the best spot I could find to make painting the inside also viable, Sometimes you just have to make compromises.
At this point, we have enough detailing on the building to move on to the next step.

And that step is that our building needs a roof! We will use a simple but effective method for this piece. First, we will glue down a piece for our roof sections to attach to. I like to use thin cardboard from cereal, or soda boxes. This is also the material we will make our shingles out of. We just measure out pieces to fit on top of our roof sections, that have the basic shape we want the roof to take.

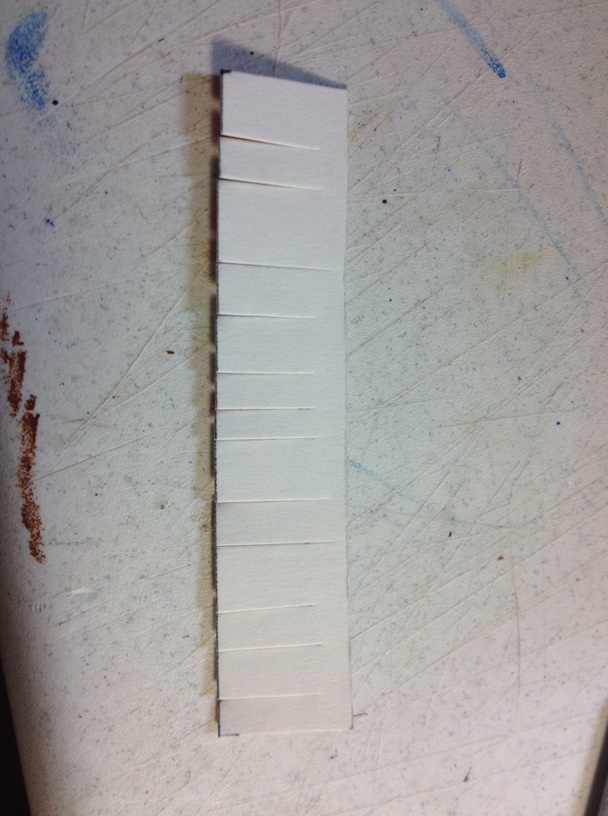
Once we have the pieces that go under the roof glued down, it is time to make some shingles. Shingles are simple, but slightly time consuming. We just measure out some strips of thin cardboard, 3/4 of an inch wide, and as long as we need to cover the roof. Once the strip is cut out, we just need to cut the individual shingles out. Using random widths, we just cut most of the way, but not ALL of the way, through the strip so that we end up with a string of shingles that are still attached along the top.
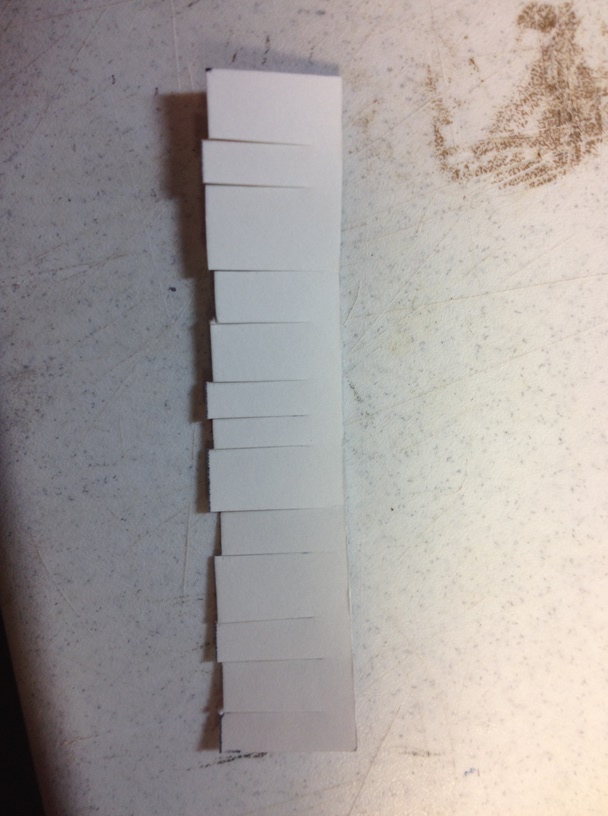
Now comes the fun part. Trim the ends of each shingle to give them slightly random lengths.
Once that is done, cut the corners off of each shingle.
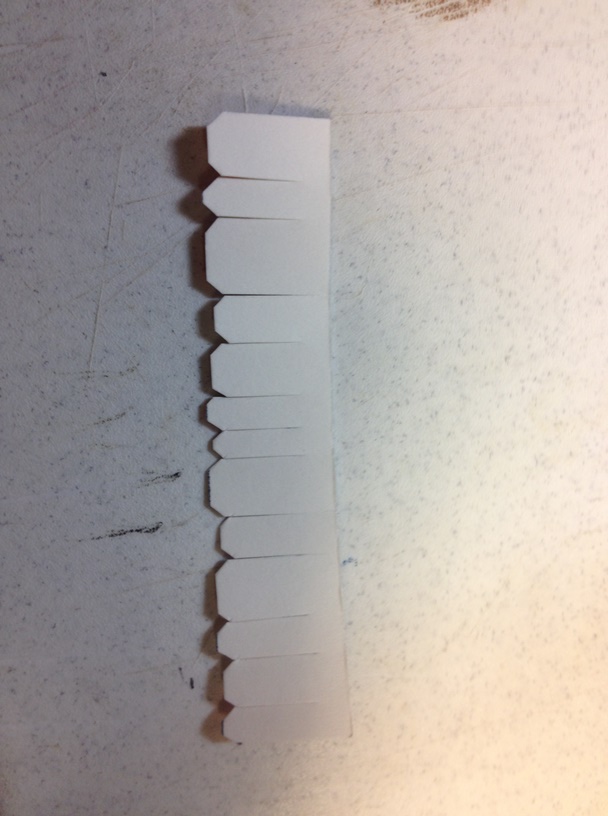
Rough up the ends of the shingles, and glue the strip down to the sub roof, starting at the bottom.

Repeat over and over until the whole roof is covered. Just make sure to stagger the shingle sections to increase the “damaged” look of the building. Once we are done, our building should look something like this…

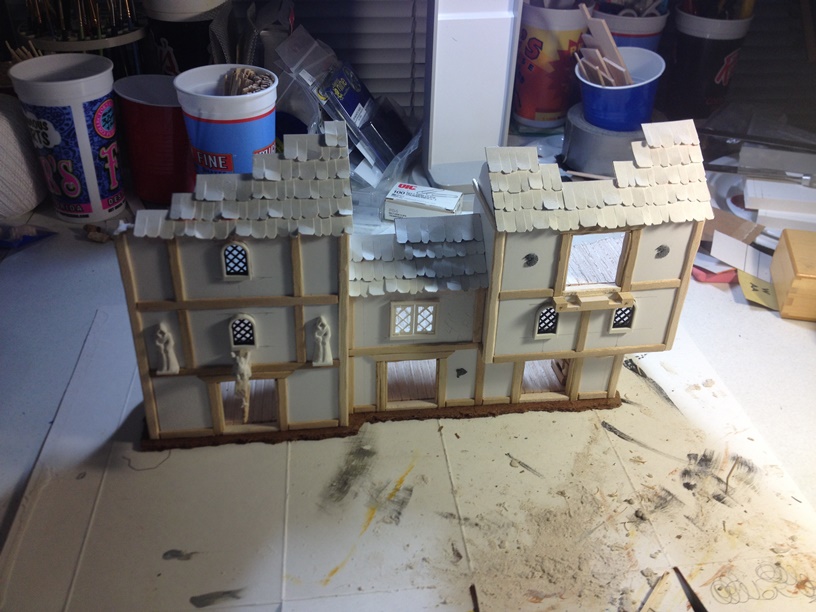
We are almost there. One last important step before we start to paint our building. We need to texture the walls. Texture is important for terrain because the texture is what is going to help us create the illusion of depth when we paint.
There are many methods to texturing. Some people add sand to black acrylic paint and brush that on for their base coat. Others use store bought textured paint. I use stucco patch. Stucco patch can be bought from any home improvement store, and is fairly cheap. The brand I use only cost $8 and the container is about a quart of patch. I have textured about 10 good sized buildings with it, so far, and I have only used about a third of it. If you use stucco patch, just be sure to water it down just a little. The more dry it is, the more it sticks to you paint brush, but DOES NOT transfer to the foamcore. When it is wet, it sticks to the foamcore REALLY easily.
Here is what I use…
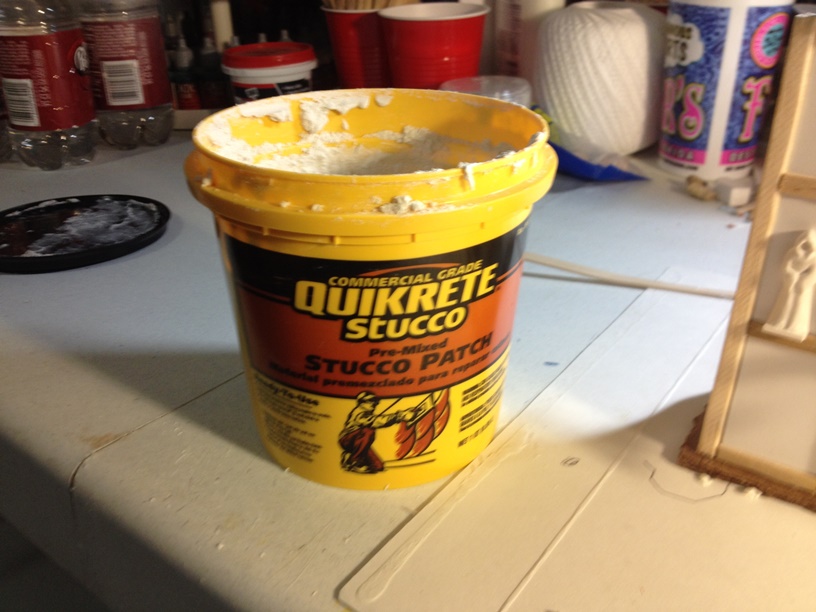
Applying it is simple. We grab an old, cheap brush, and basically just paint it on. We want to apply it to all the sections of bare wall in the building, both “inside” and outside.” We will also add some to the base all the way around. Stucco patch is great and looks realistic as both wall texture, and dirt. We just use different paint colors to separate the two. Be sure to wipe it off of any wooden sections, but do not worry about it looking sloppy. Making it look sloppy actually adds to the “gritty” look that I believe Mordheim buildings should always have.
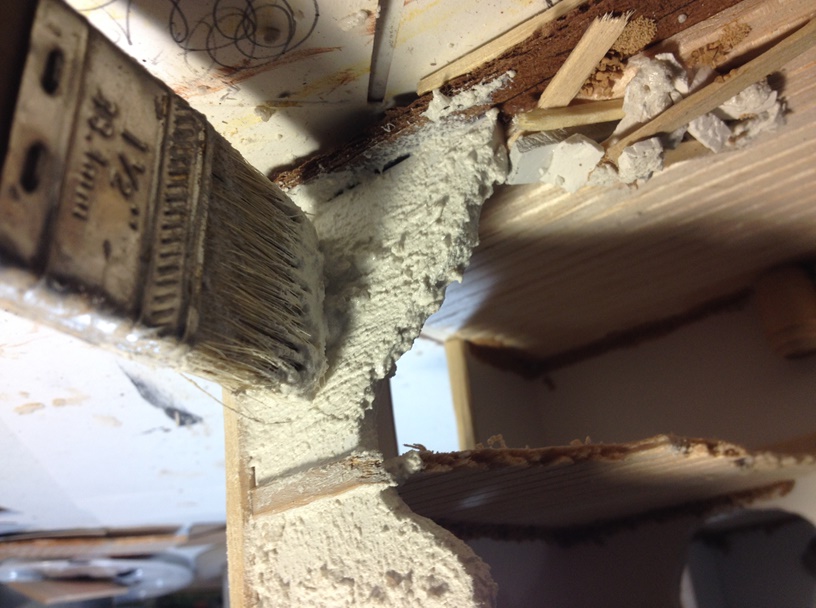
After the texture has been applied to the whole terrain piece, we just have to let it dry overnight, and then we are ready for painting.


I make no promises, but I REALLY hope to have the piece painted this week. If I can manage it, then we should have the final post to the tutorial by sometime next weekend. Until then, comments are welcome.
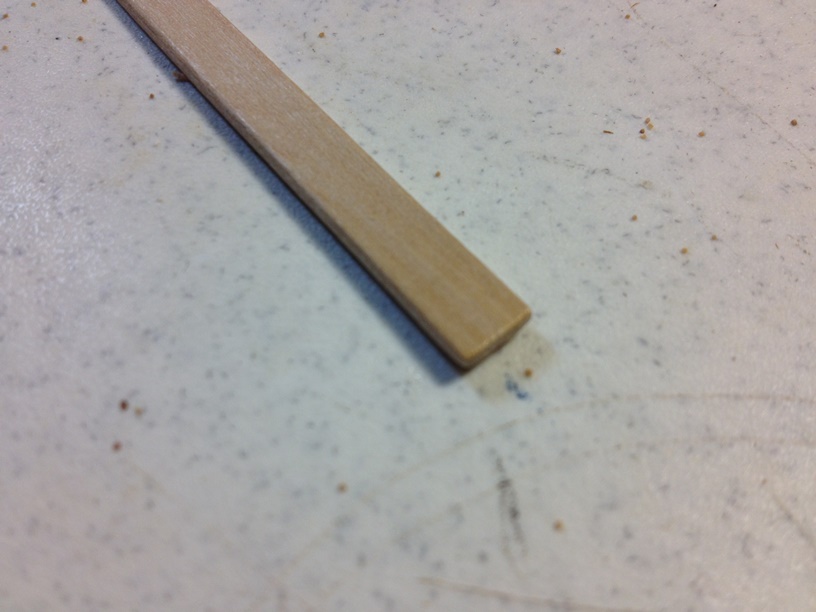
…that I wanted to share with other terrain builders. The wife drug me out to Joann’s, which I also knew as a “fabric store.” Well apparently, while I was not paying attention (which is most of the time, really), Joann’s became a “craft store” and started carrying things other than just fabric. Most of the things were standard craft and hobby items, but I saw something that grabbed my attention. Craft popsicle sticks without the usual rounded ends, that were already slightly beveled on the edges. These things are almost tailor made for terrain building. Just cut them to length and glue them in place! I’ll probably still shave them a little to give them a more rough hewn look, but for people just starting out, these would be awesome. Below are pics of the packaging and the sticks themselves…

I guess the brand name is “Woodsies.” They come in a bag of 75 for about $4. They are a little more expensive than the ones I usually get, but those have LOTS of really warped pieces that I end up tossing because they’re worthless to me. These sticks are all completely straight.
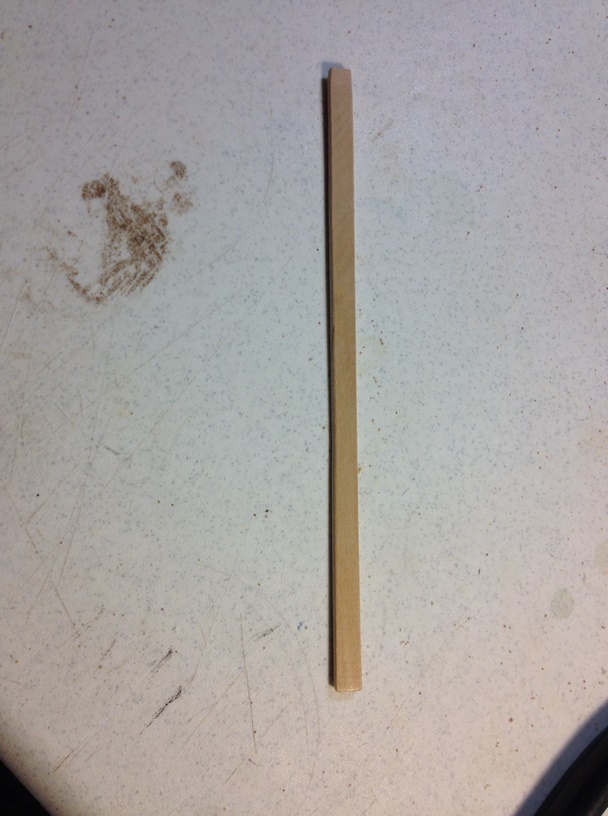
I tried to get a pic of the beveled edges, but it really just does not translate in the image.
Anyway, just wanted to pass the info along. I hope someone out there finds it useful. And stay tuned, the next part of my terrain tutorial should be coming in the next few days!
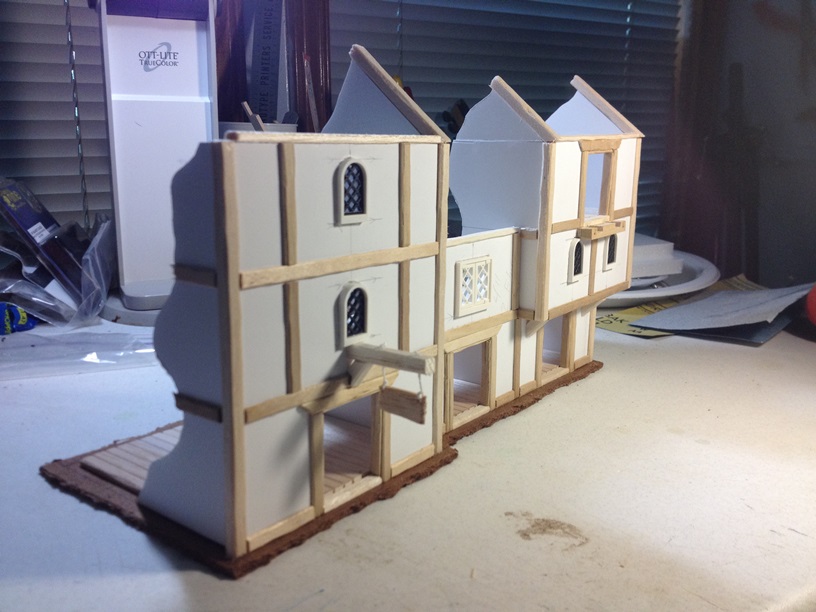
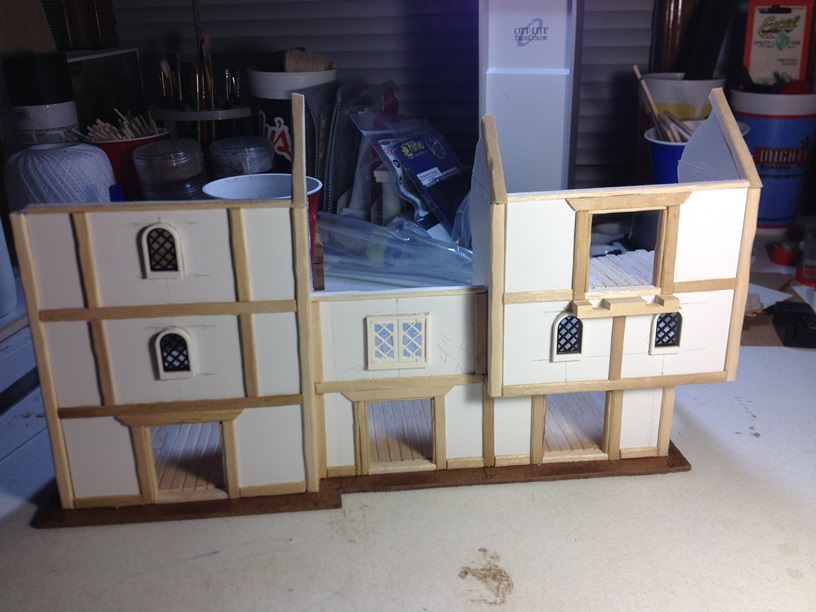
I really did not expect to have another update quite so soon, but after working on the piece for a while last night and tonight, I realized that I had done enough work, that I should probably go ahead and make another update. What prompted this update was simply looking at the terrain piece yesterday afternoon and realizing that I had not done NEARLY enough detailing on this terrain piece yet. So I got busy last night and I really like where I am at now.
To start, here is the piece as it was at the end of the last update.
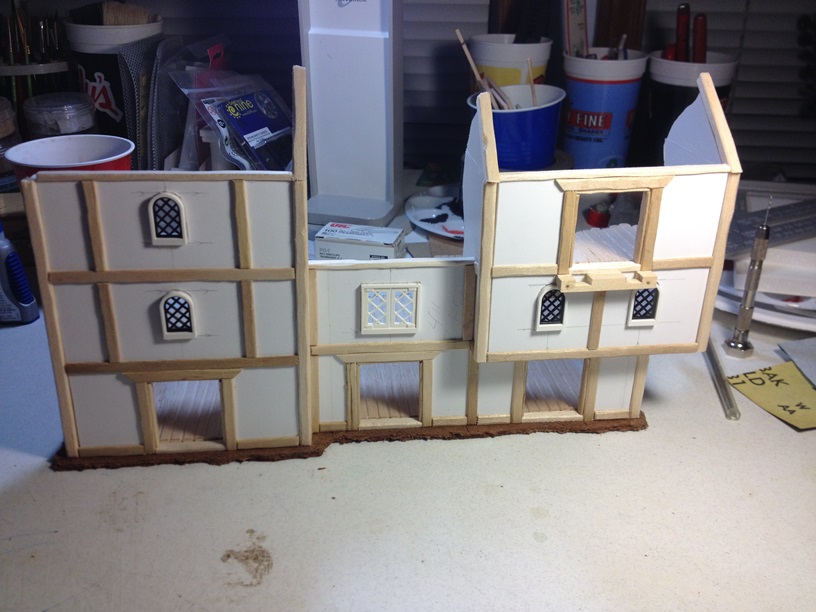
It is starting to look good, but it is still a bit bland… We REALLY want terrain to come alive to add to the atmosphere of the game, so we need to grab some balsa strips, and a hobby knife, and get to work. First we need to add some supports to the underside of the second floor of the building on the right.

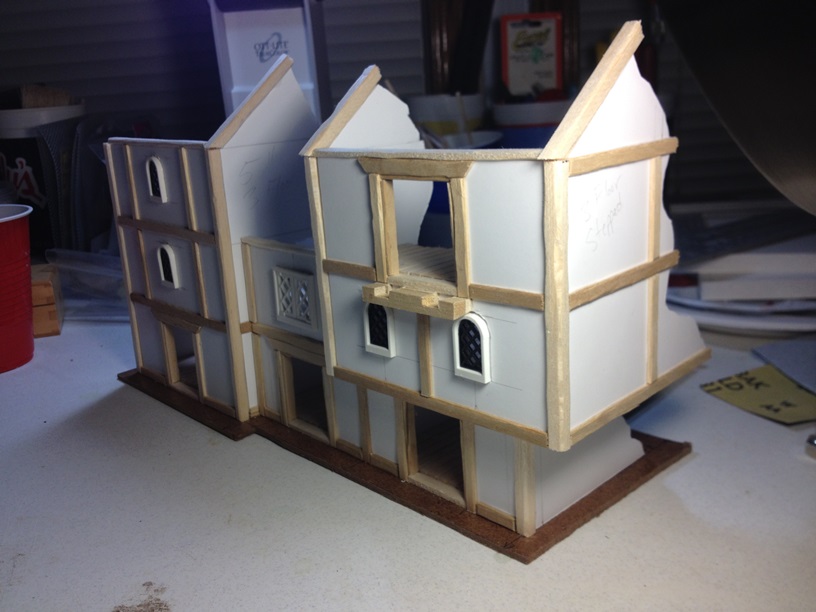
It is really easy to do. Cut a few pieces to length, shape the sides, and glue them underneath. Next, we should add some angle pieces for a little character…


As you can see, these little pieces go a long way towards really taking things to the next level. A lot of people make ok terrain that you find on gaming tables, but I like the saying, “Go big or go home.” I can apply that saying to a lot of aspects of life, and it definitely applies to making terrain.
*Quick tip*
If you are like me and do not have a hobby sized miter box, use a carpenter square, if you have one, to make sure that you get good 45 degree angles on your cuts, and cut nice and SLOW to make sure everything is straight. If your cuts on angled pieces is not straight, it is very difficult to make things fit right.
Next, I decided that I wanted a hanging sign in front of one of the buildings. These kinds of details are a little risky because they break off easily, but they look SO good. I had to have one on this piece. First, we just want to take a piece of sheet balsa wood and cut out a small rectangle. I believe I cut mine at one inch by half an inch. Then we will take a hobby knife, and simply scrape away at the edges of the rectangle to give it an appropriately worn look.
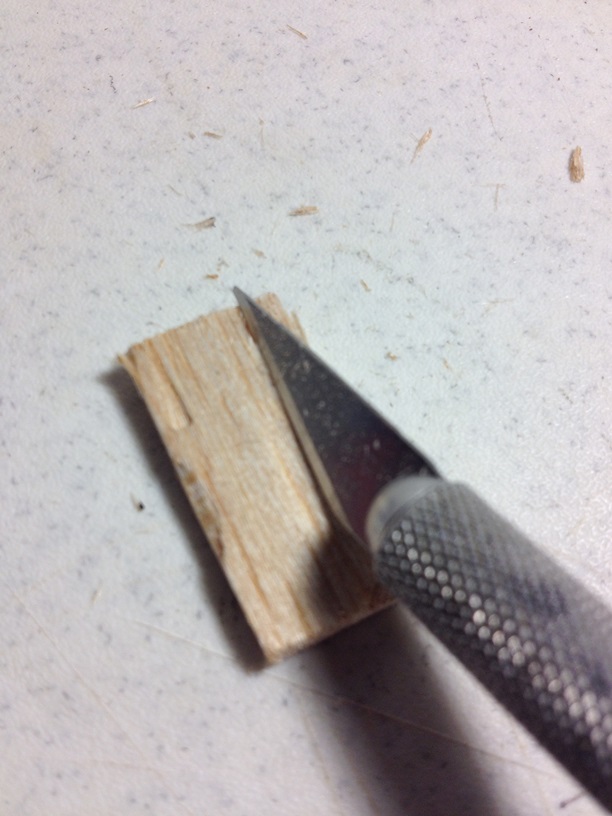

I also broke off a very small piece on one corner to give the sign a slightly uneven look. It worked out well.
To hang the sign, we will cut a strip of 1/4 inch x 1/4 inch balsa about an inch and a half long. There are a couple of different ways to hang something like this, the way I chose to do it, was I used my pin vise drill to drill two holes in both the sign and the sign post itself. I then drilled a hole all the way through the wall, and pinned the sign post to the wall. (Sorry, no pictures.) Then I used some small string to run through all the holes, and hang the sign to the wall.

If you use this method of hanging a sign, you will want to add drops of super glue to the top of the string so it does not get pulled through the holes of the sign post, and more drops to the knots on the sign itself to make sure it does not get untied. Now, assuming we are all on the same page… We simply need to trim off the excess string and our sign looks more realistic.

Now, this looks good, but it is unlikely a sign post would simply stick out from the wall like this. It needs a support, so we need to add one. We just cut another angled piece just like we did for the floor supports already and glue it to the bottom of the sign post.

One more quick step to finish off our sign… I have found that simply spray painting string with a black base coat and dry brushing it makes it fuzz up really bad, and it does not take paint well. We need to “seal” the string a little so it holds it’s braid a little more. This is a simple, but important step. We need to put a small drop of white glue on a finger, and smear it around.

Then just rub the glue on the string. And we are done with the sign…

(sorry for the blurry picture.)
The rest of what I have for tonight is pretty much just simple detailing. So I will just show the pictures…
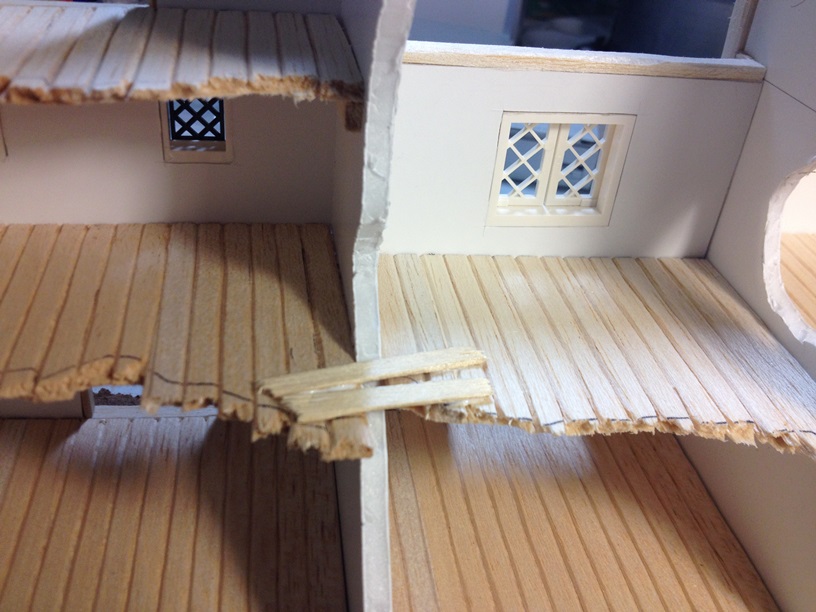
A makeshift bridge spanning a missing wall section.


Some nice repurposed Hirst Arts pieces.

A few Warhammer Fantasy plastic shield emblems.
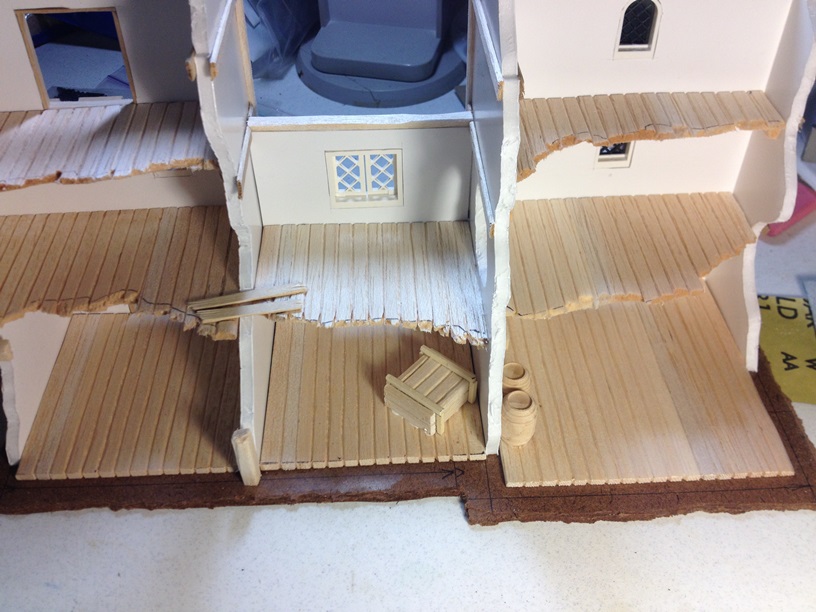
A quick, homemade crate, and couple of CHEAP doll house barrels. I get them for $1.49 for a pack of NINE barrels. They are not super detailed, but they paint up very nicely.


Then I added a little sand around the base of all the walls to simulate the accumulated crap floating around Mordheim that you would expect to pile up in corners.
That is it for tonight. I said in the last update that I hoped to have the piece finished by the end of the weekend, but I forgot that I will be taking the family on a nice vacation all next week, so the finally installments will have to wait until we get back. I MIGHT squeeze in another update before we leave Friday night, but honestly, I doubt it. Until next time…….
Ok, so it has been, what, two months since my last update on this tutorial? Yeah, I know, I REALLY suck at this blogging thing… Anyway, I have some real life things that kept me very busy lately, and so the terrain piece just sat on my table gathering dust… until now. This update will be kind of quick, mostly because I did not get a too much done tonight, but I still want to post what I did finish to hopefully motivate me to finish this bad boy. Here we go…
At the end of part two, we had just started detailing the piece. Now, the only real rule on detailing is that there really is no such thing as too much. I stopped where I did in order to not make things too complicated for this tutorial, but I could have easily gone much farther with the detailing. It really is the details that make the difference in terrain, and really take things to the next level. I will probably still do a little more embellishment with plastic bits once I have added the roof sections. Maybe I will even whip up one or two scratch built goodies. As I have said before, I never plan too much because I like to be a little surprised by the way things take shape as I go.
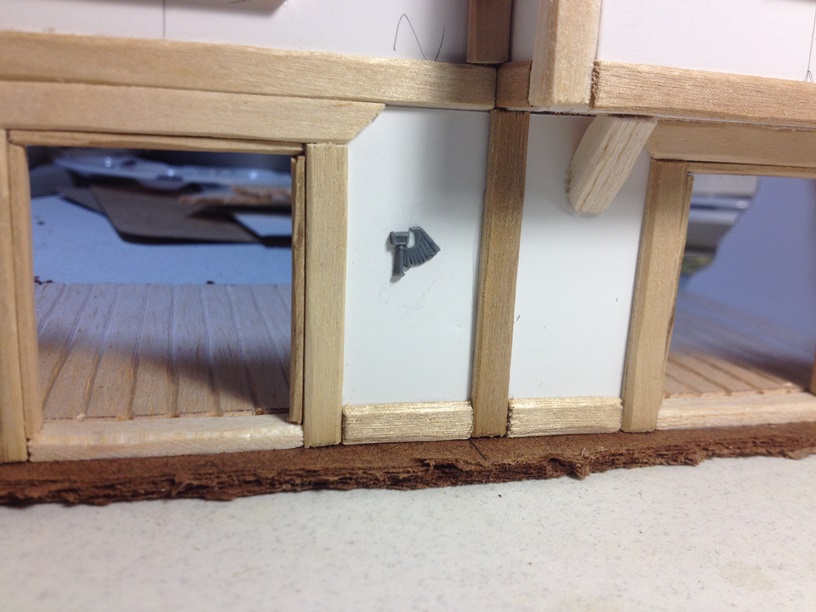
Anyway, the construction details basically consist of cutting lengths of popsicle sticks and gluing them all over the place. I glue strips along the bottom of each floor, around doors as door frames, and in random spots here and there to simulate support framing. Just glue them everywhere… Once the piece is textured and painted, it will look really cool.
One thing I like to do that might seem trivial, but I think adds a lot to the piece, is I also glue strips on the INSIDE of the doors as well, completely framing out the door. I did not always do it that way. when I first started, I would just glue the frame piece to the outside of the door, then texture on the inside pieces, but I think doing it this way looks much better. This is what I mean…

It may seem simple, but it’s all these simple things that add up to make really big things.
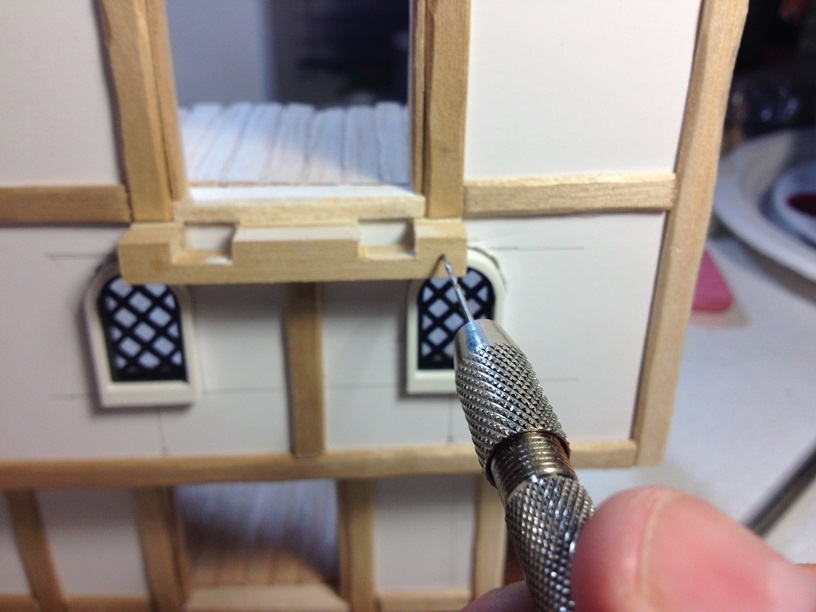
Now, you might also notice, in the bottom of that picture, the mount piece for my modular bridges. The mounts are actually really simple. I make them from two different sizes of bass wood strips. 1/4 x 1/4 inch, and 1/4 x 1/8 inch. I mark the length of the 1/4 x 1/4 strip to the same length as the door frame, specifically, two inches long. Then I cut a one inch piece and then two 1/4 inch pieces from the 1/4 x 1/8 strip. I glue the 1/4 inch pieces to the ends of the 1/4 x /14 section, and the one inch piece to the center. If measured correctly, that should leave a 1/4 gap on either side of the one inch piece. Cut 1/4 inch notches out of the 1/4 x 1/4 piece where the 1/4 inch gaps are, and the mount is done. All we need to do is glue it to the wall, nice and centered on the door. Once it is glued to the wall, we are going to put a pin through it for a little added strength. On the back side of the wall, I used another piece of bass wood as a support for the floor. Usually, I would use balsa wood since the floors should not ever need to support much weight, but since I knew I was going to put a bridge mount here, I used the bass wood for extra support. First, I drilled a hole with my pin vise drill.
Once the hole was drilled all the way through, I used a straightened paper clip with some super glue on the end for my pin. Here is the finished product.
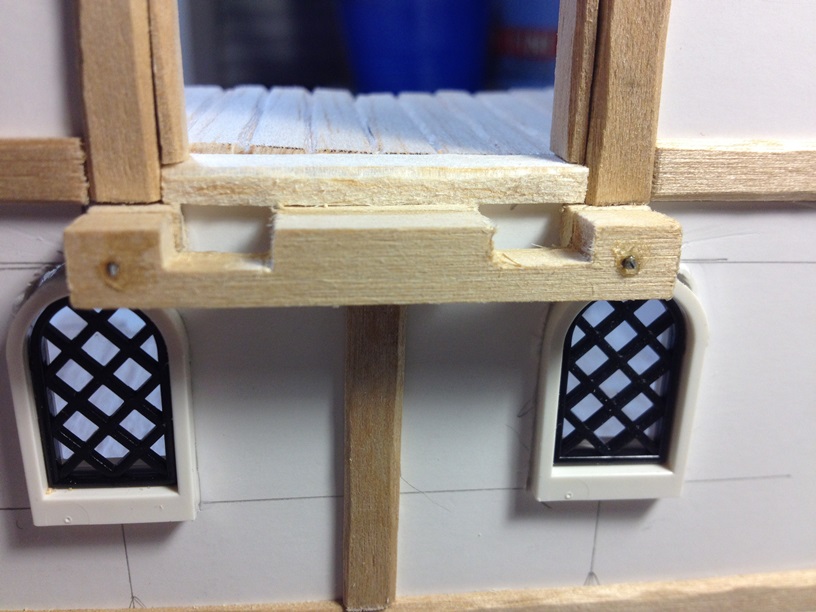
It should be good enough to support the bridge and hopefully not come apart with casual table bumping.
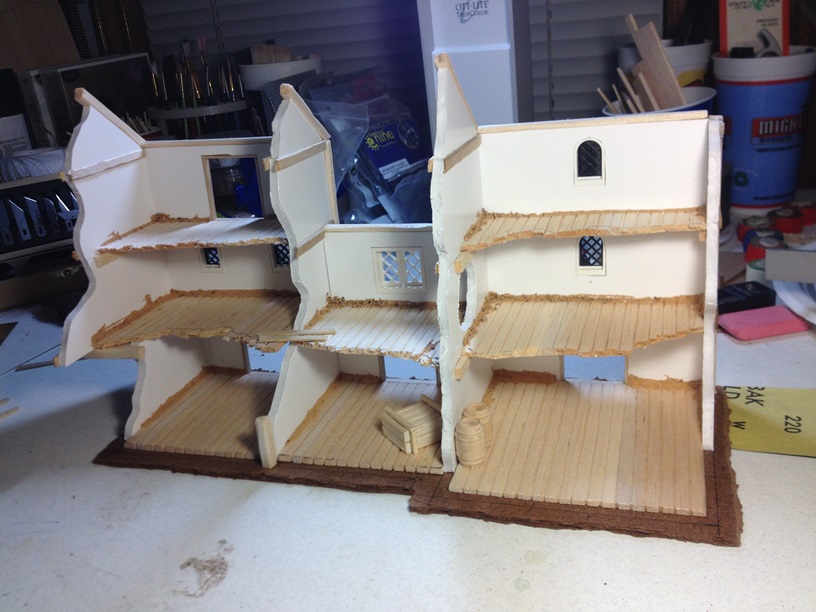
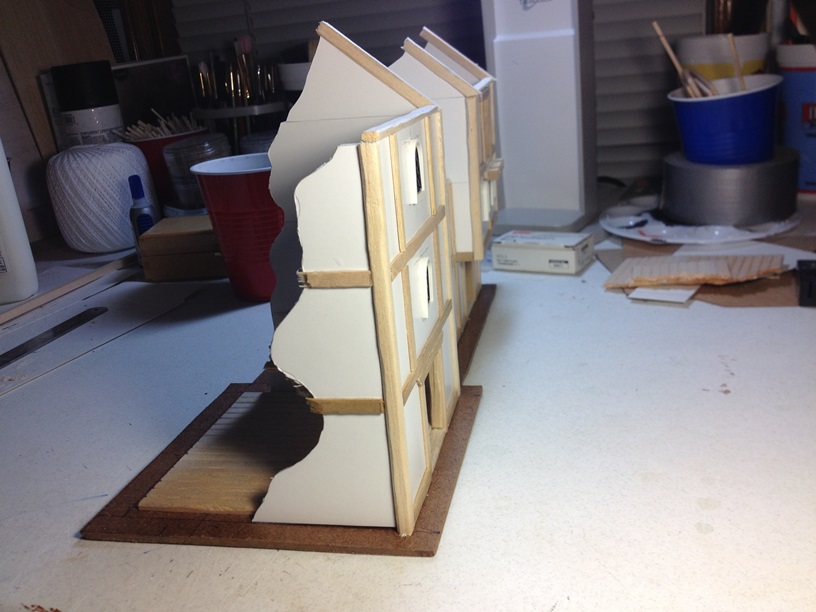
The next step could, and honestly, probably should be done much earlier, but I always just seem to wait until the last minute to do it. We need to roughen up the edges of our base. It is really simple to do with hard board. Just turn the piece upside down, and use a utility knife to score line around the underside of the piece. The line does not have to be straight, in fact, it is probably better and more natural looking the less straight it is.
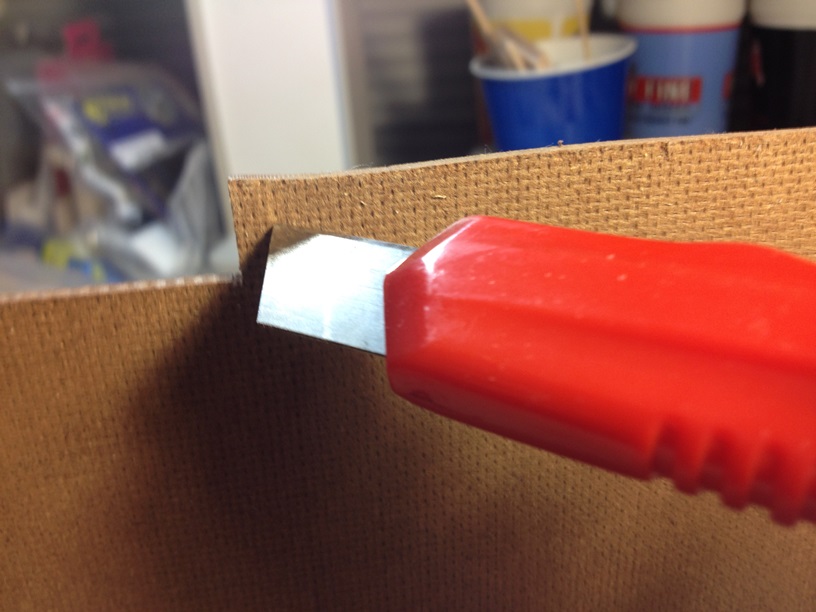
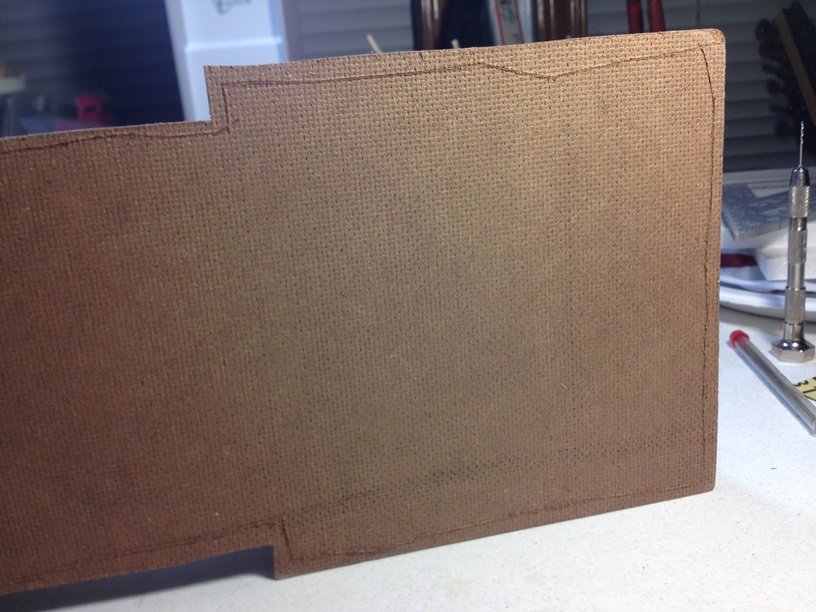
Once we have our score all the way around the base, we will just take a pair of wide pliers, I like kleins personally, and bend the outer edge upward. this creates a nice, rough, layered edge that looks pretty natural.


Once we have done this all the way around the base, the piece will really start to look like something.

Well, that is about it for today. My intent is to make roof sections, do finishing details and texture the piece in the next few days. Hopefully, there will be an update but the end of the week, and I might even be able to paint and finish the piece by the end of the weekend. Only time will tell!
As always, comments and criticisms are always welcome.
