
![]()
So… when I first started this site, it was mostly about terrain, and occasionally about minis. Then, Games Workshop went and announced that they were re-releasing my favorite game, Blood Bowl, complete with all new miniatures. As a result, for more than a year now, I have focused mostly on new minis for Blood Bowl, along with occasionally writing about other games. This has been a little bit of a dilemma for me since I dislike painting minis so much. What got me into the hobby in the first place was pictures of really awesome terrain that I saw on websites like TerraGenesis. While keeping up with Blood Bowl releases, I got away from the part I liked most about this hobby… the terrain.
Now, with Necromunda being re-released a few months ago, I finally have an excuse to get back into terrain! The last time I checked out Necromunda, all we had was the cardboard and plastic pieces that came in the original Necromunda and Outlanders boxes. I did jump on the bandwagon and pledged for the Deadzone Infestation Kickstarter campaign a couple of years ago, but as the piles of stuff I got in that Kickstarter is still sitting in the boxes they came in, this will be my first time actually building industrial/sci-fi terrain.


I decided to start small and paint up the bulkheads and barricades that came in the new Necromunda box. I did some research and found a few techniques that looked interesting and decided to get started. Unfortunately, I managed to forget to take any pictures of the pieces for the first several steps, so simple descriptions will have to be enough.
As with all my terrain, I started with a plain black base coat of spray paint. I decided to try the hairspray weathering technique to simulate rust and wear. If you aren’t familiar with it, check it out on YouTube, the results look fantastic. I sprayed a mist coat of both dark red and dark brown randomly across the pieces. As a side note, I found the results of the brown color much more pleasing than the results of the red color. Here’s where the hairspray part of the hairspray technique comes into play… I sprayed a layer of my wife’s hairspray onto the pieces after the paint dried. After the hairspray dried, I dry brushed a dark metallic over the layer of hairspray, as well as painted the pipes a copper color.
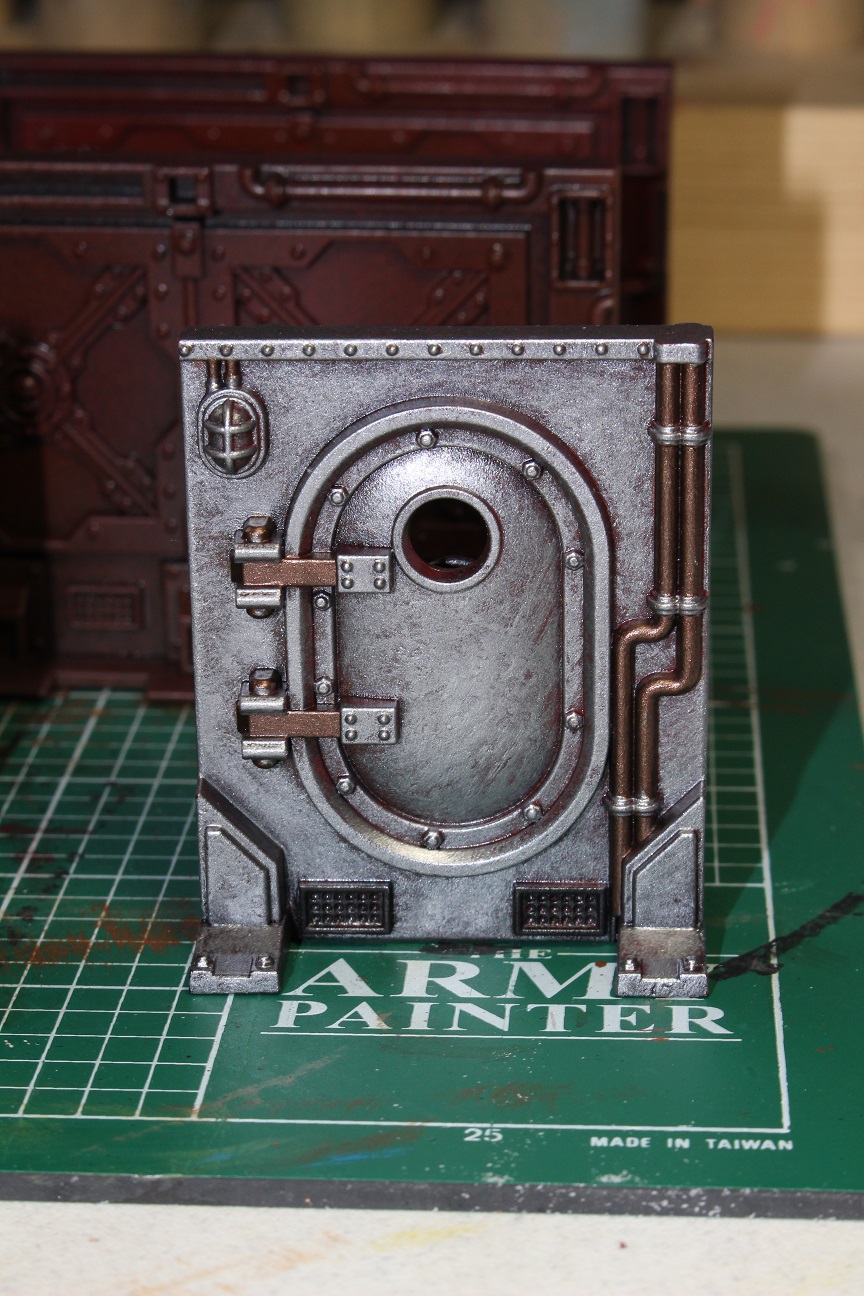
Here is what the first piece looked like after applying the metallic colors. If you look behind the piece, you can actually see a couple of others after the mist coats of red and brown. After this dries, it’s time to put the hairspray to use… The purpose of the hairspray is to keep the metallic colors from properly bonding to the layers beneath. You run the piece under some water and take a tooth brush to it until you’re happy with the way it looks. The results then look something like this:


With this being my first attempt at the technique, I was quite pleased with the results. I think the “rust” looked fairly convincing. I then repeated the technique on all the remaining bulkheads and added a few more details.


Once the bulkheads were finished, it was time to move on to the makeshift barricades. I used the same hairspray technique on the barricades, but I decided to add a little color to them. The idea I had was that the walls would be bare metal and generic, but the pieces used in the barricades would have been dragged in from various places and could be a little more random looking.
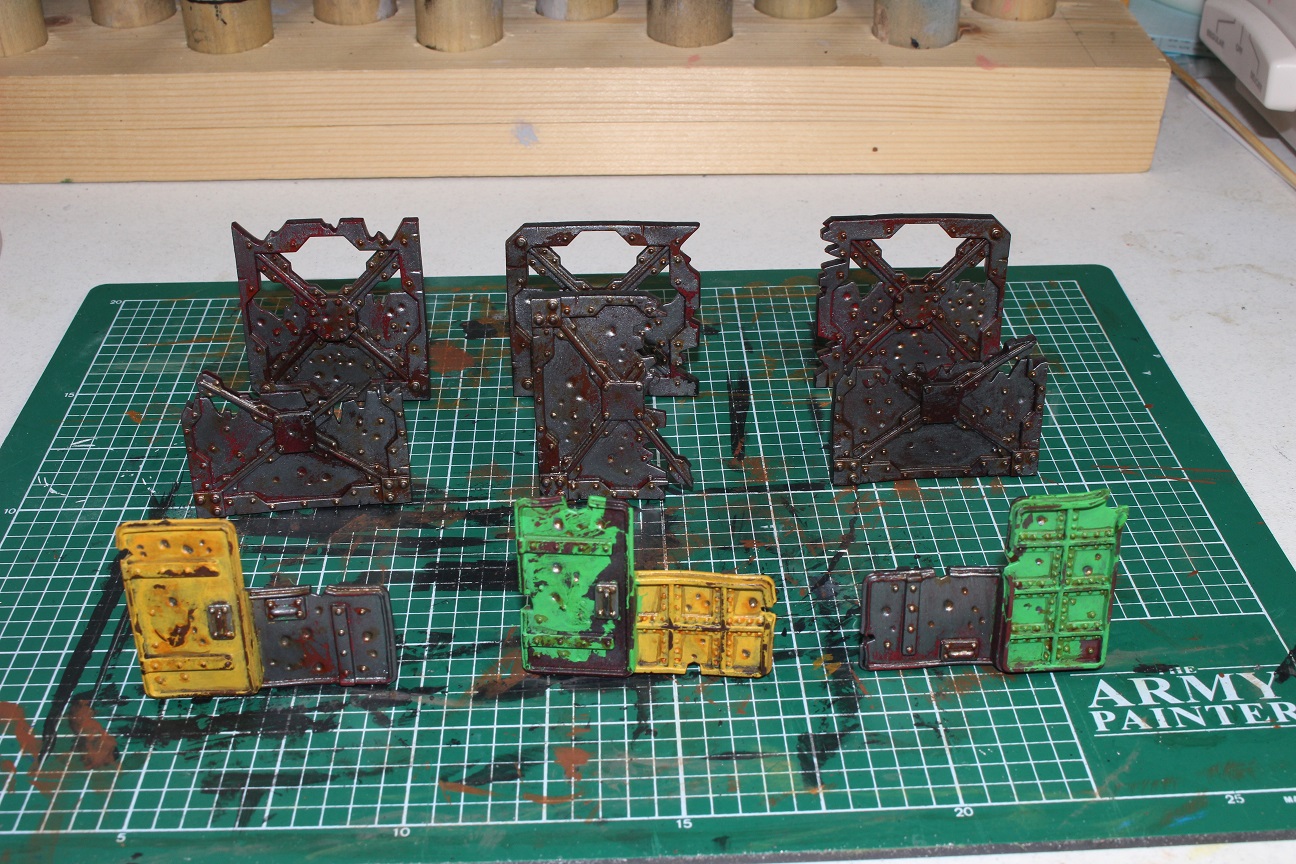
I also used some really cheap paints for the colors as opposed to the more expensive Vallejo paints I usually use. Once I put the pieces into the water and applied the tooth brush, I could REALLY tell the difference in the paint quality. The Vallejo colors I used took a bit of scrubbing to get the wearing patterns, but with the cheaper paints I used, I had to be REALLY careful with the brush so that I didn’t take it all off by accident.
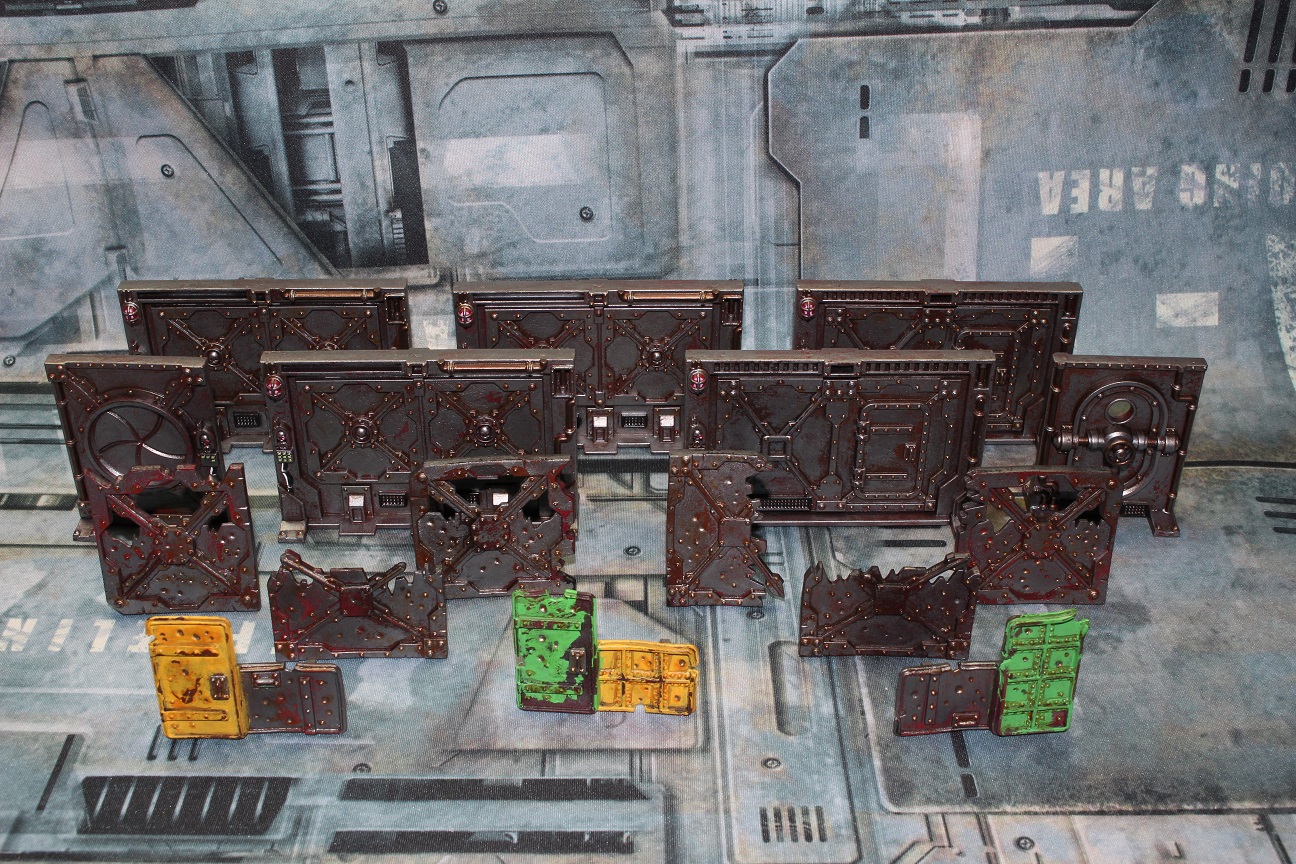
In the end I managed to figure it out and I think it turned out quite nicely. I now have a small, but nice looking pile of terrain with which to start my little corner of the Underhive with. More to come!
(Space Hulk gaming mat courtesy of Deep-Cut Studio)

Awesome job on those, they look nice and worn! Have you ever thought about trying the hairspray combined with salt method? The salt is supposed to help give a pitted appearance. It looks like you were able to achieve a really great effect with just the toothbrush though.
LikeLiked by 1 person
I have seen the salt technique, but I wanted to try one new technique at a time in case I really screwed something up. I might give the salt technique a go on the Shadow War box terrain.
LikeLiked by 1 person
Yep, makes perfect sense. I don’t know if there would be much of an add to the results you got with just the toothbrush either. I read about the salt/hairspray one, way back when I had purchased the Mantic Deadzone scenery. I got some of that scenery nearly base painted, but sadly not much further than that. Seems to be a recurring story of ‘too much stuff all at once, and never go through it’.
LikeLike
Looking great. Are you going to check out the ( expensive) forge world upgrade packs for eschar.
Shame ive just made my gangers.
LikeLiked by 1 person
They look cool, but with 3 sets of them at 16 pounds a piece, that’s a little more than my wallet can handle.
LikeLike