
My friend Kyle was awesome enough to save quite a bit of data from my hard drive crash a couple of months ago, so I thought I would post a few pictures of some previous terrain projects. Unfortunately, I do not have any of these pieces anymore. I gave them to my gaming group when I moved to Houston a little over a year and a half ago. Of course, now I am back in Austin and the guy who had possession of the pieces moved off to California. Figures. haha
This first piece is a “wizard” tower made mainly of pink insulation foam. This was my first attempt at working with this kind of foam so I learned a few things with this build. Unfortunately, I do not have any pictures of this piece finsihed, and fully painted because I moved before I managed to finish it… much like most of the pieces in this post. I kind of have terrain builder’s ADD. I keep getting ideas for new pieces before I finish pieces I am currently working on. Besides, when I built these pieces, we needed a lot of terrain, ready for the table top, in a short period of time. I intended to finish each piece when I could, but it just never happened.
Anyway, this pieces was very narrow, but also very tall. The first level was inaccessible, but it had a ladder(not shown) added to the side to allow minis to climb up to the second level. From there, a grapnel and rope led to the third level, past the inaccessible fourth level, and on to the roof. This piece towered over the whole table… it was nice.

As you can see, it was dressed up with quite a few bits. I especially liked the ornate door piece, which I have had for no less than 20 years.
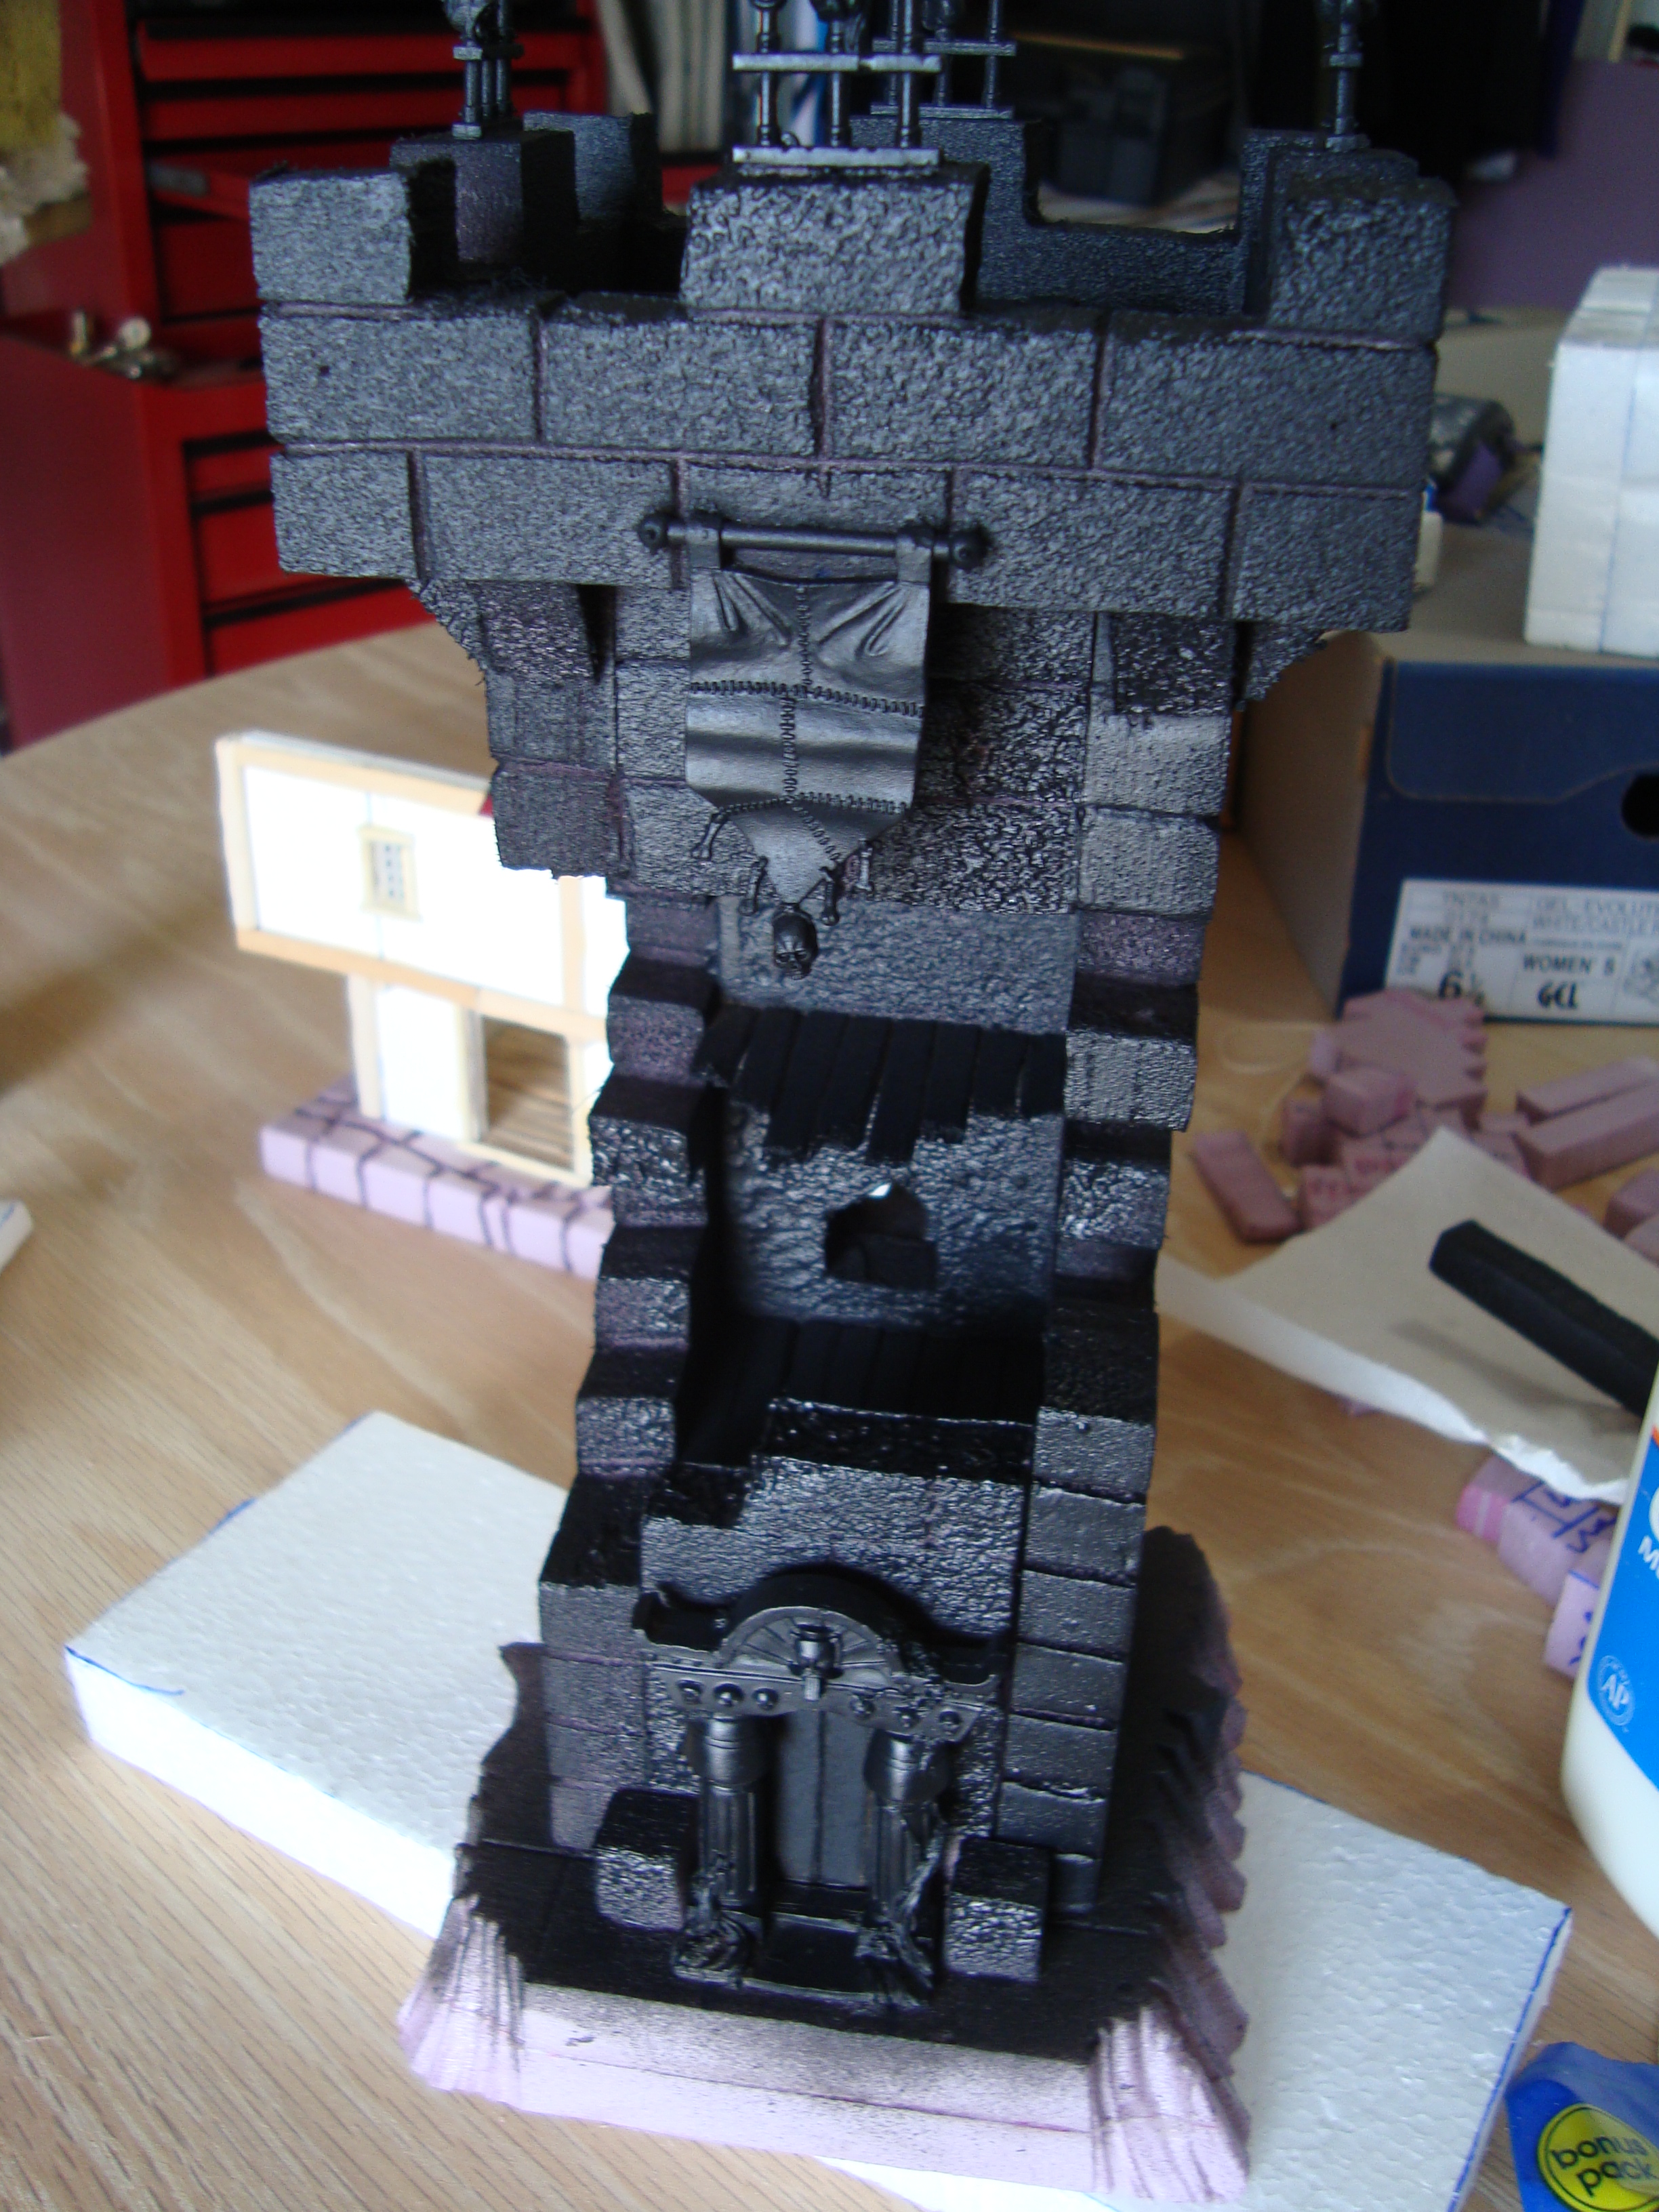
One nice thing I found with this piece. As we all know, spray paint eats styrofoam. What is nice though, is that pink insulation foam is very dense and the black spray paint base coat only gave the foam slight texture which basically simulated stone pretty perfectly. I, of course, tested a small piece of foam before I started spraying the whole tower. I was very pleased with the results though.
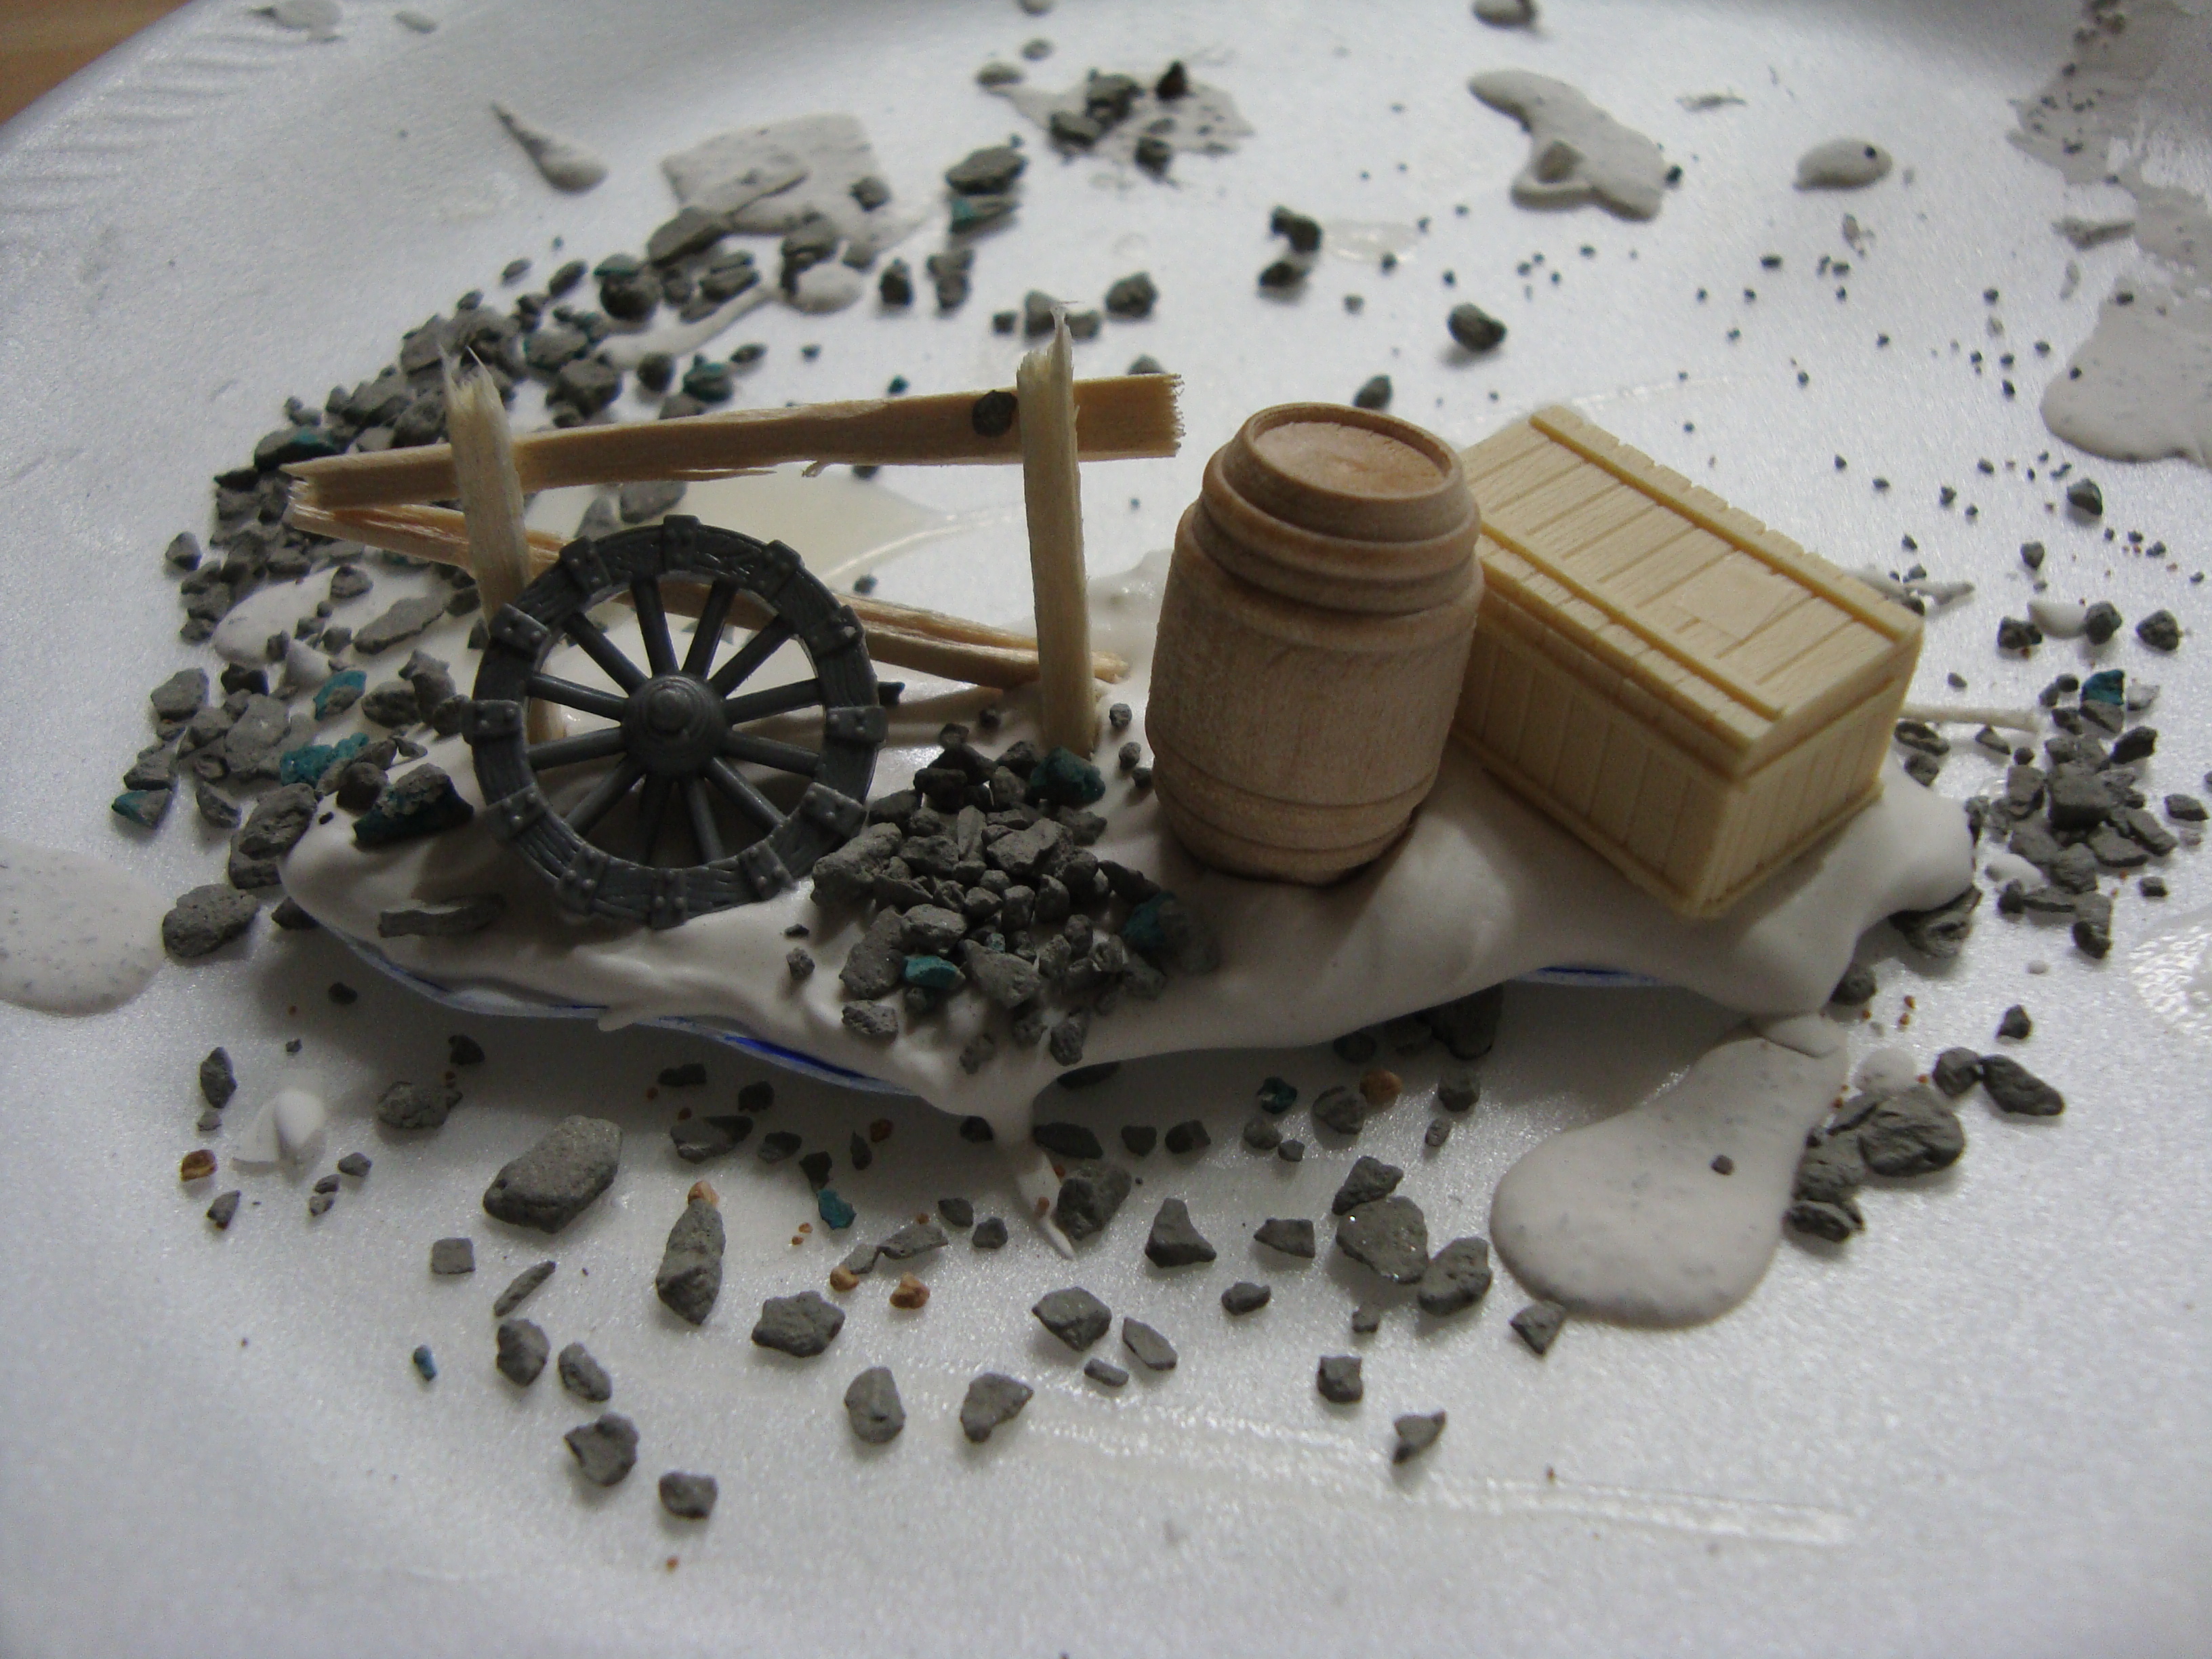
This next piece was just a small ground cover piece. I like pieces like this to break up line of sight for archers. One thing we learned early on when playing Mordheim was that when Reiklanders were up in higher locations and had clear lines of sight, no one could stand up to their archers. By adding lots of small cover pieces to go inbetween buildings, you can at least give yourself a fighting chance. This piece was very simple to make. I small piece of popsicle stick fence, one resin cast crate, one wagon wheel from the bits box, one barrel, a little joint compound and some kitty litter on a sheet plastic base and it was done. A note about these barrels. The one used in this piece was purchased from a hobby super store. They are in the doll house section and come in a little bag of nine barrels for $1.47. You can not beat these barrels. They are SUPER cheap, paint up really nice, and are the perfect size. They even have larger barrels if you want to make giant beer barrels in your terrain.
This is the above piece painted up. I was quite proud of the results. I REALLY wish I still had this piece.

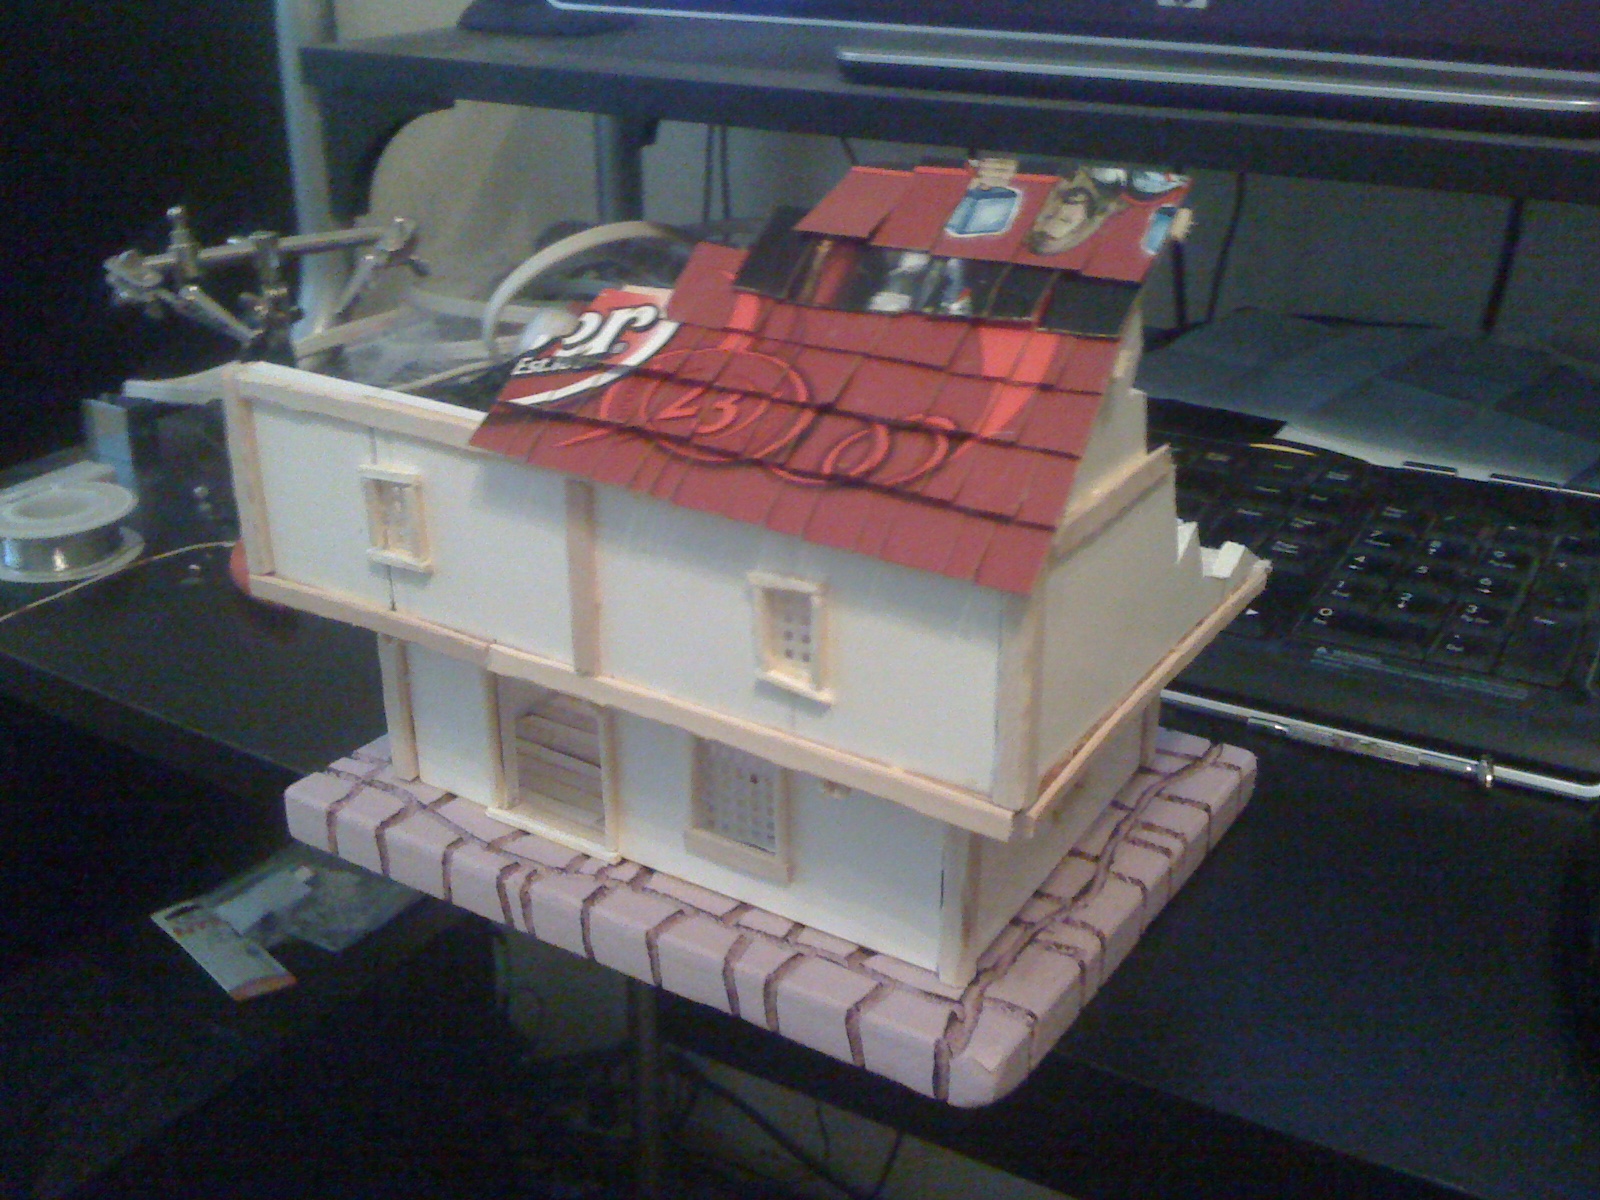
This piece was what it was. It was the first piece I built for this set of terrain. I wanted to simulate a raised stone foundation for this building with the pink foam. I got lazy and decided to carve the stone pattern with my soldering iron. The results were less than I hoped. It was functional though, and I may build a new version of this building soon. Even though it was not overly large, it was simple and a quick build. A building like this, while not spectactular, is still better than an empty spot on the table.
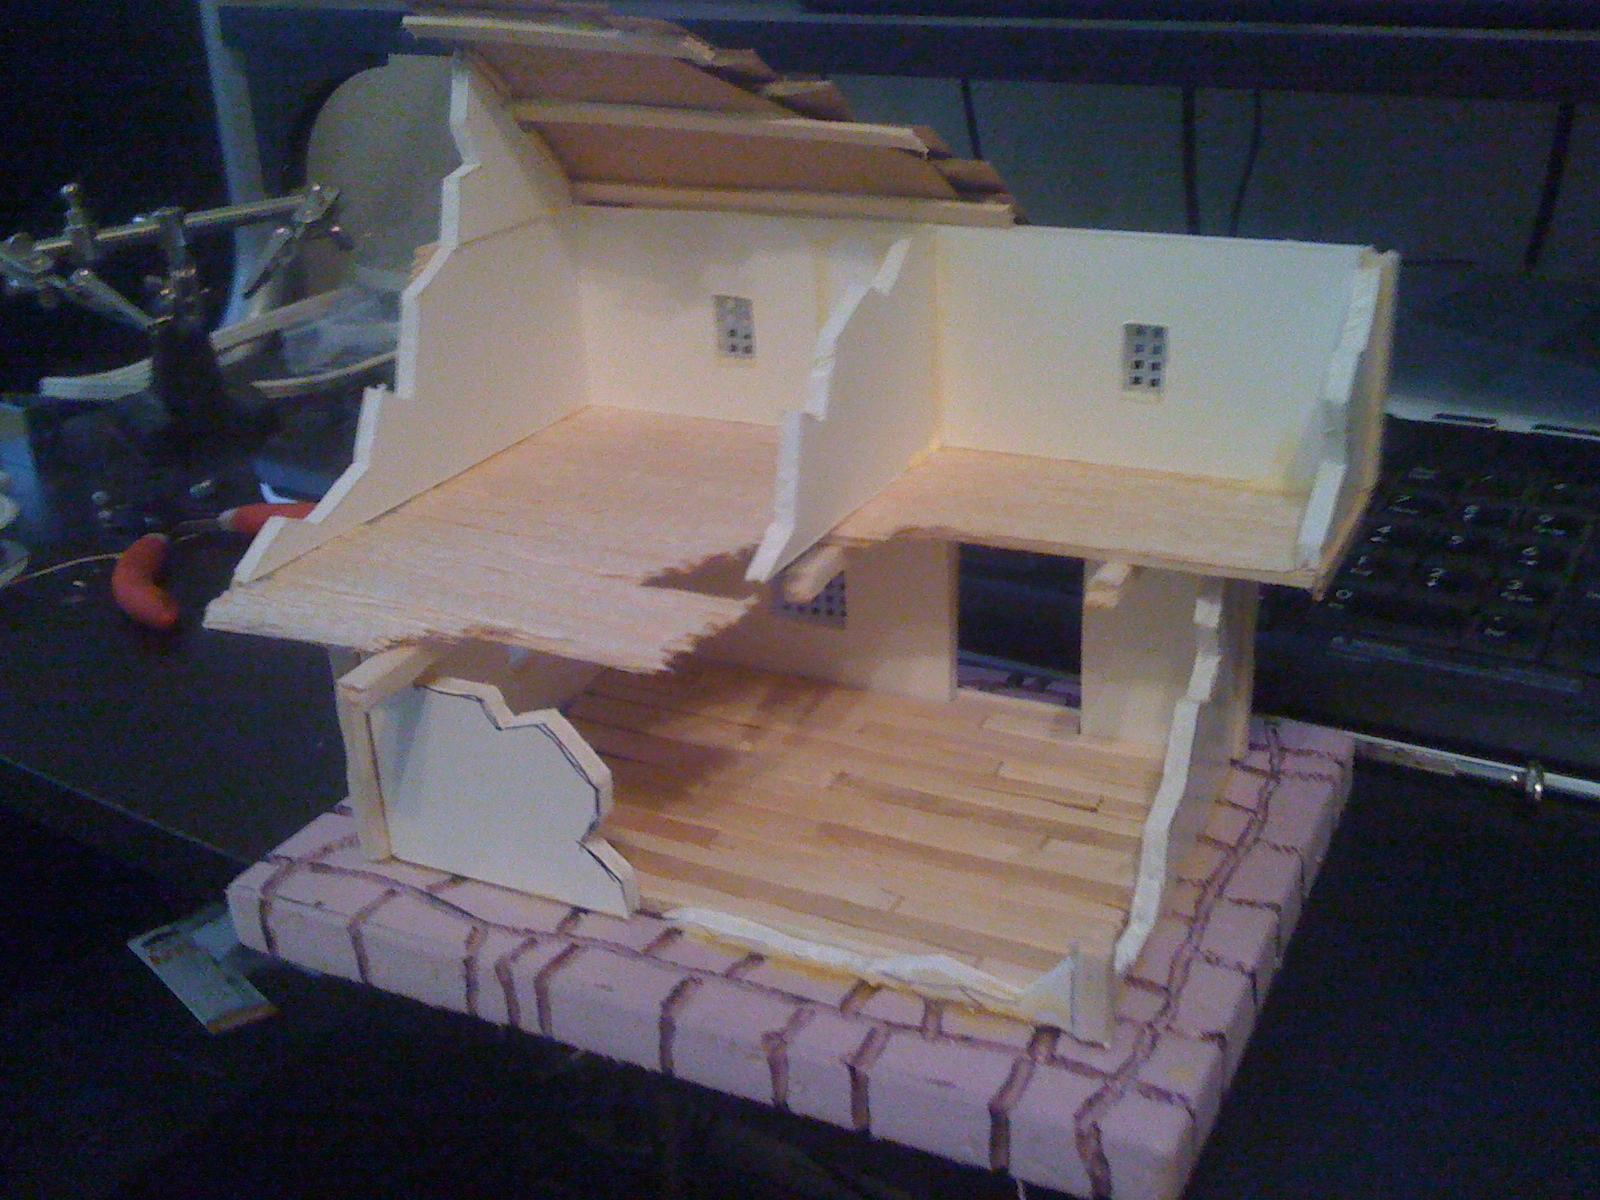
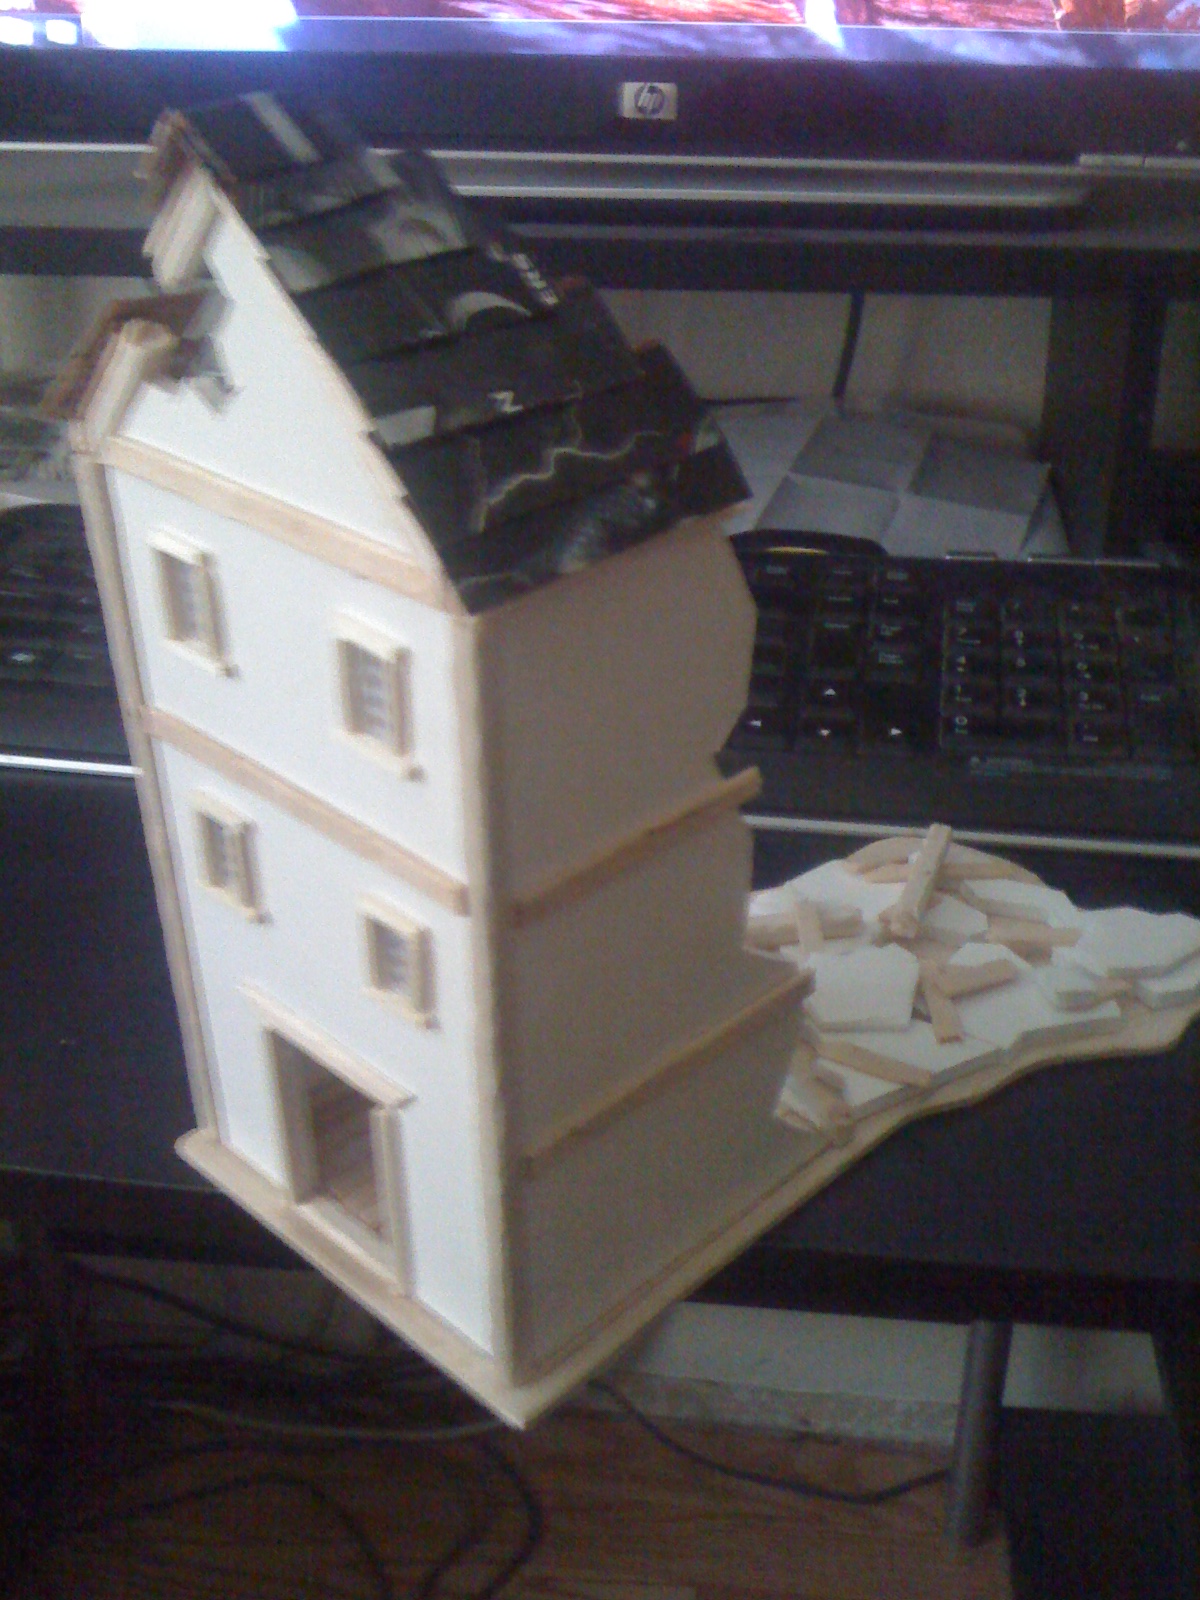
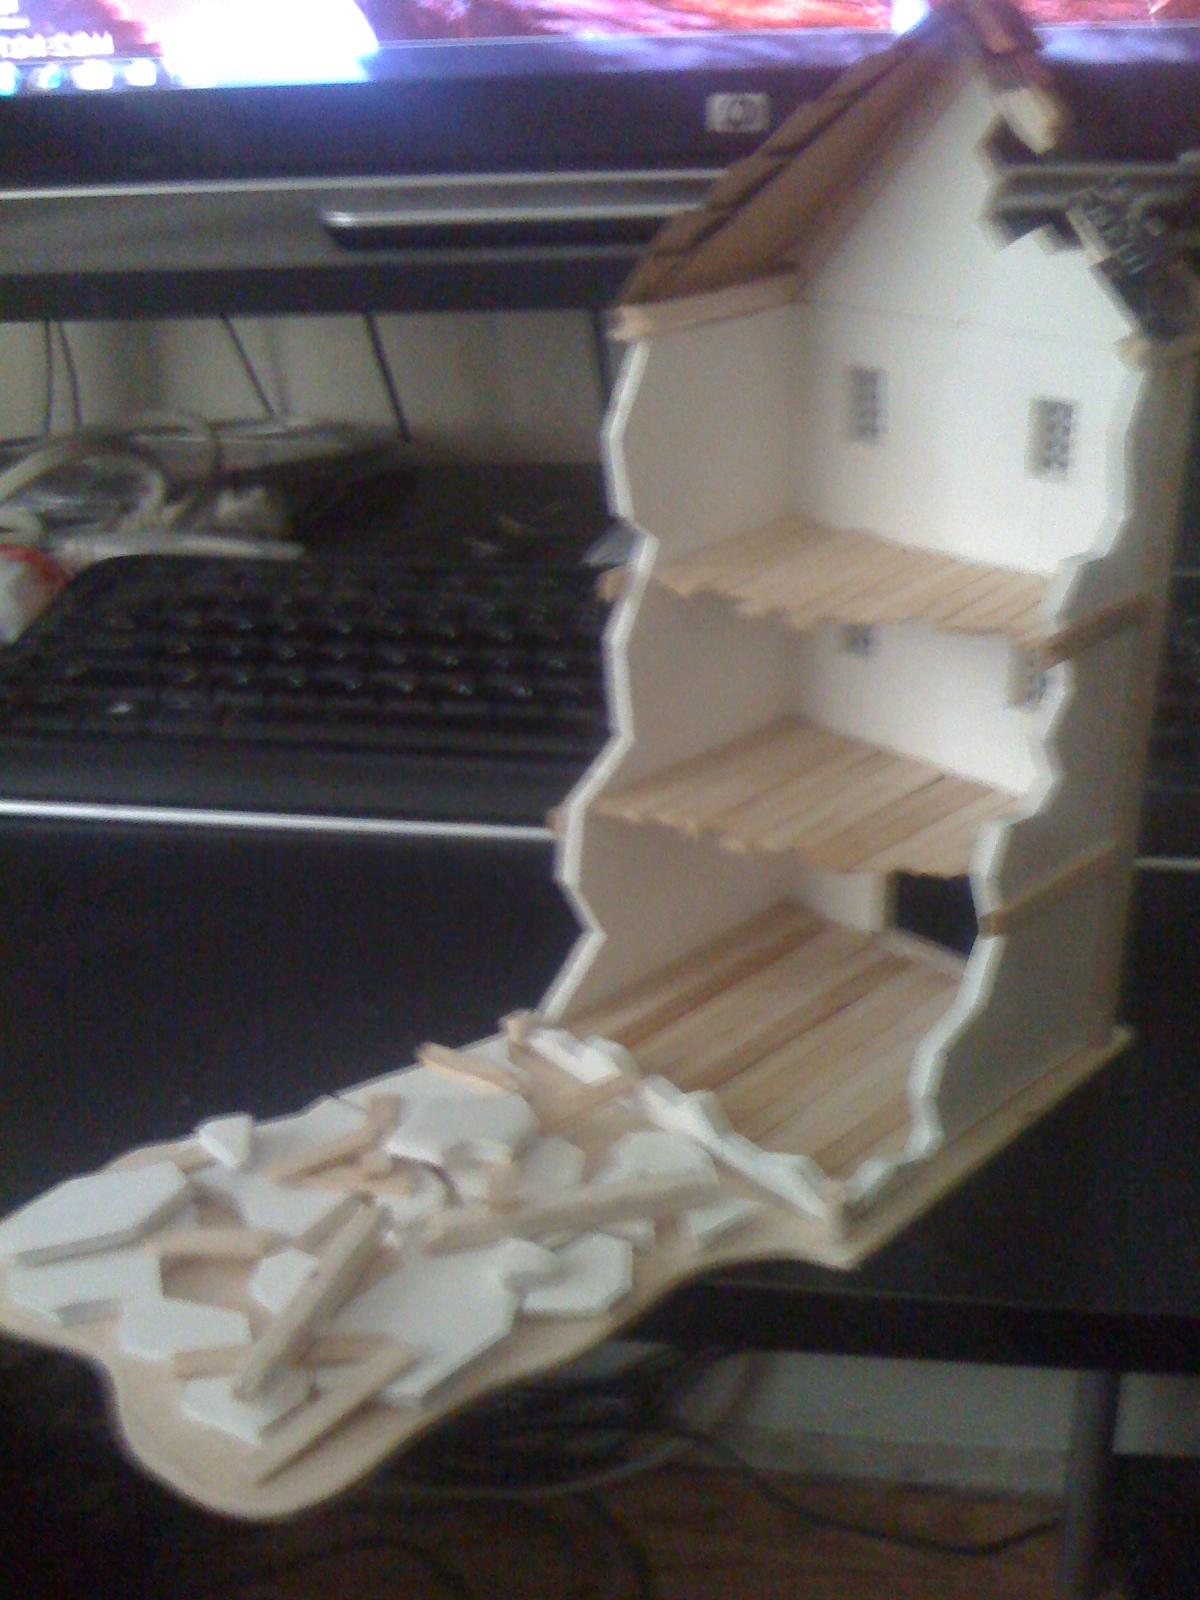
This last piece was another idea I tried out. The idea was simply this… There are lots of partially destroyed buildings in Mordheim, but, where is all the rubble from the destroyed buildings? There are rules for movement through “rough” and “very rough” terrain so I thought why not try and show some of that rubble and use the rough terrain rules at the same time. The building was a decent sized three story piece, with a large rubble pile in the rear to simulate the collapse of the back of the building. It worked for what it was and I might rebuild this piece soon as well.
That is it for tonight. Hope you liked what I had to show(or, I at least hope you did not hate it). Comments welcome!
