Ruined Building 3 WIP Part 3

SONY DSC

Another week, or so, another post. Currently, this terrain piece is probably about 75% done. Most of the painting is complete, which I do not usually do but if I finished building it 100% before painting, that would have made certain areas of the piece almost impossible to paint. As it stands, they were only extremely difficult. 🙂

Anyway, I only need to finish the roof pieces, and decide once and for all how I intend to do the small, “lookout” platform on the very top. I have that mostly figured out but I have to make a couple of decisions to finalize it. I also need to paint up and glue the ladders in place to provide access to all upper floors. That is a quick enough process. Hoping to have it 100% complete by the end of next week. Finding time to work on it with a 3 month old needing lots of attention has been challenging.

That is all for now!

SONY DSC

SONY DSC

SONY DSC

SONY DSC

Ruined Building 3 WIP Part 2

SONY DSC

We had family in this weekend to see the baby so with their attention diverted to him, I managed to get some more time to work on terrain. I was able to make quite a bit of progress and most of the basic construction is now done. Since the first post, I have added popsicle stick flooring to all areas, triangular foamcore pieces to the tops of the walls to prepare for roofs, a few extra windows, and lots of trim pieces. I think it is finally starting to look like something.

One of the things I run into from time to time, is that, contrary to what I read over and over again on various terrin building sites, I rarely plan to heavily when I build terrain. I usually just get an idea for a building in my head, grab some foamcore and balsa wood, and just start cutting away. As such, from time to time, I run into snags with where I want to go with a building. In this case, I originally wanted to do a flat terrace like top on this building, but I had already cut the balsa wood corners at a specific length and I decided I would go a different direction instead of trying to patch the two sections together. I decided, instead, to make a pitched roof like the two side sections but with a smaller, “lookout” type platform resting on the roof. It will be a little more work intensive but I think the result will end up looking better. I hope to have this one completely done by the end of next weekend.

SONY DSC

SONY DSC

SONY DSC

Mordheim Ruined Building 3 WIP

SONY DSC

I decided to try and write a blog about a new piece of terrain as I work on it. This may end up boring people but I just wanted to see how it works out. So with Sevendust blaring from my computer speakers, I proceed!

This is a terrain project that I actually started several months ago but with the birth of my son in early January, and us moving back to Austin from the dreaded city of Houston after that, pretty much every thing else got put on hold for a while. Now that we are getting settled back in and I am preparing to resume gaming with my old group, I am feeling inspired to finally finish this piece. This building is pretty much my take on the “bridge house” from the Mordheim “Blood on the Streets” terrain pack. I always thought the idea of the building was cool but I hate cardboard terrain so I decided to give it a go on my own. I am working from memory on this one since I have not seen the actual building I decided to copy in probably five years or more.

The design is fairly obvious, it is basically three independent sections joined together to make one building with an open walkway through the center. I used a thicker foam for the bottom level because I wanted to do a brick pattern of some sort, carved into the foam. Originally I wanted to do uniform bricks which is why there are straight lines drawn in the foam, but I later decided to try a more randomized rock design. It was more labor intensive but I like the result better this way. The base is made from hardboard as usual, and the upper sections are foamcore with balsa wood corner posts. The two side sections will get pitched roofs added(with appropriate damage) and the center portion will have a flat “terrace” style roof for minis to rain death down from, giving the building four levels tabletop goodness!

The “stones” of the bottom level were drawn out with a ballpoint pen and then carved into the surface by simply pressing harder with said pen. I also then pressed in random stones with my finger to give the surface a truly random appearance. The devil is in the details! It should texture and paint up nicely when done.

That’s all for now! Comments welcome!

SONY DSC

SONY DSC

SONY DSC

SONY DSC

Gaming Extras

SONY DSC

This post is all about the “extras” of tabletop gaming. You know, the things that aren’t absolutely required to play the game, but make the game much better if they are there. First up is the Mordheim specific, wyrdstone counters. Sure, you can use the cardboard 2D counters that come in the box but who wants to do that when making custom 3D counters is SUPER easy. These can be done in a single evening and look great on the tabletop. They are made from craft glass pieces from your local hobby super store, stucco patch, craft popsicle sticks, and plain plastic mini bases.

IMG_0748b

For these counters I used round bases, even though Mordheim uses the standard Warhammer square bases because at the time, I just could not find square bases… So round it is! I made 6 counters even though most scenarios call for a maximum of 4. This way, I have a few extras just in case. All I did was add a glob of stucco patch to the top of 3 of the bases and glued shaped popsicle sticks to the top of 3 other bases. Once the patch and glue dried respectively, I sanded off the excess with a standard rotary tool being careful not to sand away the plastic of the base. After that, it was just a matter of gluing one piece of glass to the top of each base. And since this is craft glass, there are no sharp edges to worry about cutting yourself on. Once that dries, base coat with black spray paint and drybrush up the individual parts accordingly. As with everything I do for the tabletop, the counters get a thick coat of spray clear gloss(because gloss is thicker and tougher than matte) and then a coat of clear matte to knock down the shine.

SONY DSC


Extra bridges and ladders are also always nice to have around to accommodate different table setups. These are very easy to make and can also be done in a single evening. The ladders are simply bamboo skewers with square toothpicks as rungs and detailed with either “nails”(created from leftover cutoffs from crochet mesh I used on one of the buildings I made) glued on, or string wrapped around each rung. The nail heads and rope(string) on each rung is labor intensive but the results make it worth the effort.

The bridges are just craft popsicle sticks, shaped and cut, with the occasional square toothpick added in, again detailed with “nail” heads. Both ladders and bridges are super easy to paint. Just base coat black and drybrush up with progressively lighter browns, then pick out the details with appropriate colors.

SONY DSC

Mordheim Ruined Building 2

SONY DSC

Unfortunately, I recently had a hard drive crash and lost a LOT of things including the pictures of this building getting built. Essentially, the techniques used were exaclty the same as the last building, with the notable difference being that I used crochet mesh, cut to size to simulate multi-paned windows. Just one way to give different buildings a bit of character and help each one look just a little different. I personally don’t like tables where all the terrain looks very uniform.

Again, questions, comments, and criticisms are always welcome.

SONY DSC

SONY DSC

SONY DSC

SONY DSC

Mordheim Ruined Building

For my first post on this blog I decided to start with something simple. As a few people who know me are aware, I like to play tabletop wargames. My favorite part of tabletop wargaming is building terrain, and it’s something that I feel I’m fairly decent at.
One of the games that I play is called Mordheim, made by Games Workshop. If you don’t know the game, Google it. It’s fun. Over the years I have built up terrain collections then lost them for one reason or another. This time, I plan on keeping my terrain around for a while. I will also post pictures of the terrain I build and explain how I did the pieces so that I can hopefully inspire other people in their terrain building as I was inspired by all the pieces I saw on various other sites. Any questions, comments, and criticisms are welcome.

SONY DSC

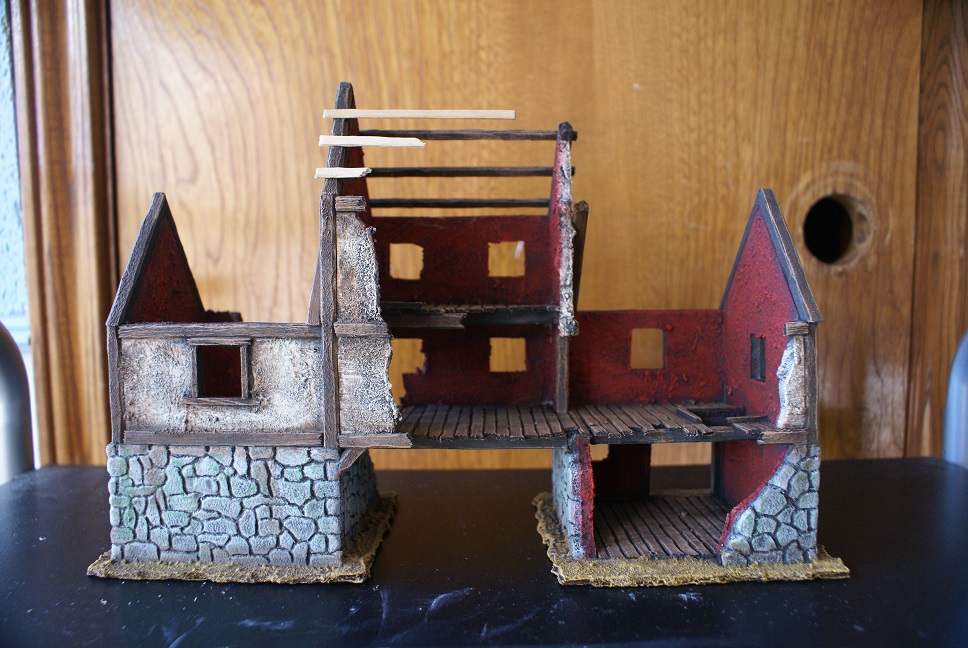
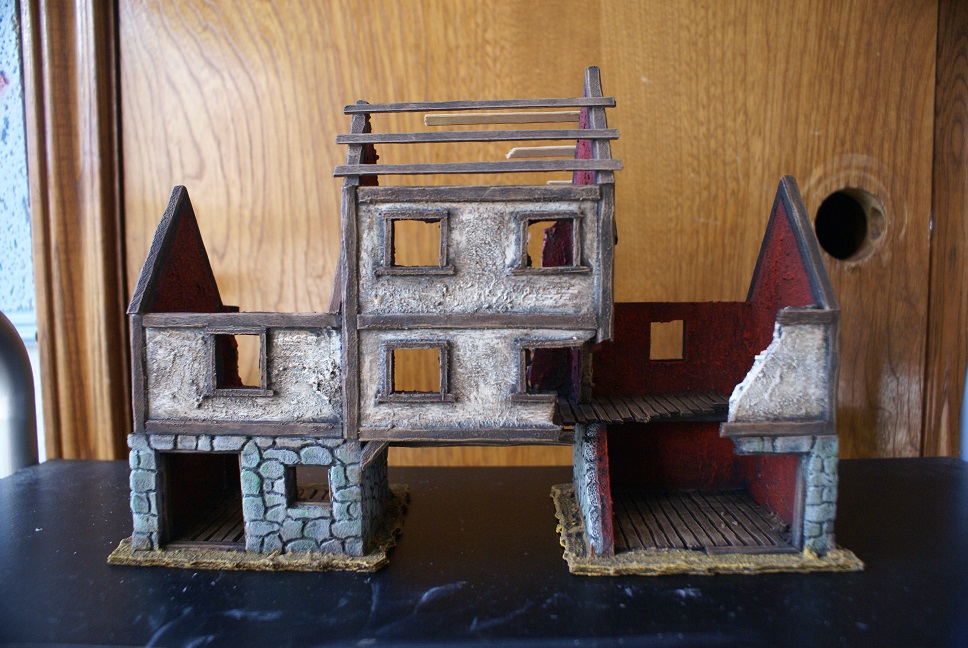
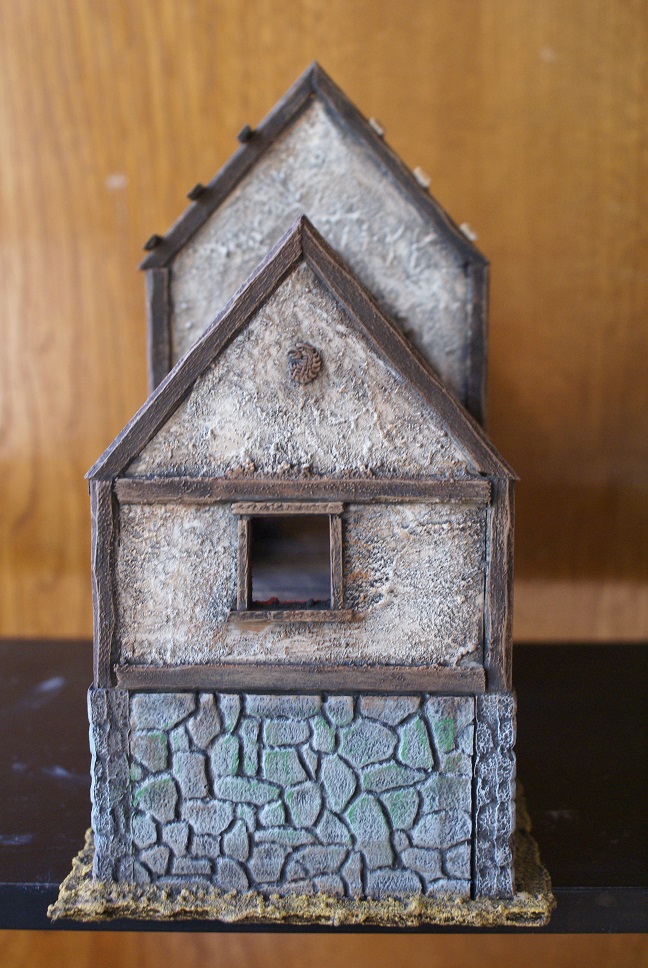
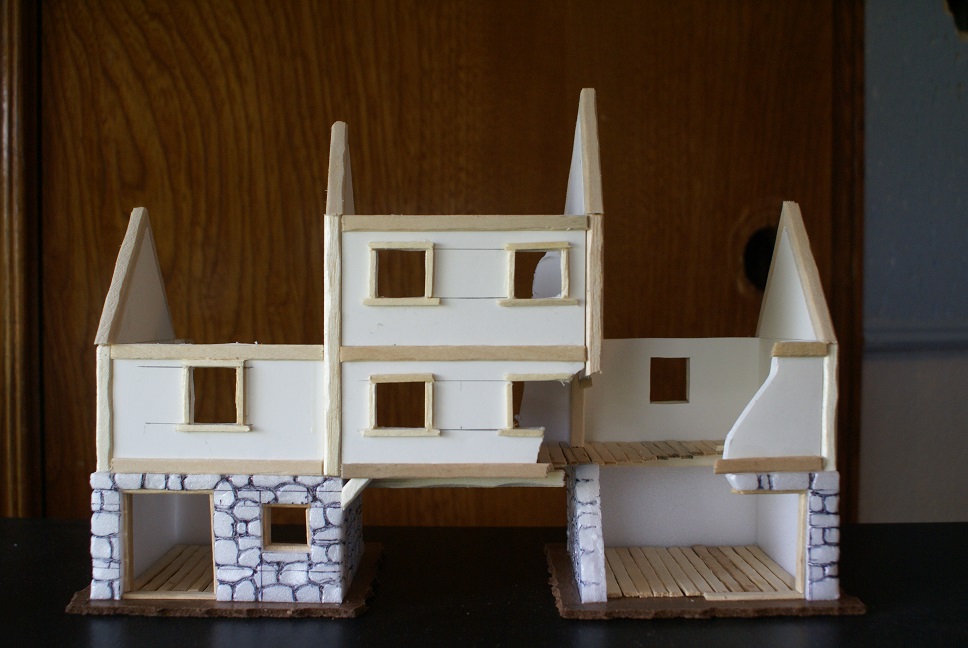
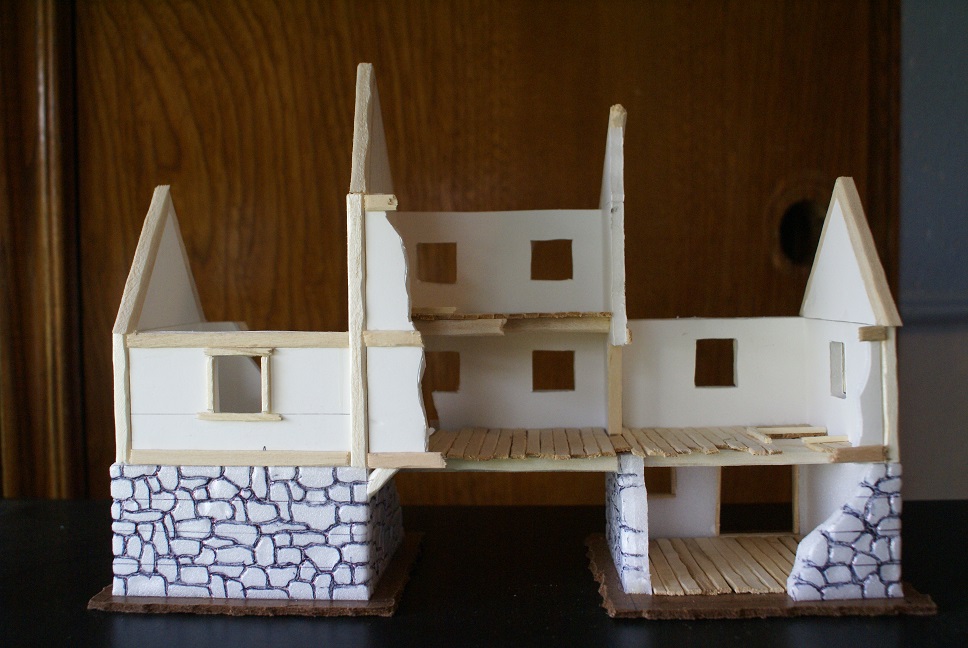
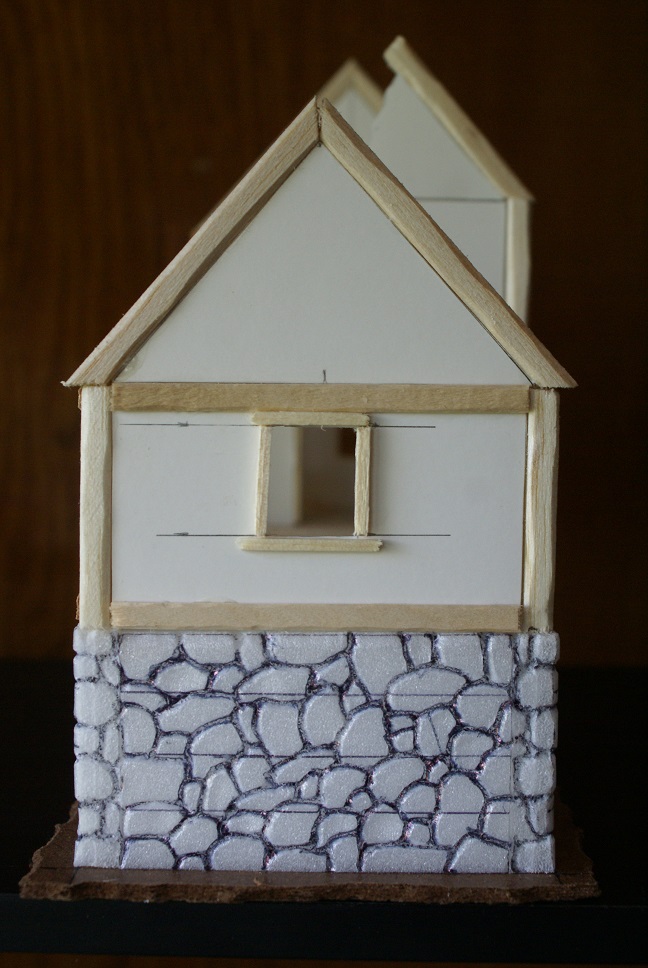
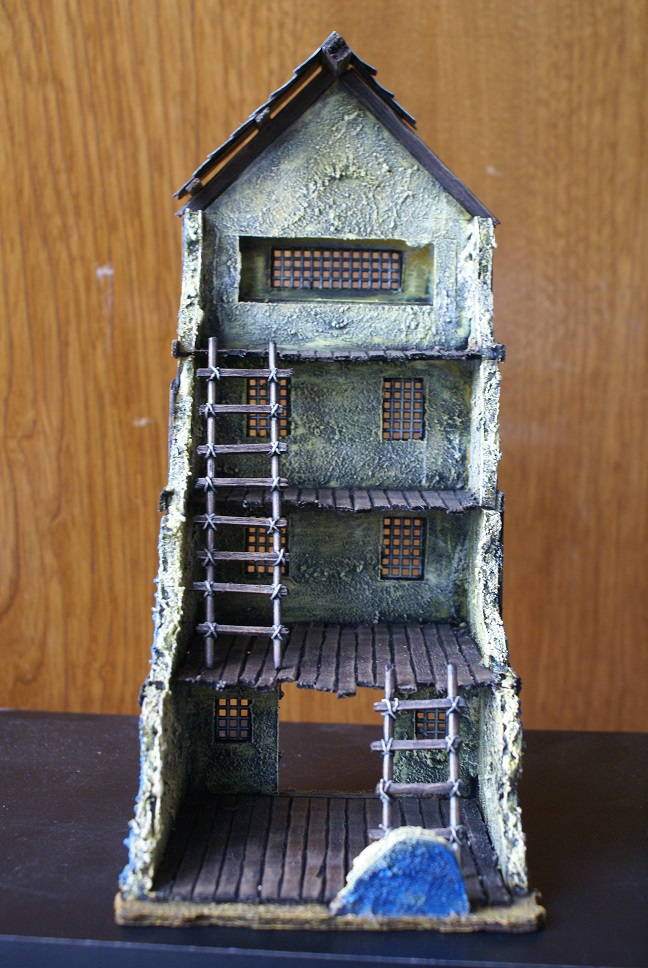
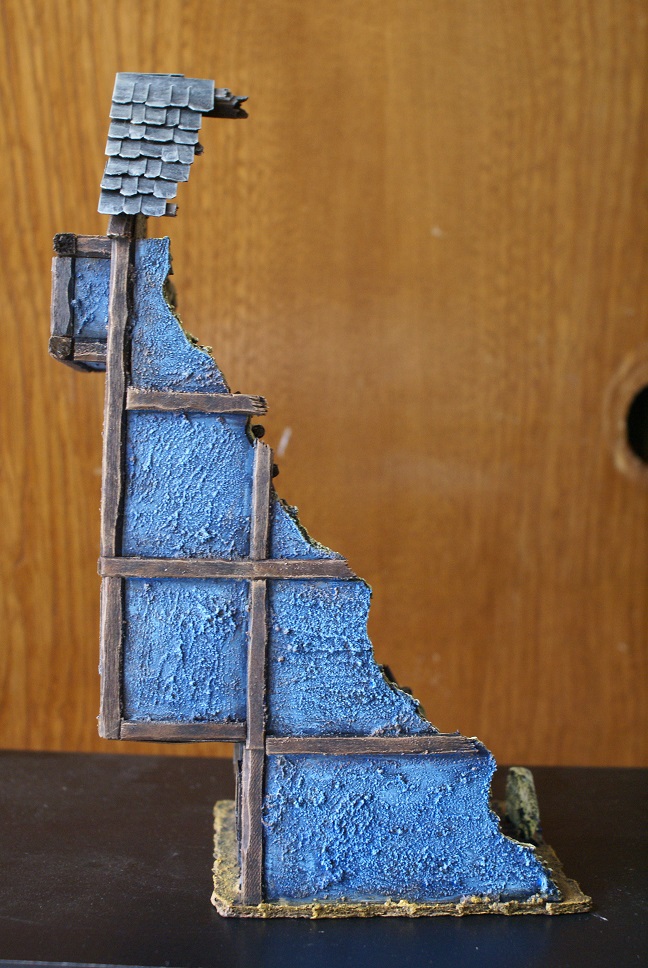
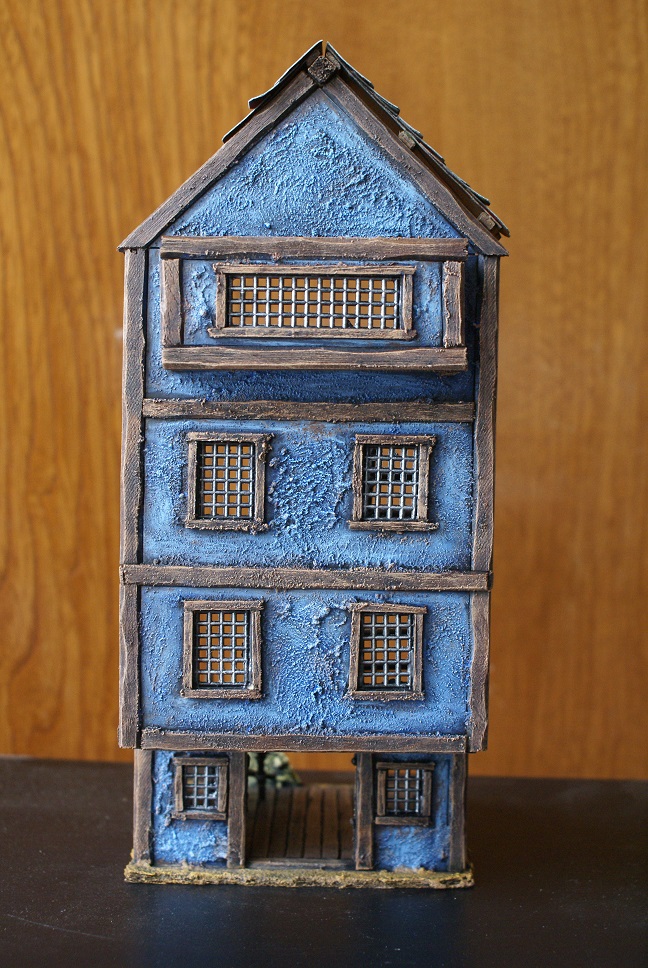
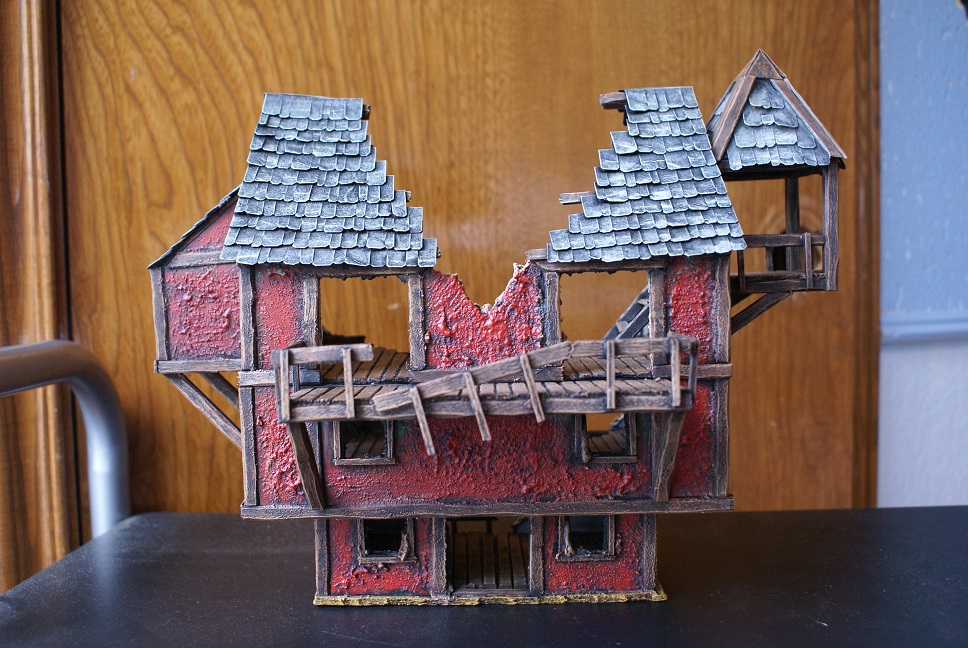
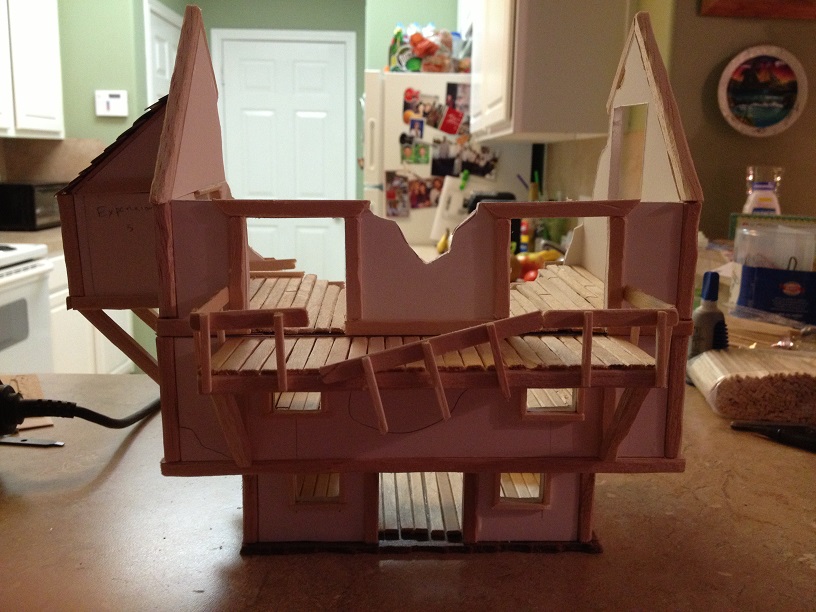
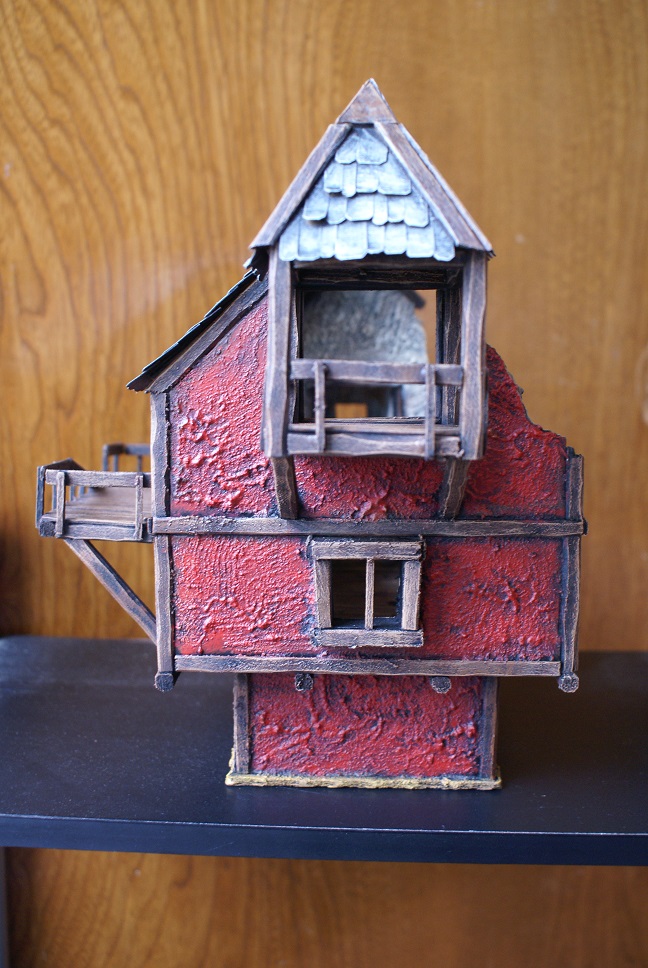
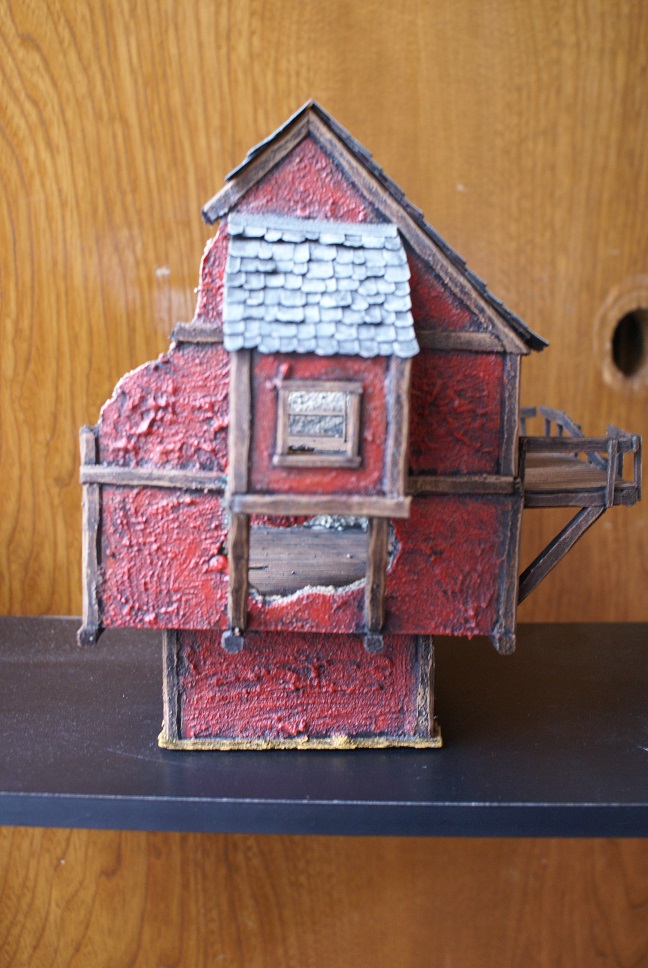
This is the first piece I built for my new terrain collection. For my games, I like bigger, vertical pieces. I also like spanning several buildings with makeshift bridges so that there is no one way to get to good spots. That way, no one is ever completely safe and no one can dominate a game from a single position. This particular piece is a three story building with a small bell tower(still need to find a good bell to put in it) on the side. It’s made, primarily, of foamcore, balsa wood, thin cardboard, tooth picks, popsicle sticks, and a hardboard base.

IMG_0449b

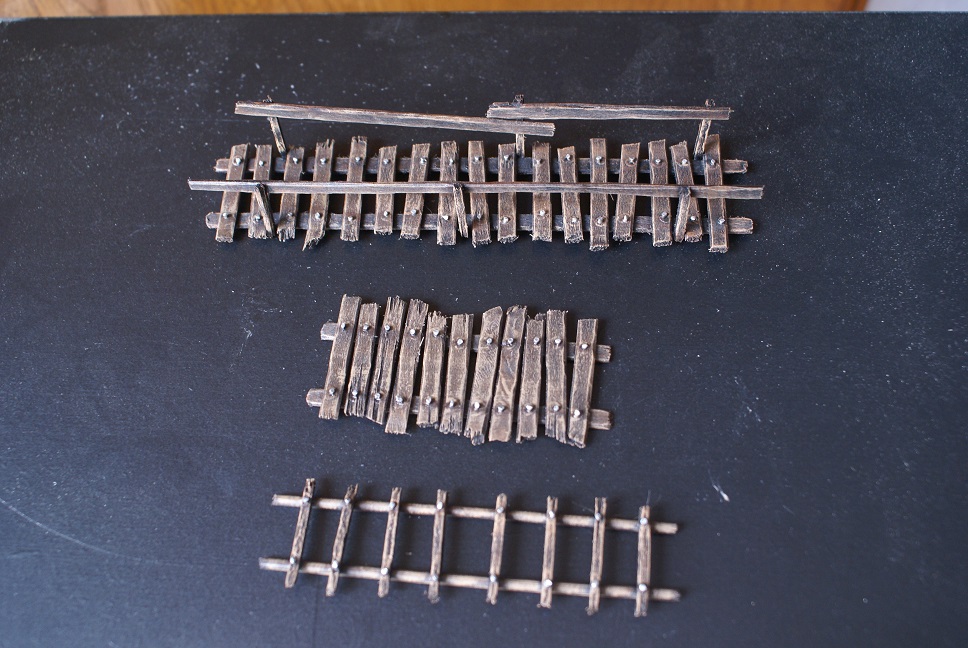
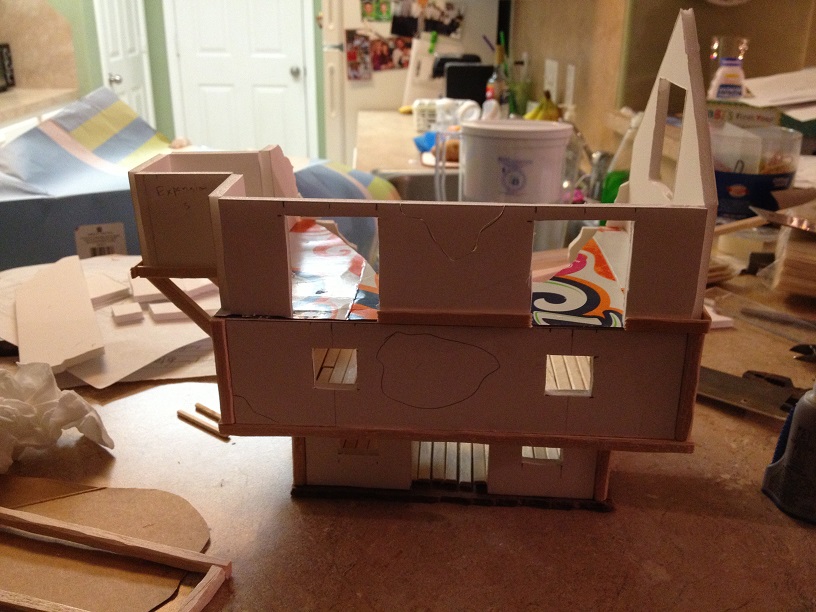
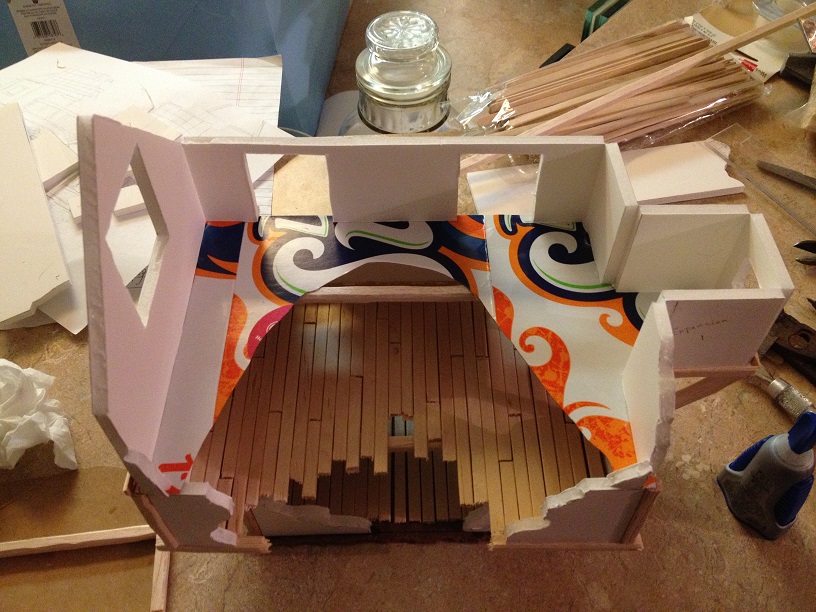
This is where I started. I decided on the dimensions of the bottom floor, then I measured and cut out a piece of hardboard a half inch(I went with one inch after this piece) longer and wider than my bottom floor. I then took a pair of pliers and carefully broke off the edges all the way around to give it a rougher, more natural look. I cut out each floor from(mostly) one piece of foamcore and made the floor boards for each floor from craft popsicle sticks. This part is really time intensive but the result can’t be beat by any other way that I have seen. I cut each stick to length and then shave down the top sides to give the sticks a slight beveled look and to really highlight the gaps between “boards” once painted. For the upper floor I first laid down a piece of thin cardboard(recycled from a soda 12 pack) in the rough shape of my floor and laid the popsicle sticks over that. Around the doors, I created door frames from more popsicle sticks, and around each window, I made window frames from square tooth picks.

IMG_0451b

Here’s a nice top-down shot to show the floor layout and floor boards of the piece. In hindsight, I wish I had made the second floor a bit smaller as the first floor is fairly hard to manipulate minis in, but you live and learn.

IMG_0458b

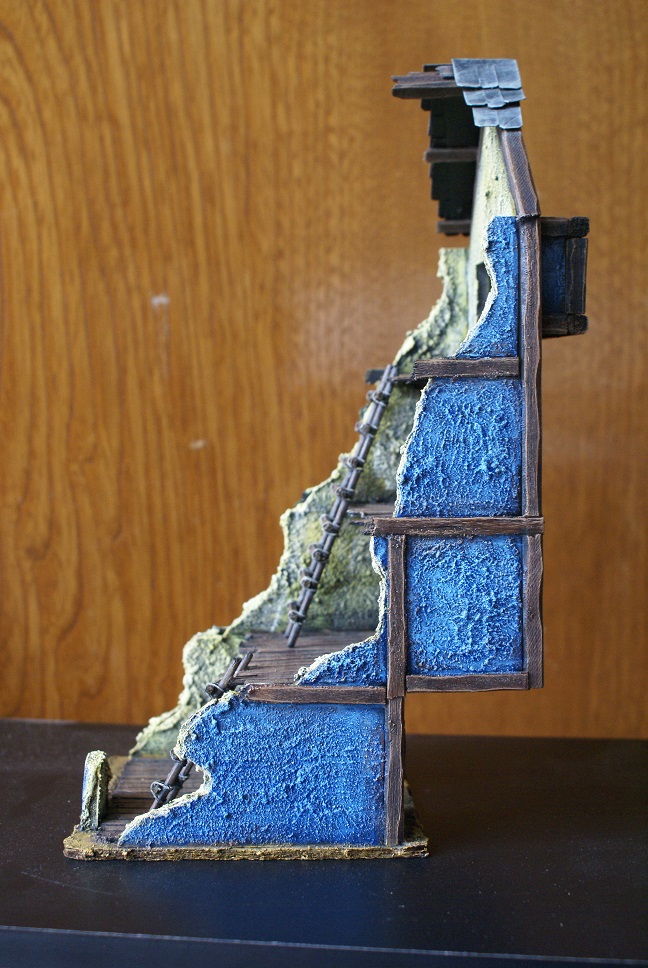
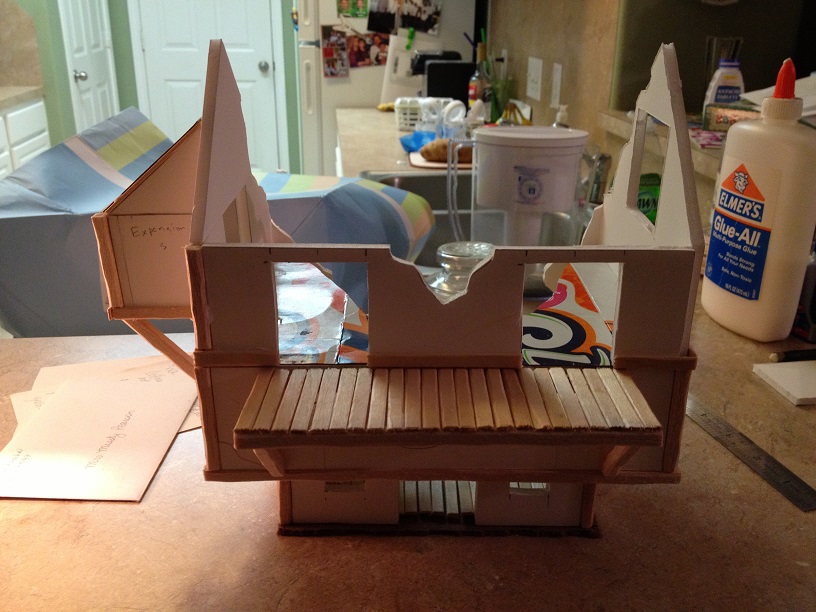
I also really wanted a balcony for this piece. I’m kind of mixing genres here but I always liked old westerns where the street was always lined with businesses with balconies where bad guys would line up to shoot the good guys. Balconies provide good elevated areas to shoot from but they also conatain a risk. You get a good view of the table but you are also exposed. I like to mix in risk with reward in my games.

IMG_0459b

Here is the piece with the door and window frames finished out, and with the balcony railing in place. I decided to create a small gap in the railing to create a risk of falling if any minis get knocked down near the gap. Once again, risk and reward.

Unfortunately I didn’t take and pics of the painting in progress so I’ll have to just skip to the finished piece from here. All of the foamcore was coated with a thin layer of stucco patch with a little water added. Stucco patch is great for texturing. No sand needed, and with just a little water to thin it out, it’s ready to go right out of the container. It was base coated black, the outside was then built up with dry brushing from a very dark red to a highlight of almost fire engine red, while the inside was started with a light tan and dry brushed up to an off white. The roof tiles are thin cardboard cut into small sheets of tiles, that are trimmed to individual lengths and then bent slightly to make them look as non uniform as possible. Again, this is very labor intensive but the result is very satisfying. All wooden pieces were given a dark to light brown drybrush build up. Also, ladders made of bamboo skewers and toothpicks were added to give access to each of the floors. The final step was to give it a couple of heavy coats of clear gloss acrylic followed by a coat of matte to knock the shine down. The gloss is hard and thick so it gives the piece some protection on the tabletop.

SONY DSC

SONY DSC

SONY DSC

SONY DSC

All in all, I am happy with this piece though I did learn a few “what not to do’s.”

Here is a list of all materials and where you can find them:

Local hobby super store

Foamcore

Balsa wood sticks

Craft popsicle sticks

Craft square toothpicks

Assorted acrylic paints

Local home improvement super store

Hardboard

Stucco patch

Grocery store

Bamboo skewers

Soda 12 packs for thin cardboard