OK, so Orclahoma Bowl/Spiky Cup weekend was two weeks ago and I am just now getting around to posting about how things went. What can I say? It has been a rough two weeks on the personal front. Anyway, this will be a pretty short post, with only a quick overview because way too much happened to remember many specific details.
Tag Archives: Wargaming
The Road to Orclahoma Bowl/Spiky Cup UPDATE 2!
Well, thanks to a week in Atlanta for work, getting this Dwarf team finished in time for Orclahoma Bowl/Spiky Cup REALLY came down to the wire. I was starting to get more than a little nervous that I was not going to be able to finish the team in time. Luckily, though, I was worried for nothing because I managed to finished with just a few days to spare. This is probably the last team I will be painting for a little while as I really need a bit of a break. I also really need to finish the final installment of my Mordheim terrain tutorial series. Thirdly, I think it is REALLY time for a hobby desk overhaul. I am in dire need of some major organization, and less crap EVERYWHERE.
The Road to Orclahoma Bowl/Spiky Cup UPDATE!
Quick update today… Just wanted to say seven Dwarves down, ten Longbeards and one Deathroller to go! Of course, I do not REALLY need eighteen minis just for the tournament, but if I am going to paint a team, I might as well paint the TEAM…
The Road to Orclahoma Bowl/Spiky Cup!
OK, so it has only been two weeks since I made the drive up to Oklahoma for Critter Bowl IV, but I have already made plans to return next month for Orclahoma Bowl/Spiky Cup. this is a two day, two tournament Blood Bowl event hosted by Scott and Steve of the Both Down podcast. I had a great time at the last tournament, but Orclahoma Bowl/Spiky Cup is their “premiere” tournament event and so I am going to brave the five and a half hour drive again. At least I will not be going alone this time, as a whole group of coaches from Austin are all piling in together.
CritterBowl IV Results!
So, yesterday I traveled five and a half hours north to Norman, OK to participate in CritterBowl IV. CritterBowl is a charity/baby shower tournament held by the hosts of the Both Down podcast, for one of the guys in their league. It was a smaller tournament with a turnout of eight coaches. It was a great opportunity to meet a few new coaches and make some friends in a small, intimate environment.
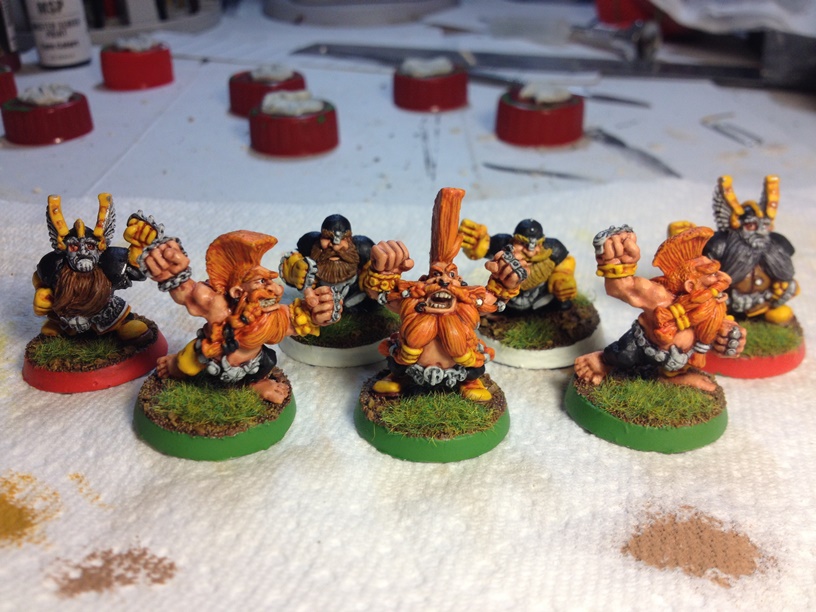
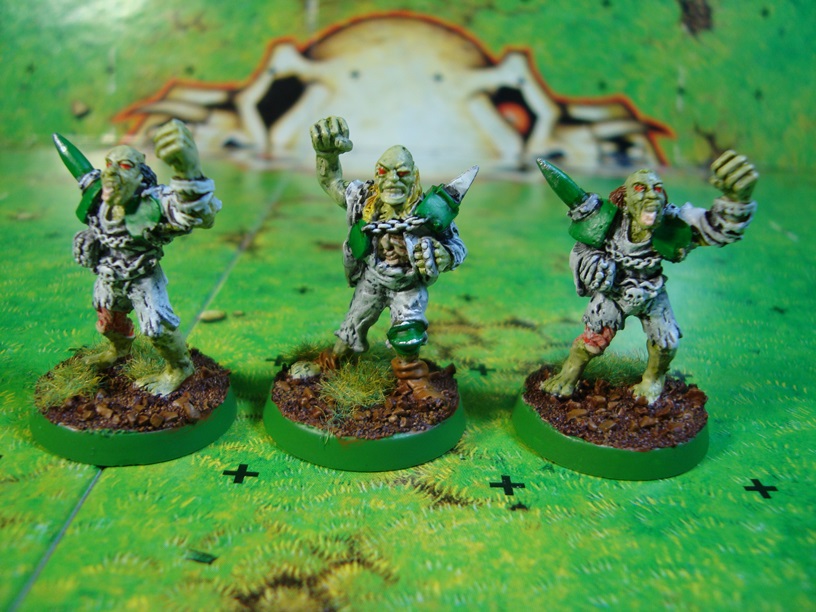
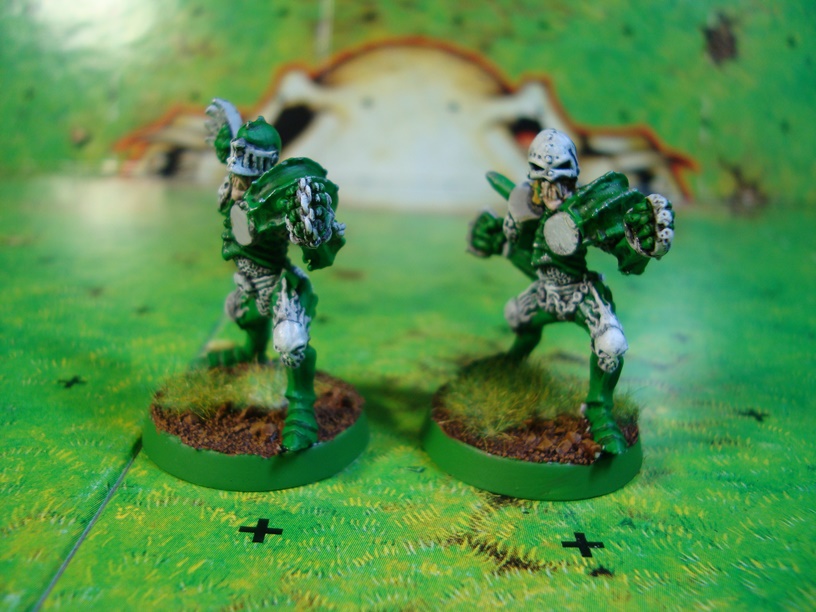
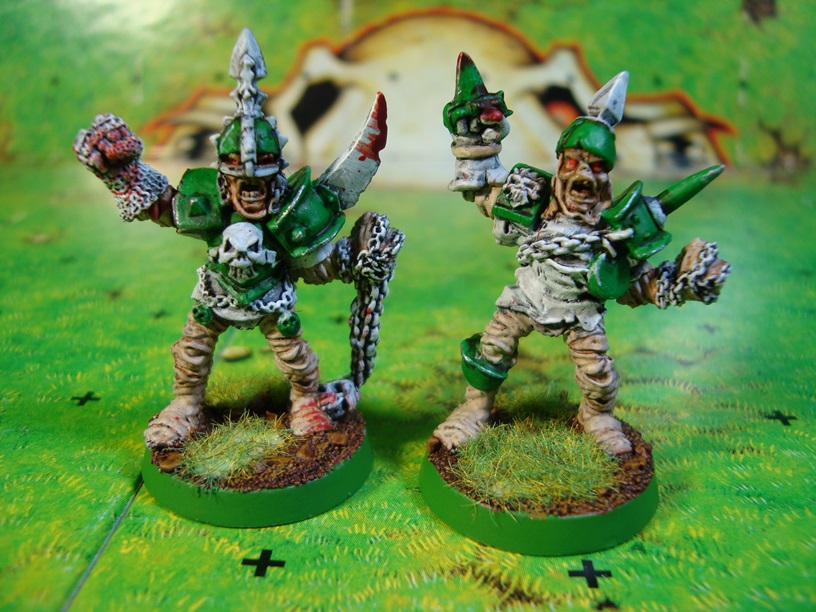
Below are the results of my four games at CritterBowl. I originally posted these game results as separate posts, but I think it will work better as all one single post. I brought my trusty Orc team, though I did do a little roster tweaking from what I usually bring.
GAME 1!
My first game was against Sarge, the coach whose father-to-be status was the whole reason we were all there. Sarge brought Goblins with lots of secret weapons and lots of Bribes. It was a very good game, and very close. Surprisingly, I did not manage to cause a single against his goblins despite having Mighty Blow on two players. On the other hand, Sarge managed to get me down to four players on the pitch at one point. Ball and Chain with Mighty Blow is just sick…
Anyway, I scored first in the first half and despite my decreasing numbers, I managed to hold my own against him. I held him off until turn seven of the second half, where he managed a miraculous goblin tossing touchdown. The game ended in a 1-1 tie.
All in all, it was a fun game played against a really nice guy.
Game 2!
Game two was played against Steve of the Both Down podcast and his Chaos Dwarves of Death, Doom, and Poopie (my name for his team, not his). Again, I fought to a 1-1 tie, but this time I was the one who managed to get the last second TD. I was still out casualtied, but not by near as much. Ties are not as great as wins, but they are better than losses.
As with the last game, Steve is a very nice guy and a very good coach. It was a tight and competitive game all mthe way through. On a side note, his Chaos Dwarf minis looked fantastic. 🙂
At this point we took a quick break for lunch. We had some tasty pizza that, for some reason, was not actually cut into slices by the pizza place… WTF!?
Game 3!
Game 3 found me facing another Goblin team, but Nuffle finally favored me in this game. My opponent (I forget his name because I am terrible with names… Sorry, sir!), and his stunties put up a valiant effort, but the dice just did not treat him well. I kicked off at the start, but managed to get possession of the ball about half way through the half. I scored at the end of the half, and then received at the start of the second half. With his dwindling numbers, I managed to get close to the ends one quickly, but stalled for a couple more turns to cut down the chances of him scoring two quick Goblin tossing touchdowns. With only a few turns left, I kicked to him, but he was unable to get the ball. I managed to run in, grab the ball, and score a last turn, third touchdown. Won the game 3-0 and finally did more casualties than my opponent.
Game 4!
Going into game 4, I only had one win, but I still did not have any losses, so I was feeling pretty decent. Game 4 was against Scott from Both Down, and his Dark Elves. Luckily for me, Scott only had one Witch Elf because Frenzy can be rough when your opponent is good at using it to push your players off the pitch… And Scott was. Game 4 was, again, a very competitive, and close game. As with every other game that day, I kicked off to start. Scott did a very good job holding me off and scoring late in the first half. He pushed several of my key players off the pitch, but luckily, none of them got hurt more than simple KOs. Starting the second half, most of my players came back, back and I believe Scott was down a couple by that point. I managed to muscle my way to the end-zone around turn three, and hoped that I could manage to get the ball back and actually win instead of ending the day with a third tie. Scott did his best to keep that from happening and turn 7 saw him 4 squares from the end-zone in possession of the ball. I outnumbered him by a little bit by this point, and Scott wanted to end the day with a win as much as I did. He attempted a leap to get to the end-zone, but unfortunately for Scott, he failed his landing and dropped the ball. In my previous turn, I had run a single blitzer back toward the other end-zone hoping that I could manage to get the ball back. On my final turn, I had a thrower close to where Scott’s player dropped the ball. I managed to get him to the ball, picked it up and had just enough movement to put my blitzer in Long Bomb passing range. In the luckiest rolling I have ever had in a game of Blood Bowl, I managed to successfully complete the pass, then run the blitzer into the end-zone for the win.
Scott was a very tough opponent, and it was really only his bad luck, combined with my good luck that allowed me to pull out the highlight reel win.
Final Results!
Even though I only won half of my games, thanks to the fact that I did not actually lose any games, I managed to end the day with a second place finish. I believe I ended up being the only coach without a loss.
To sum things up, I had a really good time, met some really nice people, shared a lot of laughs, and I look forward to going back for Orclahoma Bowl in March. The Oklahoma guys made me feel at home, and I recommend that everyone who is interested in Blood Bowl check out the Both Down podcast.
Critter Bowl IV
As much as I have played Blood Bowl over the years, I have only played in a few tournaments. I just have not had many opportunities. So, after playing in my first table-top Blood Bowl league in years recently, I entered the ROT Blood Bowl tournament in Austin in May. I only did ok, but I had a great time. Since then, I have been looking for an opportunity to play in another tournament. Enter Critter Bowl IV, hosted by the guys of the Both Down podcast on January 24th.
Critter Bowl is part Blood Bowl tournament, part baby shower for some I guy have never met. But hey, I do not really need an excuse to want to play Blood Bowl. It is in Norman, OK, though, so that will be quite a drive from Austin, TX. I am trying to get one or two of my league buddies to go with me, but we will see…
Anyway, I am thinking about actually blogging the tournament so I can document my experience for posterity and all. Should be a good time.
Second Edition Blood Bowl Minis!
So, a couple of days ago, during lunch, I decided to stop into a used game shop in town. This place is mostly board games and old toys, but I thought I would look around and check things out. Man, am I glad I did…
In the very back corner, I noticed a few blisters of old looking minis beckoning to me. When I got close enough to see them clearly, I could not believe my eyes. Among a few very old Warhammer minis, this place actually had FOUR sealed blisters of second edition Blood Bowl minis. I immediately snapped them up and took them home.
There were two blisters of Dark Elves with five minis a piece (all with the feathers still attached to their heads!), one blister of Humans with six minis, and one Star Player blister with six minis. Twenty-two minis in total… Holy Crap!
I immediately traded the Dark Elves to a friend for a mint copy of the game Block Mania, with the Mega Mania expansion. I am going to keep one or two of the Star Players for my current teams, and the rest with probably go up for trade.
I am so glad that I walked into that store… 🙂
Holy Cow! I Finally Painted Some Minis!
OK, so this may seem like absolutely no big deal to most of you, but to me, this is a very big deal. You see… I HATE painting minis. Like, I REALLY HATE painting minis. I enjoy making terrain, but painting minis is just flat out WORK for me. But after our most recent season of Blood Bowl… a season that took us about a full year to play 7 games, I have decided that it is time to give a team other than Orcs a shot.
I actually got this Undead team about six months ago with the intent to paint them, and play them in Austin’s ROT Tournament this past summer. Well, I primed them, and I applied a base coat or two to all of the minis, but I never managed to finish them. Not even close. Well, with the Thanksgiving holiday, I had a long weekend around the house, so I decided that it was time to give it another shot.
Knowing how much I dislike the process, I decided early on to make things as easy on myself as possible. I decided on a green and white paint scheme. Since my primer is a light gray, all white pieces were already base coated this way. I also did not go all out with details, and little painting slips that would have driven me nuts 10 years ago were left as is. As such, is this the best paint job I have ever done? Not even close. But I did NOT want to throw all my paints and brushes out the window when I was done. That is REAL progress for me. Anyway, with my only intent being a gaming table level of quality, I am quite pleased with how they turned out, and I am even going to prime another team I had sitting on the shelf to see if I can manage to do it again. I also still need to pick up a couple of extra minis to actually field the starting roster I want, but one step at a time.
Enjoy! And sorry for my (lack of) mini photography skills.
Mordheim Terrain Tutorial – El Cinco
Finally! A freaking update! OK, so I will not bore you with details as to why I have not posted an update to the tutorial in while. I have just been busy. That is all there is to it. But now, I have an update to share with you! So, here we go!
The last update ended with us working on details, and interestingly enough, that is where we pick up with this update. Just to add a little flair, I decided to add a couple of small rubble piles to the floor of the buildings. Nothing too large as I did not want the piles to get into the way of the functionality of the piece. Rubble piles are pretty easy. We just want to drop a few small wood strips, and layer them with some small pieces of foamcore, or other make shift pieces of debris. On one of the piles, I used foamcore, on another I took a plaster Hurts Arts mold brick that a friend gave me, and I broke it into chunks of various size. Both methods worked well for me.
After creating our “piles” we need to add a little grit and dirt to make it look as natural as possible.
Along with the small barrels that I regularly use in my terrain, I also had a couple of larger barrels that I had not used before, that are large enough to be big beer casks that you might find in some medieval tavern. I built a small stand for one of them and placed it in the corner. It is not an ideal location for for where it might be realistically placed if the building were real, but it was the best spot I could find to make painting the inside also viable, Sometimes you just have to make compromises.
At this point, we have enough detailing on the building to move on to the next step.
And that step is that our building needs a roof! We will use a simple but effective method for this piece. First, we will glue down a piece for our roof sections to attach to. I like to use thin cardboard from cereal, or soda boxes. This is also the material we will make our shingles out of. We just measure out pieces to fit on top of our roof sections, that have the basic shape we want the roof to take.
Once we have the pieces that go under the roof glued down, it is time to make some shingles. Shingles are simple, but slightly time consuming. We just measure out some strips of thin cardboard, 3/4 of an inch wide, and as long as we need to cover the roof. Once the strip is cut out, we just need to cut the individual shingles out. Using random widths, we just cut most of the way, but not ALL of the way, through the strip so that we end up with a string of shingles that are still attached along the top.
Now comes the fun part. Trim the ends of each shingle to give them slightly random lengths.
Once that is done, cut the corners off of each shingle.
Rough up the ends of the shingles, and glue the strip down to the sub roof, starting at the bottom.
Repeat over and over until the whole roof is covered. Just make sure to stagger the shingle sections to increase the “damaged” look of the building. Once we are done, our building should look something like this…
We are almost there. One last important step before we start to paint our building. We need to texture the walls. Texture is important for terrain because the texture is what is going to help us create the illusion of depth when we paint.
There are many methods to texturing. Some people add sand to black acrylic paint and brush that on for their base coat. Others use store bought textured paint. I use stucco patch. Stucco patch can be bought from any home improvement store, and is fairly cheap. The brand I use only cost $8 and the container is about a quart of patch. I have textured about 10 good sized buildings with it, so far, and I have only used about a third of it. If you use stucco patch, just be sure to water it down just a little. The more dry it is, the more it sticks to you paint brush, but DOES NOT transfer to the foamcore. When it is wet, it sticks to the foamcore REALLY easily.
Here is what I use…
Applying it is simple. We grab an old, cheap brush, and basically just paint it on. We want to apply it to all the sections of bare wall in the building, both “inside” and outside.” We will also add some to the base all the way around. Stucco patch is great and looks realistic as both wall texture, and dirt. We just use different paint colors to separate the two. Be sure to wipe it off of any wooden sections, but do not worry about it looking sloppy. Making it look sloppy actually adds to the “gritty” look that I believe Mordheim buildings should always have.
After the texture has been applied to the whole terrain piece, we just have to let it dry overnight, and then we are ready for painting.
I make no promises, but I REALLY hope to have the piece painted this week. If I can manage it, then we should have the final post to the tutorial by sometime next weekend. Until then, comments are welcome.
Found something cool last night…
…that I wanted to share with other terrain builders. The wife drug me out to Joann’s, which I also knew as a “fabric store.” Well apparently, while I was not paying attention (which is most of the time, really), Joann’s became a “craft store” and started carrying things other than just fabric. Most of the things were standard craft and hobby items, but I saw something that grabbed my attention. Craft popsicle sticks without the usual rounded ends, that were already slightly beveled on the edges. These things are almost tailor made for terrain building. Just cut them to length and glue them in place! I’ll probably still shave them a little to give them a more rough hewn look, but for people just starting out, these would be awesome. Below are pics of the packaging and the sticks themselves…
I guess the brand name is “Woodsies.” They come in a bag of 75 for about $4. They are a little more expensive than the ones I usually get, but those have LOTS of really warped pieces that I end up tossing because they’re worthless to me. These sticks are all completely straight.
I tried to get a pic of the beveled edges, but it really just does not translate in the image.
Anyway, just wanted to pass the info along. I hope someone out there finds it useful. And stay tuned, the next part of my terrain tutorial should be coming in the next few days!


